

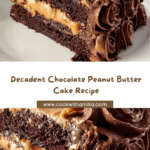
If you are craving a dessert that perfectly balances rich chocolate and creamy peanut butter, then this Simple Chocolate Peanut Butter Cake is about to become your new obsession. With its moist layers of chocolate cake paired with a luscious peanut butter frosting, this cake delivers indulgence without any fuss. Whether you’re celebrating a special occasion or simply treating yourself, its tender crumb and the satisfying nutty sweetness create a comforting experience that feels both classic and delightfully fresh.

Ingredients You’ll Need
Every ingredient in this recipe plays a vital role in crafting an irresistibly moist and flavorful cake. These simple staples blend together to create the ideal texture, deep cocoa flavor, and that creamy peanut butter frosting everyone loves.
- 1 ½ cups all-purpose flour: Provides the perfect structure to keep the cake light yet sturdy.
- 1 ½ cups granulated sugar: Sweetens the cake evenly and helps achieve a tender crumb.
- ¾ cup unsweetened cocoa powder: Adds the deep chocolate richness without extra sweetness.
- 1 ½ teaspoons baking soda: Helps the cake rise to create a light texture.
- ¾ teaspoon baking powder: Works alongside baking soda to ensure a fluffy rise.
- ¾ teaspoon salt: Balances the sweetness and enhances the chocolate flavor.
- 1 cup buttermilk: Brings moisture and a subtle tang for tender, rich crumb.
- ½ cup vegetable oil: Keeps the cake incredibly moist without weighing it down.
- 2 large eggs: Bind ingredients while adding richness and structure.
- 1 ½ teaspoons vanilla extract: Boosts overall flavor with warm, comforting notes.
- 1 cup boiling water: Intensifies the cocoa flavor and thins the batter for ultimate moistness.
- 1 cup unsalted butter, softened (for frosting): Creates the creamy base of the peanut butter frosting.
- 1 ½ cups creamy peanut butter: The star of the frosting, delivering that signature nutty flavor.
- 4 cups powdered sugar: Sweetens and thickens the frosting to a luscious consistency.
- ½ cup milk: Balances and smooths the frosting texture.
- 1 teaspoon vanilla extract (for frosting): Adds depth and rounds out the peanut butter flavors.
- 4 ounces semi-sweet chocolate, chopped (optional ganache): Perfect for a glossy, rich chocolate topping.
- ½ cup heavy cream (optional ganache): Creates a silky ganache to drizzle over the finished cake.
How to Make Simple Chocolate Peanut Butter Cake
Step 1: Prepare Your Pans and Preheat the Oven
Start by preheating your oven to 350°F (175°C). Grease and flour two 8-inch round cake pans to ensure your cakes come out easily after baking. Taking this small step upfront saves you from any sticking or tearing issues later.
Step 2: Mix the Dry Ingredients
In a large bowl, whisk together flour, sugar, cocoa powder, baking soda, baking powder, and salt. This helps evenly disperse the leavening agents and cocoa powder, ensuring your cake bakes evenly and develops that rich chocolate taste.
Step 3: Combine Wet Ingredients with Dry
Add the buttermilk, vegetable oil, eggs, and vanilla extract to your dry mix. Beat everything together on medium speed for about 2 minutes until smooth. This crucial step helps incorporate air for a light crumb and perfectly blends flavors.
Step 4: Add Boiling Water
Carefully stir in the boiling water until just combined. The batter might be thin—that’s exactly what you want! The hot water intensifies the cocoa flavor and keeps your cake wonderfully moist.
Step 5: Bake the Layers
Divide the batter evenly between the prepared pans and pop them into the oven. Bake for 30-35 minutes, until a wooden skewer inserted into the center comes out clean. Let the cakes cool in the pans for 10 minutes before transferring to a wire rack to cool completely.
Step 6: Prepare the Peanut Butter Frosting
While the cakes cool, beat the softened butter and creamy peanut butter together until smooth. Add powdered sugar gradually, mixing well as you go. Then, slowly pour in milk and vanilla extract and continue beating until the frosting becomes light and fluffy. This frosting perfectly complements the rich chocolate layers with its creamy, nutty sweetness.
Step 7: Assemble the Cake
Level the cake layers if needed. Place one cake layer on your serving plate and generously frost the top. Add the second layer, then frost the top and sides of the cake evenly. If you want to take it to the next level, prepare the optional chocolate ganache for a glossy finish.
Step 8: Optional Chocolate Ganache Topping
Place chopped semi-sweet chocolate in a heatproof bowl. Heat heavy cream until simmering, then pour over the chocolate. Let it sit for 5 minutes before whisking until smooth. Allow to cool slightly then drizzle over the cake for a stunning chocolate finish.
How to Serve Simple Chocolate Peanut Butter Cake

Garnishes
Enhance your cake’s presentation with a handful of chopped peanuts for a crunchy contrast or a few chocolate shavings for extra indulgence. Fresh raspberries or sliced bananas also add a pop of color and complementary flavors to enliven each bite.
Side Dishes
Pairing this decadent cake with a scoop of vanilla ice cream or a dollop of whipped cream can amplify every forkful. If you prefer something less sweet, a cup of bold coffee or a creamy hot chocolate offers a perfect balance.
Creative Ways to Present
For parties, consider serving individual cake slices topped with extra frosting piped decoratively and a drizzle of ganache. You can also make mini versions using cupcake tins for an adorable twist on this Simple Chocolate Peanut Butter Cake that everyone will love.
Make Ahead and Storage
Storing Leftovers
Once frosted, keep your cake covered tightly in an airtight container at room temperature for up to two days. If your home is warm, refrigerate to maintain freshness, but allow slices to come to room temperature before serving to regain that moist texture.
Freezing
This cake freezes beautifully. Wrap individual slices or the entire cake tightly in plastic wrap, then into a freezer-safe container or bag. Freeze for up to three months. When ready to enjoy, thaw overnight in the fridge and bring to room temperature before serving.
Reheating
Though best served fresh, reheating a slice slightly warms the frosting and enhances softness. Use a microwave on low power for 10-15 seconds—just enough to take the chill off without melting the frosting.
FAQs
Can I use natural peanut butter instead of creamy?
Natural peanut butter can be used, but keep in mind it’s usually thinner and less sweet. You might want to add a little extra powdered sugar or mix well to keep your frosting creamy and stable.
Is it necessary to use buttermilk?
Buttermilk adds tenderness and slight tanginess that heightens the cake’s flavor. If you don’t have it on hand, you can make a substitute by mixing 1 tablespoon of lemon juice or vinegar into 1 cup of milk. Let it sit for 5 minutes before using.
Can I make this cake gluten-free?
Absolutely! Swap the all-purpose flour for a gluten-free blend that includes xanthan gum for best results. Expect a slightly different texture but just as delicious.
What if I don’t want to make the ganache?
The cake is incredible on its own with just the peanut butter frosting, so the ganache is optional. It does add an elegant touch and extra chocolate flavor if you’re feeling fancy.
How do I level the cake layers?
Use a serrated knife or a cake leveler to gently slice off any dome on top of the cake layers. This helps stack the layers evenly and keeps your cake looking neat and professional.
Final Thoughts
Making this Simple Chocolate Peanut Butter Cake is like giving yourself a delicious hug in dessert form. It’s straightforward to prepare, yet impresses with every bite thanks to its perfect balance of chocolate and peanut butter. I hope you enjoy baking and sharing this cake as much as I do—there’s nothing better than creating something homemade that fills the room with enticing aromas and brings smiles all around.
Your email address will not be published. Required fields are marked *