

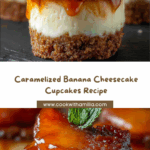
If you have a sweet tooth and love desserts that combine creamy richness with a touch of natural fruit sweetness, you are in for a real treat with these Caramelized Banana Cheesecake Cupcakes. Imagine a buttery graham cracker crust hugging a silky, smooth cheesecake filling, crowned with perfectly caramelized banana slices that bring a warm, caramel-sweet flavor and a delightful texture contrast. These cupcakes are not only a feast for your taste buds but also a charming way to impress friends and family at any gathering. Let’s dive into how to make these irresistible little bites of joy!

Ingredients You’ll Need
Don’t let the list intimidate you—each ingredient in this recipe is simple yet plays a crucial role in creating the perfect balance of flavor and texture that defines Caramelized Banana Cheesecake Cupcakes.
- Graham cracker crumbs: Provide a crunchy, buttery base that’s essential for the crust’s structure and flavor.
- Granulated sugar: Sweetens both the crust and the cheesecake filling, balancing the tang of cream cheese.
- Unsalted butter: Adds richness and helps bind the crust ingredients while caramelizing the bananas.
- Cream cheese: The star of the cheesecake filling, delivering that creamy, tangy texture we all love.
- Eggs: Essential for binding the filling and giving it a smooth, custardy consistency.
- Vanilla extract: Enhances the overall flavor with a warm, fragrant note.
- Sour cream or Greek yogurt: Introduces slight tanginess and makes the filling extra creamy.
- Bananas: Choose ripe but firm bananas for optimal caramelizing and flavor.
- Brown sugar: Key for that deep caramel flavor in the bananas’ glaze.
- Ground cinnamon: Adds an optional warming spice that pairs beautifully with banana.
- Salt: Just a pinch to balance sweetness and deepen flavor.
- Fresh mint leaves (optional): For a fresh, eye-catching garnish.
How to Make Caramelized Banana Cheesecake Cupcakes
Step 1: Preparing the Crust
Start by heating your oven to 325°F (160°C) and lining your muffin tin with paper liners. Mixing the graham cracker crumbs, sugar, and melted butter creates the foundation for your cupcakes. Pressing this mixture firmly into the cupcake liners ensures a sturdy base that holds all those creamy layers perfectly. This simple step is key to achieving that satisfying crunch with every bite.
Step 2: Crafting the Cheesecake Filling
The secret to silky smooth cheesecake filling lies in beating the cream cheese until it’s perfectly smooth before gradually adding sugar, eggs, vanilla, and sour cream. This careful mixing technique prevents lumps and creates a luscious texture that will bake into creamy perfection. Filling each crust-lined tin about two-thirds full gives room for the filling to set just right without overflowing.
Step 3: Baking to Perfection
Bake these little treats for about 18 to 20 minutes until the centers are just set but still slightly jiggly. Then, turning off the oven and allowing the cupcakes to cool inside with the door ajar helps prevent cracking on top, keeping them looking as beautiful as they taste. Once cool, refrigerate for a minimum of two hours to achieve that classic dense, creamy cheesecake texture.
Step 4: Making the Caramelized Bananas
This step adds the magic that transforms these cupcakes from everyday to extraordinary. Melt butter in a skillet and stir in brown sugar, cinnamon, and a pinch of salt until bubbly. Adding banana slices and cooking them gently in this mixture for just a couple of minutes on each side caramelizes their natural sugars, coating them in a glossy, fragrant glaze that’s pure indulgence.
Step 5: Assembling the Caramelized Banana Cheesecake Cupcakes
The grand finale—top each chilled cheesecake cupcake with a caramelized banana slice. Drizzle some of that luscious syrup from the skillet over the top to create a beautiful glossy finish. Adding a fresh mint leaf not only brings a pop of color but also a refreshing counterpoint to the rich sweetness. Now they’re ready to wow anyone lucky enough to try one!
How to Serve Caramelized Banana Cheesecake Cupcakes

Garnishes
While the caramelized banana slice is a star garnish on its own, enhancing it with extra caramel drizzle or a fresh mint leaf elevates the presentation and adds a delightful complexity of flavor and aroma. A small dollop of whipped cream can also add an airy lightness that balances the richness perfectly.
Side Dishes
Pair these cupcakes with a light cup of coffee or tea to complement their richness without overwhelming the palate. For a fresh contrast, a mixed green salad with citrus vinaigrette or a simple bowl of fresh berries works wonderfully to brighten the dessert experience.
Creative Ways to Present
For parties or special occasions, consider serving the Caramelized Banana Cheesecake Cupcakes on a tiered dessert stand to showcase their charm. You could alternately plate them with a drizzle of chocolate or caramel sauce and a sprinkle of chopped toasted nuts for added texture and a gourmet touch. These cupcakes are as versatile as they are delicious, so have fun styling them to match your occasion!
Make Ahead and Storage
Storing Leftovers
Because these cupcakes contain cream cheese, it’s important to store them in the refrigerator, tightly covered to prevent drying out or absorbing other odors. Stored properly, they’ll stay fresh and creamy for up to three days, making them perfect for a make-ahead dessert.
Freezing
If you want to prepare Caramelized Banana Cheesecake Cupcakes in advance, freeze them before adding the caramelized bananas. Wrap each cupcake tightly in plastic wrap and then place in a freezer-safe container. They freeze well for up to a month. When you’re ready to serve, thaw overnight in the fridge and add fresh caramelized bananas just before serving for the best texture and flavor.
Reheating
These cupcakes are typically enjoyed chilled or at room temperature. If you prefer the bananas warm, gently reheat the caramelized banana slices in a small pan over low heat just before assembling. Avoid heating the whole cupcake as this can affect the cheesecake’s texture.
FAQs
Can I use regular bananas instead of ripe but firm ones?
For this recipe, firm bananas hold up better during caramelization without turning mushy, giving you that perfect texture contrast. Overripe bananas may become too soft and lose their shape when cooked.
Is it possible to make these cupcakes dairy-free?
Yes! Substitute cream cheese with a dairy-free cream cheese alternative and use vegan butter for both the crust and caramelization steps. Keep in mind that the texture and flavor might vary slightly, but they’ll still be delicious.
How long can I store Caramelized Banana Cheesecake Cupcakes at room temperature?
Because of the cream cheese filling, it’s best not to leave these cupcakes out for more than two hours. Otherwise, refrigerate them promptly to ensure food safety and freshness.
Can I prepare the caramelized bananas ahead of time?
While you can make them in advance, they are best served freshly caramelized for optimal taste and texture. If you do prepare them early, store in the fridge and gently reheat before topping the cupcakes.
What can I use instead of graham cracker crumbs for the crust?
Digestive biscuits or any sturdy sweet biscuit finely crushed work great as a substitute. Just be sure to adjust the sugar slightly if the biscuits are sweeter or less sweet than graham crackers.
Final Thoughts
Every bite of these Caramelized Banana Cheesecake Cupcakes is a little celebration—creamy, sweet, and a bit indulgent, yet perfectly balanced. Whether you’re making them for a special occasion or a cozy night at home, they bring a joyful comfort that’s impossible to resist. Give this recipe a try and watch these cupcakes quickly become a treasured favorite in your dessert lineup!
Your email address will not be published. Required fields are marked *