

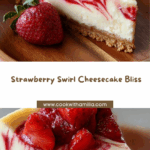
If you’re searching for the ultimate showstopper dessert, look no further than this Strawberry Swirl Cheesecake. Each slice is a work of art, featuring rich, creamy cheesecake rippled with gorgeous fresh strawberry swirls atop a buttery graham cracker crust. It’s the kind of irresistible treat that never disappoints, whether you’re celebrating a special occasion or just satisfying your sweet tooth. Not only is it stunning to serve, but every bite tastes like summer on a plate—velvety, fruity, and decadent in all the best ways. The process is both approachable and rewarding, making this Strawberry Swirl Cheesecake a favorite for home bakers and cheesecake lovers alike.

Ingredients You’ll Need
This recipe keeps things delightfully simple, letting classic ingredients shine so the flavors and textures are spot-on. Each component, from the crust to the swirl, plays a special part in creating the perfect Strawberry Swirl Cheesecake that’s equal parts creamy, fruity, and utterly delicious.
- Graham cracker crumbs: These make the signature sweet-and-salty base that’s crisp yet tender—perfect for holding up that luscious filling.
- Granulated sugar: A touch of sugar sweetens both the crust and the filling, enhancing the natural flavor of the strawberries.
- Unsalted butter: Melted butter helps bind the crust and adds rich, toasty notes.
- Cream cheese: The star ingredient, bringing ultra-creamy texture and classic cheesecake tang.
- Sour cream: Adds a subtle tang and silky smoothness to the cheesecake filling, balancing the sweetness.
- Eggs: Essential for binding the filling just right, giving you that dreamy, custardy consistency.
- Pure vanilla extract: A little goes a long way here, creating a beautiful, aromatic backdrop for the other flavors.
- Fresh strawberries: Fresh berries bring vibrant color and fresh, natural sweetness to your swirl.
- Lemon juice: Just a teaspoon brightens up the strawberry flavor, making the swirl really pop.
How to Make Strawberry Swirl Cheesecake
Step 1: Prepare the Pan and Preheat Your Oven
Start by greasing a 9-inch springform pan and carefully wrapping the outside with aluminum foil—it’s the best way to prevent water from seeping in during the water bath. Preheat your oven to 325°F (160°C), setting the stage for a perfectly baked Strawberry Swirl Cheesecake.
Step 2: Make the Graham Cracker Crust
In a bowl, combine the graham cracker crumbs, sugar, and melted butter, using a fork to ensure every crumb is coated. Press it into an even layer in the bottom of your prepared pan; use the bottom of a measuring cup for that professional finish. Bake the crust for 10 minutes, then let it cool completely so it stays crisp under all that creamy filling.
Step 3: Blend the Strawberry Swirl
While the crust cools, toss the fresh strawberries, sugar, and lemon juice in a blender or food processor. Puree until perfectly smooth, then strain through a fine sieve to remove seeds for the glossiest swirl possible. Set aside while you whip up the cheesecake filling.
Step 4: Mix the Cheesecake Filling
Using a hand or stand mixer, beat the softened cream cheese and sugar together until completely smooth and creamy—no lumps allowed! Add the sour cream and vanilla, mixing until combined, then add the eggs one at a time, beating on low after each addition. It’s important not to overbeat so your Strawberry Swirl Cheesecake comes out ultra creamy, not dense.
Step 5: Assemble and Swirl
Pour the cheesecake filling over the cooled crust, smoothing the top. Drop spoonfuls of the strawberry puree over the filling, then use a skewer or thin knife to swirl the strawberry through the batter. Go for a lovely marbled effect—no need for perfection, just big, beautiful swirls!
Step 6: Bake in a Water Bath
Place the springform pan inside a large roasting pan, then add hot water so it comes halfway up the sides of your cheesecake pan. This gentle, steamy bake keeps the Strawberry Swirl Cheesecake creamy and helps prevent cracks. Bake for 55–65 minutes, until the edges are set and the center barely jiggles.
Step 7: Cool and Chill
When baking is done, turn off the oven, crack open the door, and let your cheesecake rest inside for an hour. This gradual cooling is the secret to a crack-free top. Remove, let cool to room temperature, then refrigerate overnight. Cheesecake needs that chill time for the flavors and texture to settle into perfection.
How to Serve Strawberry Swirl Cheesecake

Garnishes
The simplest way to make your Strawberry Swirl Cheesecake even more dazzling is with a cloud of whipped cream and some extra fresh strawberries on top. A few mint leaves or a light dusting of powdered sugar add just the right touch of freshness and elegance. Let the beauty of those strawberry swirls shine through—sometimes less is more!
Side Dishes
Pair each creamy slice with a light and refreshing side, like a fruit salad or a scoop of lemon sorbet. A cup of coffee or a glass of sparkling rosé perfectly complements the richness of the cheesecake and the bright strawberry flavors, making dessert feel like a truly special occasion.
Creative Ways to Present
Try slicing your Strawberry Swirl Cheesecake into thin wedges and serving each on a colorful plate for extra visual appeal. If you’re entertaining, consider making mini cheesecakes in cupcake tins—a fun twist that’s just as beautiful. You can even serve individual slices in jars, layered with extra swirl and some crushed graham crackers for a playful, portable treat.
Make Ahead and Storage
Storing Leftovers
Keep any leftover Strawberry Swirl Cheesecake covered in the refrigerator, either in the pan with plastic wrap or transferred onto a plate and loosely tented with foil. It’ll stay fresh and delicious for up to five days—if it lasts that long! The texture only gets creamier after a day or two in the fridge.
Freezing
For longer storage, freeze the cheesecake (whole or in slices) by wrapping it tightly in plastic wrap and a layer of foil. It keeps beautifully for up to two months. Thaw overnight in the refrigerator before serving, and you’ll have an almost-fresh Strawberry Swirl Cheesecake ready for any sudden dessert cravings.
Reheating
Cheesecake is best enjoyed chilled or at cool room temperature, so no need to reheat. If you’ve frozen it, just let it thaw in the fridge. For texture, let slices sit at room temperature for about 20 minutes before serving to bring out the flavor and creaminess.
FAQs
Why do I need a water bath for Strawberry Swirl Cheesecake?
The water bath ensures gentle, even baking, which is key to achieving that silky-smooth cheesecake texture. It keeps the edges from drying out, prevents cracks, and helps your Strawberry Swirl Cheesecake turn out beautifully every time.
Can I use frozen strawberries for the swirl?
Absolutely! Just thaw and drain the frozen berries well before pureeing. While fresh strawberries make the swirl even more vibrant, frozen work beautifully and are available year-round, so you can enjoy Strawberry Swirl Cheesecake any season.
What’s the best way to swirl the strawberry puree?
Use a skewer, chopstick, or thin knife to gently drag the puree through the cheesecake batter. Aim for broad, sweeping motions for classic swirls, but don’t over-mix so you get those gorgeous marbled streaks of strawberry running through each slice.
How do I know when the cheesecake is done baking?
Check for set edges and a slightly jiggly center—think of the wobble of set Jell-O. Don’t worry if the middle seems a bit soft; it will firm up as the Strawberry Swirl Cheesecake cools and chills, resulting in the creamiest possible texture.
Can I make this cheesecake ahead of time?
Yes, and it’s encouraged! This Strawberry Swirl Cheesecake actually tastes even better after a night in the fridge, as the flavors and texture have time to develop. Simply bake, chill overnight, and you’re all set to wow your guests (or treat yourself) the next day.
Final Thoughts
Baking a Strawberry Swirl Cheesecake is pure joy, from the moment you start swirling the strawberry to the first creamy, berry-filled bite. Whether you’re making it for a party or just because, you’ll love how impressive and delicious it is. Gather your ingredients, embrace those beautiful swirls, and share a little slice of happiness—it’s a dessert that always delights!
Your email address will not be published. Required fields are marked *