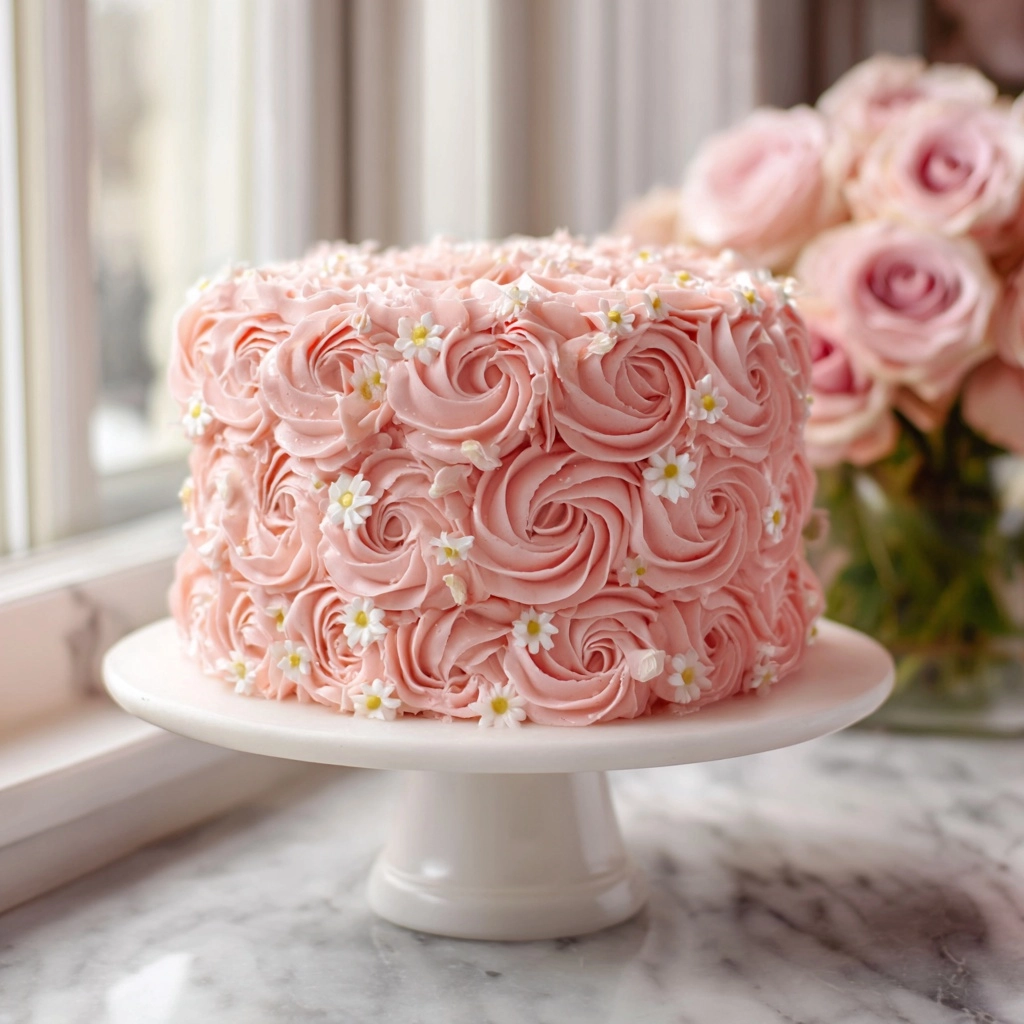
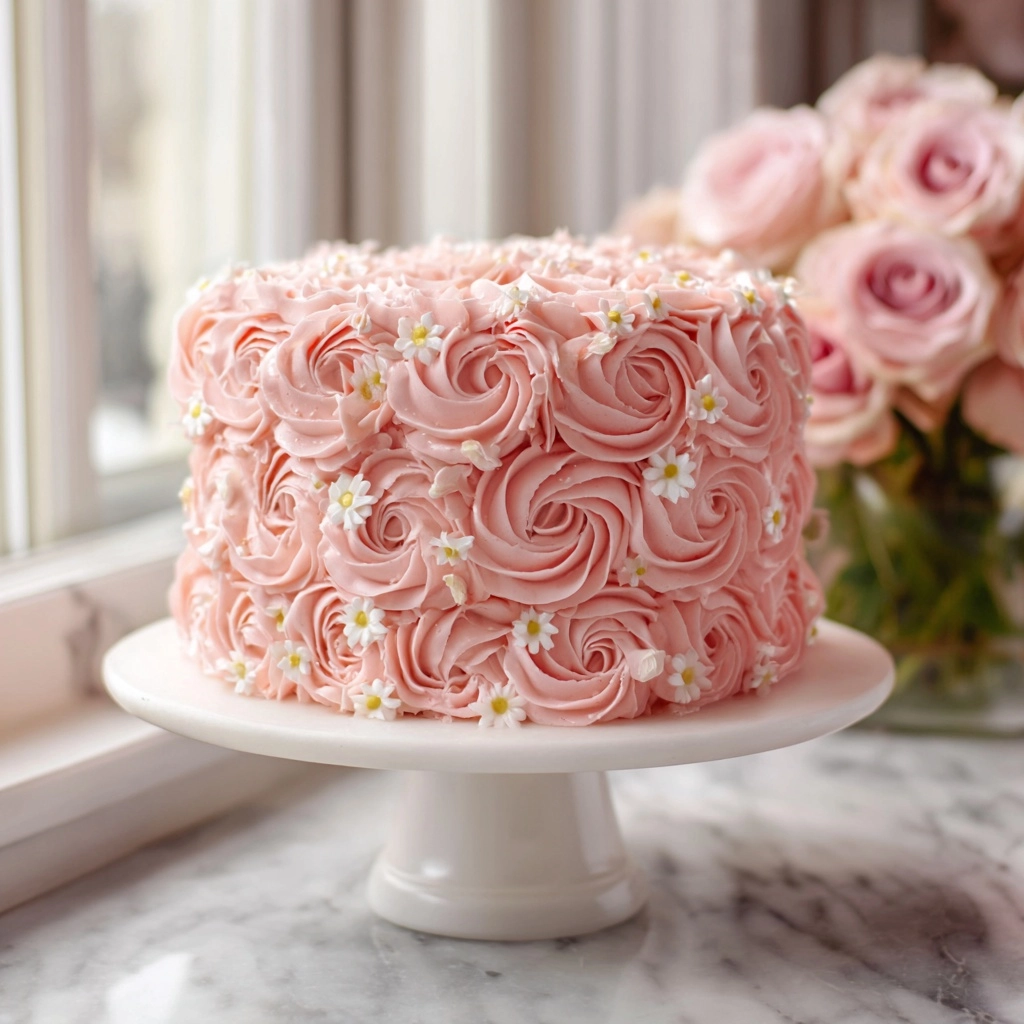
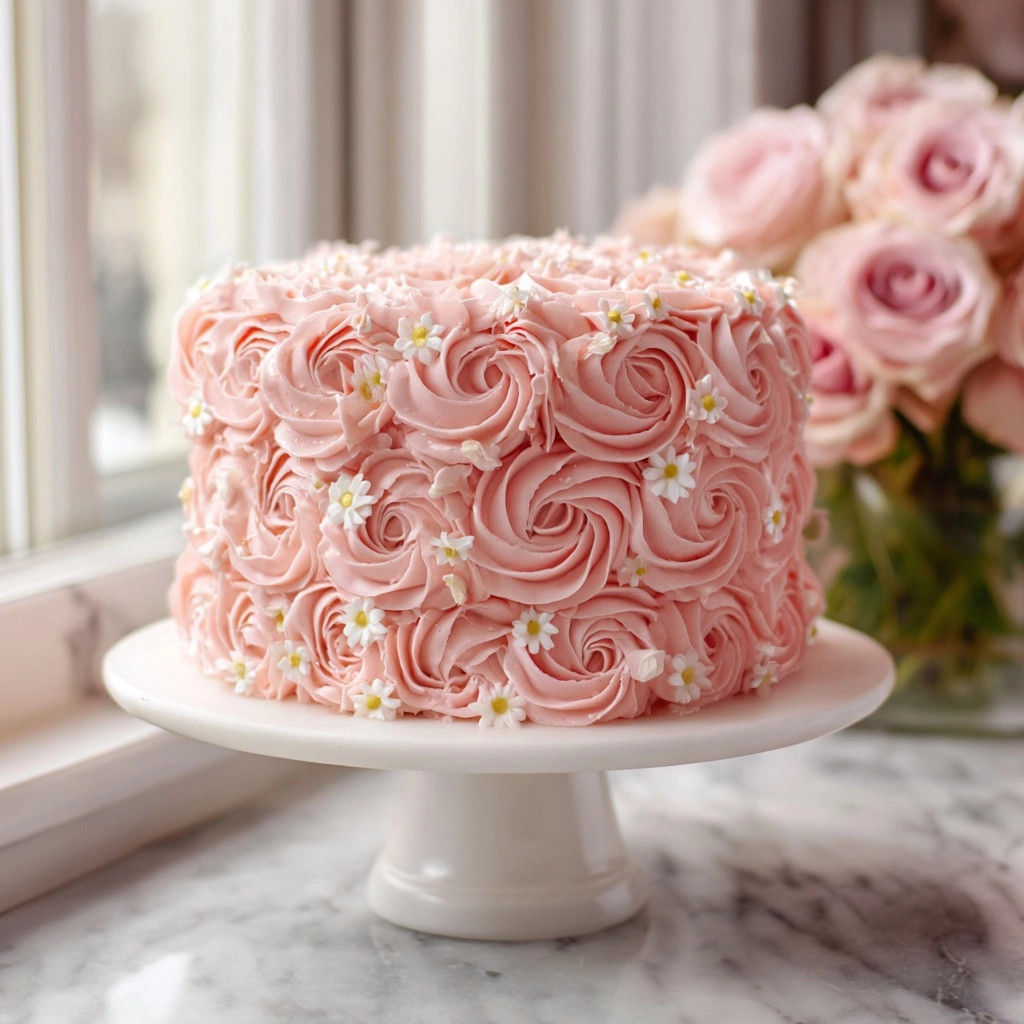
Celebrate any special occasion with the breathtaking Rosette Cake (Buttercream Rose Cake), an irresistible showstopper that tastes as beautiful as it looks! This elevated classic features ultra-tender cake layers enveloped in dreamy, cloud-like buttercream, all adorned with a garden’s worth of swirling, blushing pink rosettes. Whether you’re commemorating birthdays, weddings, or simply want to dazzle at your next gathering, this cake is the perfect edible centerpiece that’s sure to wow every guest.
Ingredients You’ll Need
The magic of a Rosette Cake (Buttercream Rose Cake) lies in the harmonious blend of its straightforward, high-quality ingredients. Each element plays a crucial role in the final taste, texture, and stunning color of your masterpiece—so let’s see what you’ll need to bring your rose cake to life!
- All-purpose flour: Gives your cake the perfect crumb and structure, ensuring the layers hold up to decadent buttercream.
- Granulated sugar: Adds gentle sweetness and encourages a moist, tender crumb in each bite.
- Unsalted butter (cake & buttercream): Essential for richness in both the cake and the frosting—always use unsalted so you control the flavor.
- Large eggs: Bind the ingredients together and add extra moisture for a soft, fluffy cake texture.
- Milk: Provides moisture and helps create a fine, delicate crumb.
- Baking powder: The lift your cake needs for beautiful, even layers.
- Salt: Balances sweetness, deepens flavors, and enhances every note.
- Vanilla extract: A must for depth and warmth—make sure to use good-quality vanilla.
- Powdered sugar: The foundation of silky, stable buttercream with just the right sweetness.
- Heavy cream: Ensures a fluffy and creamy buttercream that’s perfect for piping.
- Pink gel food coloring: Highly pigmented for intense, customizable pink hues without thinning your buttercream.
How to Make Rosette Cake (Buttercream Rose Cake)
Step 1: Preheat the Oven and Prep Your Pans
Let’s get your kitchen ready for cake magic! Start by preheating your oven to 175°C (350°F). Grease and flour two 8-inch round cake pans, or line them with parchment rounds, to ensure the cakes release effortlessly—no sticking means perfectly smooth layers for decorating later.
Step 2: Make the Cake Batter
In a large mixing bowl, beat the butter and sugar together until the mixture is pale, creamy, and feels almost cloud-like—a sure sign your cake will be soft and airy. Add in the eggs one at a time, mixing well after each, to create a silky batter that bakes up fluffy. In a separate bowl, sift together the flour, baking powder, and salt for even dispersal. Gently incorporate the dry mixture into your wet ingredients, alternating with milk, and finish by stirring in the vanilla. Mix just until everything is blended; overmixing can cause dense cake layers.
Step 3: Bake the Cakes
Divide the cake batter as evenly as possible between your two prepared pans—smooth the tops with a spatula for even baking. Pop the pans into the oven and bake for 25 to 30 minutes, or until a toothpick inserted in the center comes out clean. Let them cool in the pans for about 10 minutes before turning onto a wire rack to cool completely. This step is crucial for a sturdy Rosette Cake (Buttercream Rose Cake) that holds its sculpted buttercream roses.
Step 4: Prepare the Buttercream
Bring butter to room temperature and beat it until ultra-creamy. Gradually sift in powdered sugar, mixing slowly to start (to avoid a sugar cloud!), then beat in vanilla and heavy cream until the mixture is plush, smooth, and fluffy. Add in your pink gel food coloring a little at a time, mixing until you reach your desired shade. Pro tip: mix up a few different pink tones for a mesmerizing ombré effect when you pipe your rosettes!
Step 5: Assemble & Decorate with Rosettes
Stack your cake layers with a generous swoosh of buttercream in between. Apply a crumb coat—a thin layer of frosting—to seal in stray cake crumbs, then chill the cake for 20 to 30 minutes to set. Once chilled, cover your Rosette Cake (Buttercream Rose Cake) in a thicker layer of pink buttercream. Now, the fun truly begins: fit a piping bag with a closed star or petal tip (like Wilton 1M or 2D), fill it with buttercream, and pipe spiraling roses all over the cake. Finish with optional fondant flowers, edible pearls, or a light dusting of shimmer for that fairy-tale finish.
How to Serve Rosette Cake (Buttercream Rose Cake)

Garnishes
Elevate your Rosette Cake (Buttercream Rose Cake) with touches of edible sophistication—think delicate fondant flowers, pastel-hued edible pearls, or just a twinkle of shimmer dust. For a nature-inspired flourish, consider a scattering of dried rose petals or a ring of fresh berries around the base for both color and a pop of flavor.
Side Dishes
Balance out the sweet, buttery richness of your cake with light, refreshing sides. A bowl of tart summer berries, lemon sorbet, or even a flute of sparkling rosé makes for a dreamy pairing that lets the Rosette Cake (Buttercream Rose Cake) shine as the centerpiece of your dessert table.
Creative Ways to Present
Take your presentation to the next level by placing your Rosette Cake (Buttercream Rose Cake) atop a vintage cake stand or a rustic wooden board. Arrange fresh flowers around the base (just be sure they’re food safe), or display your cake alongside individual pastel cupcakes topped with mini rosettes for a coordinated, picture-perfect dessert spread.
Make Ahead and Storage
Storing Leftovers
To keep your Rosette Cake (Buttercream Rose Cake) fresh and beautiful, store any leftovers in an airtight container at room temperature for up to 2 days. If your kitchen is especially warm, transfer the cake to the refrigerator, but allow slices to come to room temperature before serving for the softest crumb and creamiest buttercream.
Freezing
For longer storage, you can freeze both the undecorated cake layers and the finished cake. Wrap cooled cake layers tightly in plastic wrap and foil, then freeze for up to 2 months. If freezing a fully decorated cake, chill until the buttercream is firm, then wrap and freeze. Thaw overnight in the refrigerator, then bring to room temperature before serving for the freshest flavor and texture.
Reheating
While cakes aren’t typically reheated like other desserts, if you find your slices a bit chilly from the fridge, let them sit at room temperature for 30 to 60 minutes before enjoying. This simple step coaxes the butter and sugar back to their most lusciously melt-in-your-mouth state.
FAQs
Can I use different shades of buttercream for a multi-colored rosette effect?
Absolutely! You can divide your buttercream into several bowls and tint each one with varying amounts of pink or even other pastel colors. Fill your piping bag with different colors to create an enchanting ombré or rainbow effect across your Rosette Cake (Buttercream Rose Cake).
What piping tip makes the best rosettes?
A closed star tip, such as Wilton 1M or 2D, is perfect for creating beautiful, defined rosettes. Practice on a piece of parchment paper before decorating the cake to get the motion just right.
Can I make the cake layers in advance?
Yes! You can bake the cake layers one or two days ahead. Once cooled, wrap them tightly in plastic wrap and store at room temperature or freeze if storing for longer than two days. This makes final assembly a breeze on celebration day.
How do I prevent my buttercream from melting while piping rosettes?
If your kitchen is warm or your hands tend to heat up the piping bag, chill the bag in the fridge for 5 to 10 minutes before piping. This will help the buttercream hold its shape for crisp, gorgeous rosettes.
Can I use a different frosting besides buttercream?
While classic American buttercream holds the best shape for intricate designs like rosettes, you can also use Swiss meringue buttercream for a lighter flavor, or even stabilized whipped cream for a softer, less sweet finish (though your rosettes may not be as defined).
Final Thoughts
There’s something truly magical about creating and sharing a Rosette Cake (Buttercream Rose Cake)—from the gentle swirls of pastel buttercream to the first forkful of soft, vanilla-kissed cake. Don’t hesitate to try this stunning recipe and put your own creative spin on it! Trust me, every swirl and petal is worth it, and your guests will be talking about your masterpiece long after the last slice disappears.


Your email address will not be published. Required fields are marked *