

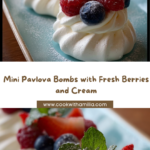
If you have a sweet tooth and love a dessert that looks as delightful as it tastes, Pavlova Bombs are your new best friend. These little cloud-like meringue treats are crisp on the outside and melt-in-your-mouth soft on the inside, bursting with luscious whipped cream and fresh berries. They bring that perfect balance of crunchy texture, fluffy sweetness, and fruity freshness that makes every bite unforgettable. Pavlova Bombs are not just a dessert; they’re a celebration on a plate, perfect for impressing guests or treating yourself to something special.

Ingredients You’ll Need
The beauty of Pavlova Bombs lies in their simplicity. Each ingredient plays an essential role in creating the light, airy texture and the rich, fresh flavor balance that makes this dessert so irresistible. Using quality and fresh components will truly elevate the final result!
- 4 large egg whites (120 g): The foundation of your meringue, responsible for the fluffy and crisp texture.
- 1 cup granulated sugar (200 g): Adds sweetness and helps stabilize the egg whites while baking to achieve that delicate crunch.
- 1 teaspoon cornstarch (3 g): Helps absorb any moisture and keeps the pavlova center soft and marshmallowy.
- 1 teaspoon white vinegar (5 ml): Stabilizes the meringue and sharpens the flavor slightly to balance the sweetness.
- 1 teaspoon vanilla extract (5 ml): Adds warmth and depth to the meringue’s flavor.
- 1 cup heavy cream (240 ml): Whipped into soft peaks to create the deliciously creamy filling.
- 1 tablespoon powdered sugar (8 g): Sweetens the whipped cream without making it overly sugary.
- 1 teaspoon vanilla extract (5 ml): Used again in the cream to complement the flavor of the meringue.
- 1 cup mixed fresh berries (150 g): Bursting with color and natural tanginess, they brighten up your Pavlova Bombs visually and taste-wise.
- Optional garnishes (extra berries or mint leaves): Perfect finishing touches that add vibrancy and a fresh aroma.
How to Make Pavlova Bombs
Step 1: Prepare the Oven and Baking Sheet
Start by preheating your oven to 250°F (120°C). While it warms up, line a baking sheet with parchment paper. This simple step ensures your Pavlova Bombs won’t stick, making clean-up a breeze and helping the meringue keep its perfect shape.
Step 2: Whip the Egg Whites
Begin beating the egg whites until soft peaks form – this means when you lift the beaters, the tips gently hold their shape but fold over slightly. This is the critical stage where your Pavlova Bombs gain volume and airiness.
Step 3: Add Sugar Gradually
Slowly add the granulated sugar one tablespoon at a time while continuing to beat. Patience here spells success; the sugar must dissolve completely for that glassy, shiny finish. Keep whipping until the meringue reaches stiff peaks and has a glossy appearance.
Step 4: Fold in the Dry Ingredients and Flavorings
Gently fold in the cornstarch, white vinegar, and vanilla extract using a spatula. This step is essential to keep the airiness intact. The cornstarch will give you that soft center contrast, while the vinegar stabilizes the structure.
Step 5: Shape the Pavlova Bombs
Using a piping bag or two spoons, dollop the meringue onto your prepared baking sheet into small dome shapes. These bite-sized forms will bake evenly and look absolutely adorable on your serving tray.
Step 6: Bake and Cool
Bake the meringues at the low temperature of 250°F (120°C) for about 70 minutes. They’ll dry out beautifully, becoming crisp on the outside while retaining a supple center. Once out of the oven, let them cool completely on the tray – this prevents cracks and helps maintain their shape.
Step 7: Prepare the Filling
Whip the heavy cream with powdered sugar and vanilla extract until soft peaks form. This luscious, lightly sweetened whipped cream will be the perfect base to create your Pavlova Bombs’ signature creamy filling.
Step 8: Assemble Pavlova Bombs
Carefully spoon or pipe the whipped cream into each cooled meringue dome, then nestle a handful of fresh mixed berries on top. This combination of textures and flavors is where Pavlova Bombs truly shine!
How to Serve Pavlova Bombs

Garnishes
To elevate the appearance and taste of your Pavlova Bombs, garnish them with extra fresh berries or bright mint leaves. These small touches bring an inviting freshness and a pop of color that makes the dessert impossible to resist.
Side Dishes
Pavlova Bombs are quite versatile, so you can pair them with a variety of side dishes. A light fruit coulis or a spoonful of lemon curd served alongside can beautifully complement the sweetness. Alternatively, a crisp, refreshing green salad with citrus vinaigrette balances the dessert if you plan a full meal.
Creative Ways to Present
For extra wow factor, arrange the Pavlova Bombs on a large platter with a scattering of edible flowers or dust them lightly with cocoa powder or crushed pistachios. You can also serve them in individual glasses layered with additional whipped cream and berries to create mini trifle-style treats.
Make Ahead and Storage
Storing Leftovers
If you have leftovers (which can be rare!), store the assembled Pavlova Bombs in an airtight container in the refrigerator for up to one day. The meringue will begin to soften as it absorbs moisture from the cream, so it’s best enjoyed fresh.
Freezing
Freezing the assembled Pavlova Bombs is not recommended, as the texture of the meringue will degrade. However, you can freeze unfilled meringue shells in an airtight container for up to one month. When you’re ready to enjoy, simply thaw at room temperature and assemble with fresh cream and berries.
Reheating
Pavlova Bombs are best served cold or at room temperature. Reheating is not necessary and can cause the delicate meringue to lose its crispness. Enjoy them straight from the fridge or after sitting out a little while for the flavors to open up.
FAQs
Can I use egg substitutes for Pavlova Bombs?
Traditional Pavlova Bombs rely on egg whites for that essential airy texture, so substitutes won’t give the same result. For the best outcome, stick to real egg whites.
How do I prevent cracks in my meringue?
To avoid cracks, bake the meringue at a low temperature and allow it to cool slowly in the oven with the door slightly propped open, if possible. Rapid temperature changes can cause cracking.
Can I make Pavlova Bombs gluten-free?
Yes! Pavlova Bombs are naturally gluten-free since they are made from egg whites, sugar, and cream without any wheat-based ingredients, making them perfect for gluten-intolerant guests.
What types of berries work best?
Mixed fresh berries like strawberries, raspberries, blueberries, and blackberries provide a beautiful combination of flavors and colors. Use whichever berries are freshest and in season for the best taste.
How long can I keep the meringue shells before assembling?
You can store unfilled meringue shells in an airtight container at room temperature for up to 5 days, keeping them crisp and ready for quick assembly when desired.
Final Thoughts
If you’re looking to delight friends or simply treat yourself, Pavlova Bombs bring a light, airy, and irresistibly fresh dessert to the table every time. Their playful size makes them perfect for parties, afternoon tea, or just a sweet pick-me-up. Trust me, once you try making and tasting Pavlova Bombs, they’ll become a beloved recipe in your collection. So grab your mixing bowl, gather those simple ingredients, and enjoy the magic of these little edible clouds!
Your email address will not be published. Required fields are marked *