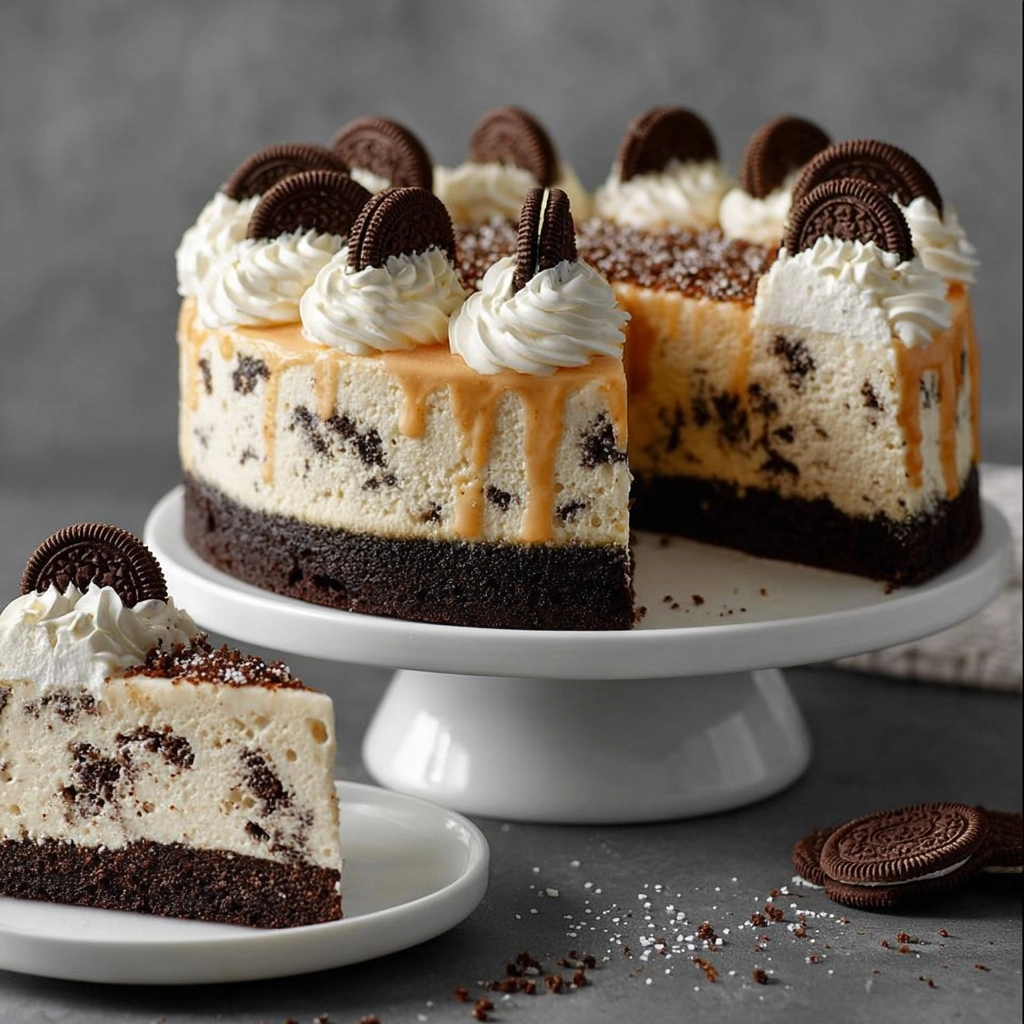
There’s just something undeniably joyful about a slice of Oreo Cheesecake. Imagine sinking your fork into velvety layers of creamy cheesecake, studded with chocolatey Oreo pieces, all resting on a buttery cookie crust that takes each bite over the top. Whether you’re preparing a show-stopping birthday treat or simply looking to upgrade your weekend dessert game, this Oreo Cheesecake delivers big flavor and comforting nostalgia in every forkful. With its simple ingredients and easy-to-follow steps, you’ll find making this crowd-pleaser at home is as enjoyable as eating it!
Ingredients You’ll Need
The beauty of this recipe lies in its familiar, store-cupboard staples. Each ingredient takes on a starring role, joining forces for the ultimate Oreo Cheesecake experience: crunchy, creamy, sweet, and ever-so-indulgent.
- Oreo cookies – 24 pieces (for crust): These get crushed up to create that irresistible chocolatey base; don’t remove the cream filling! It adds both flavor and texture.
- Unsalted butter – ½ cup (115g), melted: Melted butter holds the cookie crumbs together and infuses the crust with richness.
- Cream cheese – 4 packs (900g), softened: Creamy, dreamy, and essential for achieving a smooth, luxurious filling.
- Granulated sugar – 1 cup (200g): Adds just the right amount of sweetness that balances the tangy cream cheese.
- Sour cream – 1 cup (240g): Secret weapon for a luscious texture and a subtle tang that brightens every bite.
- Vanilla extract – 1 tsp: Brings a beautiful warmth and depth that complements the chocolate and cream cheese.
- Eggs – 4 large: They bind the filling and give the cheesecake structure without making it too dense.
- Oreo cookies – 12 pieces, roughly chopped (for filling): Stirred right into the batter, these chunks deliver that signature cookies-and-cream decadence.
- Whipped cream – for topping (optional): Adds a cloud-like finishing touch—perfect for special occasions.
- Extra Oreo cookies – crushed or halved, for garnish: A final flourish that gives visual appeal and extra crunch at serving time.
How to Make Oreo Cheesecake
Step 1: Make the Oreo Crust
Start by pulsing 24 Oreo cookies (cream filling and all) in a food processor until fine crumbs form—you’re aiming for the texture of wet sand. Stir these together with your melted butter until all the crumbs look evenly moistened. Tip this mixture into a springform pan and firmly press it across the base using the bottom of a glass or measuring cup. Pop the pan into the fridge while you get the filling together, so the crust can set up nicely and hold everything in place.
Step 2: Prepare the Cheesecake Filling
In a large bowl, beat your softened cream cheese and granulated sugar together until completely smooth and creamy—no lumps allowed! Next, blend in the sour cream and vanilla extract, which will add smoothness and flavor depth. Now, add the eggs one at a time, mixing gently (just enough to incorporate) to ensure you don’t overbeat; you want a fluffy, tender filling, not a dense one.
Step 3: Add the Oreo Magic
Now for the fun part: fold in those extra 12 chopped Oreo cookies. This is what takes classic cheesecake and transforms it into irresistible Oreo Cheesecake. The chopped pieces guarantee each slice is packed with playful, chocolatey surprises. Pour the luscious mixture over your chilled crust and smooth the top with a spatula.
Step 4: Bake with Care
Place your pan into a preheated oven at 325°F (160°C) and bake for 50–60 minutes. You’re looking for set edges and a slightly wobbly center (give the pan a gentle jiggle to check). That gentle jiggle ensures a creamy, never dry, cheesecake! Once done, turn the oven off, crack open the oven door (using a spoon if needed), and let your Oreo Cheesecake cool inside for about an hour. This step helps prevent unsightly cracks on top, keeping your dessert bakery-beautiful.
Step 5: Chill and Garnish
After it’s cooled in the oven, transfer the cheesecake to the fridge. Let it chill for at least 4 hours—or overnight if you have the patience—so it sets up perfectly. Before serving, top with fluffy whipped cream and a generous sprinkling of crushed or halved Oreo cookies. Each slice will look as impressive as it tastes!
How to Serve Oreo Cheesecake

Garnishes
Transform your homemade masterpiece into a true showstopper with some artful finishing touches. Pipe or dollop whipped cream around the edges, then nestle halved Oreo cookies and scatter some extra crushed cookies over the center. The pop of black-and-white against creamy filling turns every slice into an Instagram-worthy moment!
Side Dishes
While Oreo Cheesecake is plenty decadent on its own, you can offset its richness with a handful of fresh berries—think juicy strawberries or tart raspberries—for a hint of brightness. A cup of strong coffee or a glass of cold milk is the perfect pairing for this luscious dessert too, balancing every bite.
Creative Ways to Present
For a fun twist, cut the cheesecake into bite-sized bars before garnishing, making them perfect for parties or dessert buffets. You could also serve mini Oreo Cheesecakes in individual mason jars or cupcake liners for an adorable, portable treat. However you present it, the iconic cookies-and-cream vibe always shines through.
Make Ahead and Storage
Storing Leftovers
Keep any leftover Oreo Cheesecake in an airtight container in the refrigerator. The flavors meld beautifully overnight, so that second-day slice is often even better! It will stay fresh and creamy for up to five days—if it lasts that long.
Freezing
Want to save some for a later treat? You can freeze Oreo Cheesecake with great results. Wrap individual slices or the whole cake tightly in plastic wrap, followed by a layer of foil. Freeze for up to two months, and thaw overnight in the fridge before enjoying.
Reheating
Oreo Cheesecake is best served chilled or at room temperature, so there’s no need to reheat. If it’s too firm straight from the fridge, let slices sit out for 10 to 15 minutes to soften slightly, allowing the creaminess and Oreo flavor to really shine.
FAQs
Can I use double-stuffed Oreos for the crust and filling?
Absolutely! Double-stuffed Oreos create an extra creamy, indulgent crust and even more decadent chunks in the filling. Just be prepared for a slightly sweeter and richer flavor overall.
Do I need a water bath to bake this cheesecake?
No need for a water bath with this recipe. The slow oven cooling method keeps the cheesecake smooth and helps prevent cracks, making the process much simpler without sacrificing texture.
Can I make this Oreo Cheesecake gluten-free?
You sure can! Just substitute regular Oreos for your favorite gluten-free chocolate sandwich cookies. Double-check your other ingredients (especially the vanilla) to ensure they’re gluten-free, and your cheesecake will be just as delicious.
How do I know when my cheesecake is perfectly baked?
Look for set edges and a slightly wobbly center. That gentle jiggle is your sign to turn off the oven and begin the cooling process; the cheesecake will continue to set as it cools.
Is it okay to add chocolate chips or other mix-ins?
Definitely! Go ahead and fold in chocolate chips, white chocolate chunks, or even swirls of caramel for a custom touch. Just remember that the star of the show is the classic Oreo Cheesecake flavor, so don’t overpower those iconic cookies.
Final Thoughts
If you’re ready to treat yourself and impress everyone at your next gathering, I can’t recommend this Oreo Cheesecake enough. It’s the kind of dessert that guarantees smiles, sparked memories, and requests for seconds. Give it a try—there’s nothing like the combination of cookies and cream cheese to turn an ordinary day into something truly special!


Your email address will not be published. Required fields are marked *