

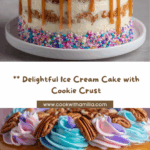
Get ready to fall in love with dessert all over again! Ice Cream Cake is the ultimate celebration treat that beautifully combines rich, velvety ice creams with an irresistible chocolate cookie crust, all crowned with fluffy whipped cream and fun toppings. Whether for birthdays, summer barbecues, or just a sweet midweek surprise, this cool confection is a guaranteed showstopper that brings smiles to every table.
Ingredients You’ll Need

Ingredients You’ll Need
One of the joys of making Ice Cream Cake at home is that the ingredient list is short, but every component shines in taste and texture. Each one is essential for building those dreamy layers and delightful contrast in every bite—so let’s give them the attention they deserve.
- Crushed chocolate sandwich cookies: These form the sturdy, chocolatey base that gives each slice a satisfying crunch.
- Unsalted butter, melted: Acts as the magic glue that holds your cookie crust together while adding a rich undertone.
- Vanilla ice cream, softened: Provides a creamy, classic layer that balances the bold flavors of the crust and chocolate ice cream.
- Chocolate ice cream, softened: Brings a decadent and dreamy contrast to the vanilla, making each bite extra indulgent.
- Heavy whipping cream: Whipped up into a cloud, it’s the perfect light topping to finish your cake.
- Powdered sugar: Adds sweetness and stability to the whipped cream, ensuring a luscious finish.
- Vanilla extract: Just a touch lifts the flavor of the whipped cream, giving it a delicious aroma and depth.
- Chocolate syrup: A final drizzle for glossy, chocolatey goodness that makes each slice extra tempting.
- Sprinkles (optional): Because a little confetti never hurt anyone! They add color and playfulness, perfect for celebrations.
How to Make Ice Cream Cake
Step 1: Build the Cookie Crust
Start by stirring together the crushed chocolate sandwich cookies and melted butter in a mixing bowl until the mixture looks like delicious edible sand. Press this cookie blend firmly into the bottom of a 9-inch springform pan, creating an even, compact layer. This will become the crave-worthy base that holds all your creamy layers together, so don’t be shy about packing it tight!
Step 2: Add the Vanilla Ice Cream Layer
Once your crust is ready, spoon in the softened vanilla ice cream and spread it out evenly with a spatula. Make sure to smooth the surface for a picture-perfect result. Pop the pan into the freezer for about 30 minutes to help this layer set, making building your next delicious tier a breeze.
Step 3: Add the Chocolate Ice Cream Layer
With the vanilla layer nice and firm, gently spread the softened chocolate ice cream over the top, smoothing it into every corner. Again, freeze the cake for another 30 minutes to lock in these creamy layers and keep your cake beautifully structured.
Step 4: Whip Up the Creamy Topping
While those cool layers set, whip together the heavy cream, powdered sugar, and vanilla in a chilled bowl until soft peaks form. This whipped cream layer is pure bliss—light, airy, and the crowning glory for your cake.
Step 5: Top and Decorate
Once the ice cream layers are fully firm, spread the freshly whipped cream over the cake. Drizzle generously with chocolate syrup, then shower with sprinkles if you wish. Return the cake to the freezer for at least two more hours to ensure everything is perfectly set. Skipping this step tempts fate and might lead to messy slices—patience is key!
Step 6: Serve with a Smile
When it’s finally time to celebrate, let the cake sit at room temperature for about five minutes so it’s easier to slice. Gently remove the springform pan sides, cut into wedges, and behold all those gorgeous, layered stripes! Savor every bite of your homemade masterpiece.
How to Serve Ice Cream Cake
Garnishes
The fun doesn’t stop after the final freeze! For a classic look, drizzle with extra chocolate syrup and scatter more sprinkles just before slicing. For a sophisticated twist, try a handful of chopped toasted nuts or a dusting of cocoa powder. Dollops of fresh whipped cream or fresh berries make each serving feel special and extra celebratory.
Side Dishes
Ice Cream Cake is an absolute star on its own, but if you want to create an epic dessert platter, serve alongside crisp wafer cookies, fresh strawberries, or a tart berry compote. For parties, pair with iced coffee or milkshakes for a full-blown treat-your-guests experience.
Creative Ways to Present
For birthdays, add sparkling candles or edible glitter atop your Ice Cream Cake. Slice into fun shapes—think hearts or stars—using a sharp knife for themed gatherings. You can even transform individual slices into ice cream sandwiches by tucking them between extra cookie layers for a whimsical, portable dessert.
Make Ahead and Storage
Storing Leftovers
If you’re lucky enough to have extra slices, simply cover them tightly with plastic wrap or foil and keep in the freezer. The whipped cream topping stays fresh and fluffy for several days, and the flavors only get better as they mingle. Just be sure to store in an airtight container to avoid picking up any freezer scents.
Freezing
Ice Cream Cake is a dream for make-ahead planning! You can prepare the entire cake days in advance, and it will stay fabulous for up to a week when wrapped well. If you’re pre-slicing, place parchment between slices to make serving a breeze straight from the freezer.
Reheating
No microwaves here! Instead, take your cake out of the freezer and let it sit at room temperature for 5–10 minutes before slicing. This softens the layers just enough for a perfect texture—creamy, not melty, and easy to cut.
FAQs
Can I use different ice cream flavors?
Absolutely! Swap out vanilla or chocolate for your favorites—think strawberry, coffee, or cookies and cream. Just soften slightly before layering in the pan and stick to the same ratios for the best results.
What if I don’t have a springform pan?
No problem! A deep cake pan lined with parchment or plastic wrap will work. Just make sure there’s enough overhang to lift the cake out gently once frozen. The sides won’t be as neat but the taste is still out of this world.
How do I soften ice cream quickly?
Either leave it at room temperature for 10–15 minutes or microwave in 10-second bursts, stirring between each interval. You want it spreadable but not melted—think of the consistency of whipped butter.
Can I make the Ice Cream Cake dairy-free?
Sure! Use your favorite dairy-free ice creams and whipped toppings. There are fantastic non-dairy creams that whip up beautifully, and plant-based butters work just as well for the crust.
Is it possible to add mix-ins to the ice cream layers?
Go for it! Fold in chopped candies, nuts, swirls of fudge, or fruit into your softened ice cream before assembling the layers. This adds exciting texture and extra bursts of flavor to your Ice Cream Cake.
Final Thoughts
This Ice Cream Cake has everything: bold flavors, beautiful layers, and loads of personality—it’s pure joy on a plate! Whether you’re sharing it with friends or sneaking a slice just for yourself, give this recipe a whirl and enjoy the delicious magic that only a homemade dessert can bring. You’re going to love every spoonful!
Your email address will not be published. Required fields are marked *