

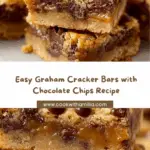
If you’re looking for a nostalgic treat that feels like a warm hug in dessert form, these Graham Cracker Bars are exactly what you need. They marry the subtle sweetness and slight crunch of graham cracker crumbs with the rich, gooey goodness of sweetened condensed milk and melty chocolate chips, creating a bar that’s simple, satisfying, and utterly irresistible. Whether you’re craving an afternoon pick-me-up or a no-fuss dessert to impress friends, these bars hit the spot every single time.

Ingredients You’ll Need
Gathering the ingredients for Graham Cracker Bars is delightfully straightforward, yet each item plays a crucial role in crafting that perfect balance of texture and flavor. From the crunchy foundation of graham cracker crumbs to the luscious, creamy sweetness of condensed milk, these components come together to create magic.
- 2 cups graham cracker crumbs: Provides the crisp and slightly nutty base that anchors the bars with classic flavor and texture.
- 1 teaspoon baking powder: Adds a subtle lift, keeping the bars from becoming too dense.
- 1 teaspoon salt: Enhances the sweetness and balances the overall flavor.
- 14 ounces sweetened condensed milk: Brings a rich creaminess and natural sweetness that binds everything together.
- 1 cup chocolate chips: Delivers melty pockets of chocolate that give each bite a decadent surprise.
- 1 teaspoon vanilla extract: Infuses a fragrant warmth that elevates the flavors to a whole new level.
How to Make Graham Cracker Bars
Step 1: Prepare Your Pan
Start by preheating your oven to 350 degrees Fahrenheit (175 degrees Celsius). Grease an 8 by 8-inch baking pan with butter or shortening for a non-stick surface, then line it with parchment paper. Letting the parchment hang over the edges makes it so easy to lift the bars out once they’re baked and cooled.
Step 2: Mix the Dry Ingredients
In a large mixing bowl, whisk together the graham cracker crumbs, baking powder, and salt. This ensures the rising agent and salt are evenly distributed throughout the crumb mixture, laying down the perfect foundation.
Step 3: Combine with Wet Ingredients
Pour in the sweetened condensed milk, sprinkle in your chocolate chips, and add the vanilla extract. Stir everything thoroughly until you have a thick, sticky dough. This mixture is dense, so don’t be alarmed if it feels a bit stubborn to stir—it’s exactly how it should be.
Step 4: Shape and Bake
Transfer the sticky mixture to your prepared pan and press it evenly into all the corners. For an extra touch of chocolaty goodness, sprinkle a few more chocolate chips on top. Bake the bars for 22 to 25 minutes—when the edges turn a beautiful golden brown, you know they’re ready to come out.
Step 5: Cool and Slice
Patience is key here. Allow the bars to cool completely in the pan, letting them set up so you get sturdy slices instead of crumbly chunks. Once cooled, use the parchment paper edges to lift the bars out and cut into nine generous squares.
How to Serve Graham Cracker Bars

Garnishes
Sprinkling a light dusting of powdered sugar over the cooled bars lends a delicate sweetness and pretty presentation. If you want to go a step further, drizzle some melted chocolate or caramel sauce for extra decadence. Fresh mint leaves or a few crushed nuts on top add a nice textural contrast and an inviting look.
Side Dishes
These bars stand beautifully on their own, but pairing them with a scoop of vanilla ice cream or a dollop of whipped cream takes the indulgence up a notch. For a refreshing balance, serve alongside fresh berries or a small cup of coffee—perfect for a cozy afternoon treat.
Creative Ways to Present
Try layering these Graham Cracker Bars in a dessert parfait with layers of whipped cream and fresh fruit for an elegant twist. Cut into bite-sized pieces to serve as party finger food, or sandwich two bars together with a smear of marshmallow fluff or peanut butter for a fun handheld treat.
Make Ahead and Storage
Storing Leftovers
Keep your Graham Cracker Bars fresh by storing them in an airtight container at room temperature for up to three days. If your kitchen is warm, the fridge is a safe bet to maintain firmness and prevent melting, though the texture might be slightly less chewy.
Freezing
These bars freeze beautifully. Wrap individual slices tightly in plastic wrap, then place them in a freezer-safe bag or container. They’ll stay perfect for up to two months, making them great to prepare in advance for surprise guests or sweet cravings down the road.
Reheating
If you prefer your Graham Cracker Bars warm and gooey, simply microwave a slice for 10 to 15 seconds or warm them in a low oven for a few minutes. Just watch closely to avoid overheating that could make the chocolate seize up or the bars dry out.
FAQs
Can I use whole graham crackers instead of crumbs?
Absolutely! You can pulse whole graham crackers in a food processor until finely ground if you don’t have pre-made crumbs handy. Just make sure to get them evenly crushed for the best texture.
Are Graham Cracker Bars gluten-free?
Traditional graham crackers contain gluten, so this recipe is not gluten-free unless you source gluten-free graham cracker crumbs specifically made for gluten-intolerant diets.
Can I substitute the chocolate chips?
Yes! Feel free to swap chocolate chips with butterscotch chips, peanut butter chips, or even chopped nuts for a fun variation that suits your taste preferences.
Is there a vegan version of these bars?
To make vegan Graham Cracker Bars, you would need to use dairy-free condensed milk alternatives and vegan-friendly chocolate chips, as well as ensure your graham crackers are vegan certified.
What’s the best way to cut neat bars?
For clean edges, wait until the bars are completely cool, then use a sharp knife wiped clean between cuts. Refrigerating the bars briefly before slicing can also help maintain structure and prevent crumbling.
Final Thoughts
These Graham Cracker Bars are a treasure trove of nostalgia and simple pleasure rolled into one easy-to-make recipe. They’re perfect when you want a quick dessert that doesn’t skimp on taste or texture. I can’t wait for you to try them and discover how this humble combination of ingredients delivers a truly irresistible treat. Happy baking and even happier eating!
Your email address will not be published. Required fields are marked *