

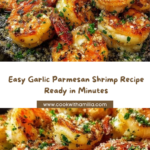
If you love dishes that come together quickly but taste like you spent hours in the kitchen, this Garlic Parmesan Shrimp recipe is absolutely for you. Bursting with rich, garlicky goodness and the bold, nutty flavor of Parmesan, every bite feels like a little celebration on your plate. Whether you’re cooking for a weeknight dinner or impressing guests, Garlic Parmesan Shrimp delivers juicy, tender shrimp coated in a velvety sauce that’s simply irresistible.

Ingredients You’ll Need
These ingredients are straightforward yet perfectly balanced to create a stunning dish. Each one plays a key role in bringing out the flavors, textures, and aroma that make Garlic Parmesan Shrimp such a memorable experience.
- Shrimp (1 lb peeled and deveined): The star of the dish, fresh shrimp provide sweet, succulent bites that cook quickly.
- Olive oil or butter (2 tbsp): Adds richness and helps gently brown the shrimp while carrying the garlic flavor.
- Garlic (4 cloves, minced): Infuses the dish with its signature bold and aromatic punch.
- Crushed red pepper flakes (1/2 tsp, optional): Offers a subtle heat to balance the richness without overpowering.
- Grated Parmesan cheese (1/4 cup): Brings creamy, nutty depth that perfectly complements the shrimp.
- Fresh parsley (1 tbsp, chopped): Adds a bright, fresh contrast and a pop of color to the final plate.
- Salt and black pepper (to taste): Essential seasonings to enhance natural shrimp flavor and bring everything together.
- Lemon juice (1 tbsp): A splash of acidity to brighten and freshen the dish right before serving.
How to Make Garlic Parmesan Shrimp
Step 1: Prep and Season the Shrimp
Start by patting your shrimp dry with paper towels — this helps them sear beautifully instead of steaming. Then, lightly season with salt and black pepper. This simple seasoning is crucial because it lets the shrimp’s natural sweetness shine through without competing with the other flavors.
Step 2: Sauté Garlic and Red Pepper Flakes
Heat olive oil or butter in a large skillet over medium-high heat. Add the minced garlic and, if you’re using them, the crushed red pepper flakes. Sauté for just 30 to 60 seconds until you can smell the aroma filling the kitchen — this step builds the flavor base for the shrimp!
Step 3: Cook the Shrimp
Place the shrimp in the skillet in a single layer. Let them cook undisturbed for 2 to 3 minutes on one side until they turn a nice pink color and are beginning to curl. Flip them over and cook for another 2 to 3 minutes until fully opaque and perfectly tender.
Step 4: Add Parmesan, Parsley, and Lemon
Remove the skillet from heat, then sprinkle the grated Parmesan cheese and chopped fresh parsley over the shrimp. Finish with a generous drizzle of lemon juice. Gently toss everything together so the cheese melts slightly and all those fabulous flavors mingle together.
Step 5: Serve Immediately
The best part is serving your Garlic Parmesan Shrimp right away while it is hot, juicy, and full of flavor. The contrast of the warm shrimp with the tangy lemon and savory cheese is simply divine.
How to Serve Garlic Parmesan Shrimp

Garnishes
Fresh parsley isn’t just for color — adding a bit more right before serving lifts the dish with a clean, herbaceous note. A few lemon wedges on the side invite guests to add extra brightness to their bites. For a bit of texture, consider toasted breadcrumbs sprinkled on top for a slight crunch.
Side Dishes
This dish plays well with many sides. Light, fluffy rice soaks up the garlicky sauce beautifully, while a simple pasta like linguine or fettuccine makes it a more substantial meal. For something green, steamed asparagus or sautéed spinach add freshness and balance the richness perfectly.
Creative Ways to Present
Try serving Garlic Parmesan Shrimp atop a bed of creamy mashed potatoes for a comforting twist. You can also turn it into a vibrant salad with mixed greens, cherry tomatoes, and a citrus vinaigrette for a fresh summer lunch. Skewer the shrimp for party-friendly appetizers, garnished with Parmesan and a touch of parsley.
Make Ahead and Storage
Storing Leftovers
If you happen to have leftovers, store them in an airtight container in the fridge for up to 2 days. Make sure the shrimp cool completely before sealing to maintain the best texture and avoid sogginess.
Freezing
While fresh is always best, you can freeze cooked Garlic Parmesan Shrimp in a freezer-safe bag or container for up to 1 month. Thaw carefully in the fridge overnight before reheating to preserve the shrimp’s texture and flavor.
Reheating
To reheat, gently warm the shrimp in a skillet over low heat or microwave them briefly, just until heated through. Avoid overcooking during reheating to keep the shrimp tender and juicy rather than rubbery.
FAQs
Can I use frozen shrimp for this recipe?
Absolutely! Just make sure to fully thaw and pat the shrimp dry before cooking. This helps ensure they sear nicely and don’t release excess water into the skillet.
Is Garlic Parmesan Shrimp spicy?
The dish is mild by default but adding crushed red pepper flakes gives a gentle kick that complements the garlic and Parmesan very well. You can omit the pepper flakes for a completely mild flavor.
What type of Parmesan cheese works best?
Freshly grated Parmesan or Parmigiano-Reggiano works best because it melts smoothly and adds a rich depth of flavor. Pre-grated powders don’t provide the same creamy texture.
Can I make this dish vegan or vegetarian?
For a vegetarian twist, try substituting shrimp with roasted cauliflower or mushrooms and use a plant-based Parmesan. The garlic and cheese flavors will still shine!
How do I prevent shrimp from overcooking?
Keep a close eye on the shrimp as they cook quickly — just a few minutes per side until opaque. When they curl into a loose “C” shape, they’re perfectly done.
Final Thoughts
Garlic Parmesan Shrimp is one of those recipes that feels fancy but is incredibly easy and quick to make, making it an instant favorite for busy nights or special occasions. The combination of garlic, cheese, and lemon transforms simple shrimp into a show-stopping dish that you’ll want to cook again and again. I encourage you to try this recipe soon and enjoy how effortlessly delicious it turns out in your own kitchen!
Your email address will not be published. Required fields are marked *