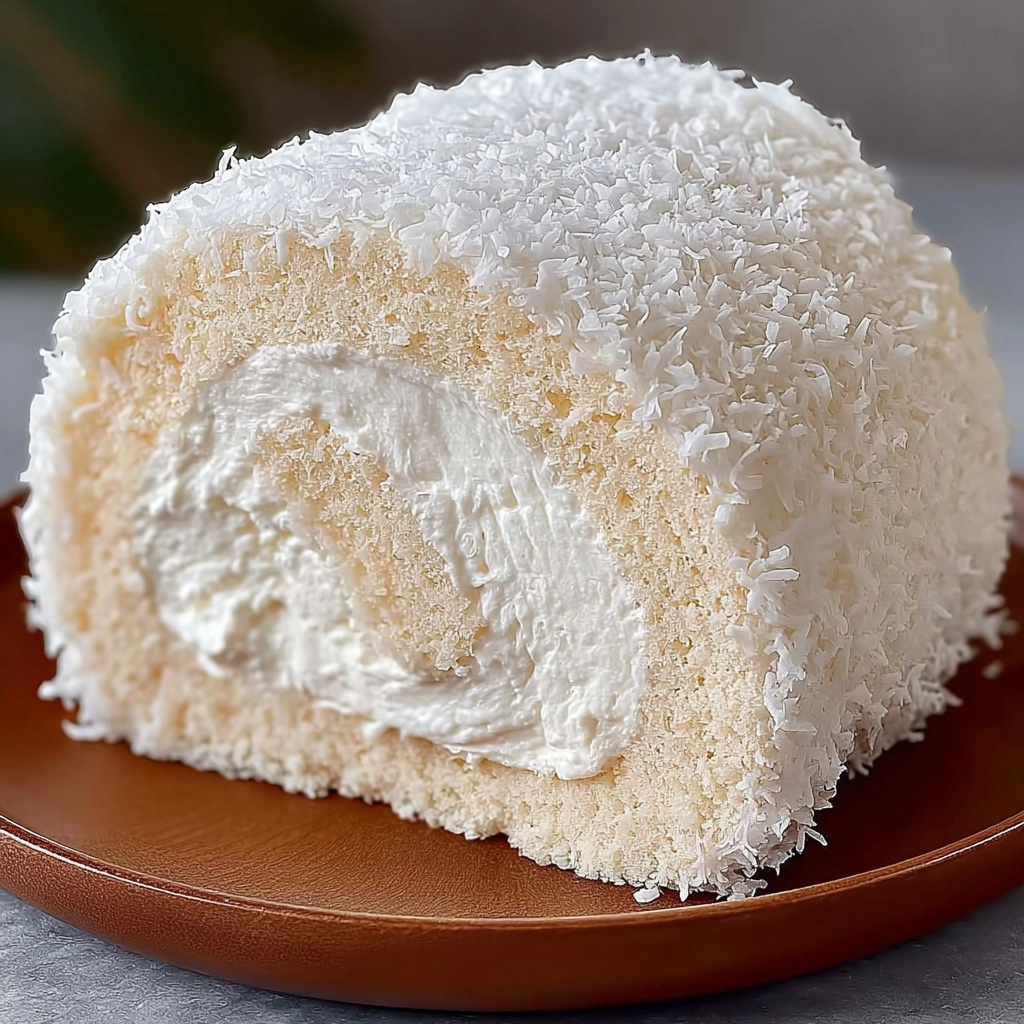
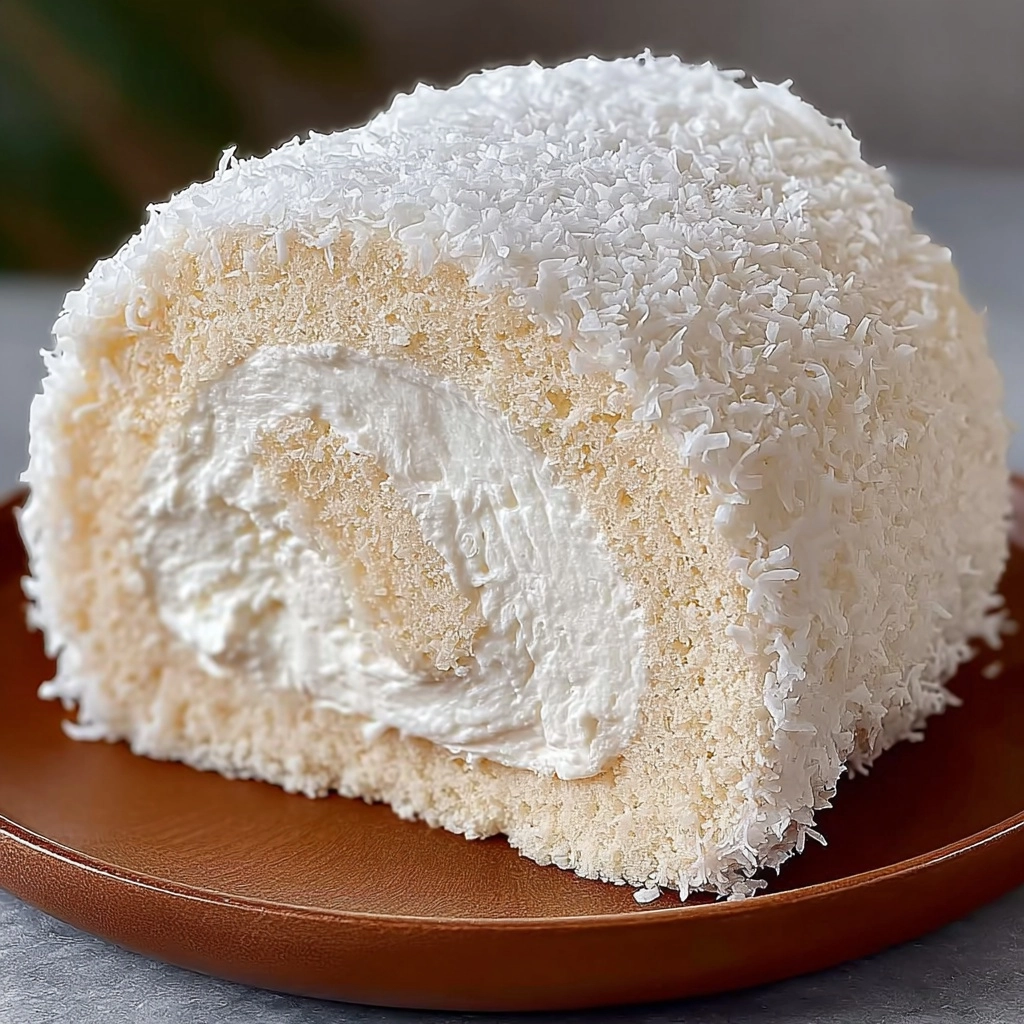
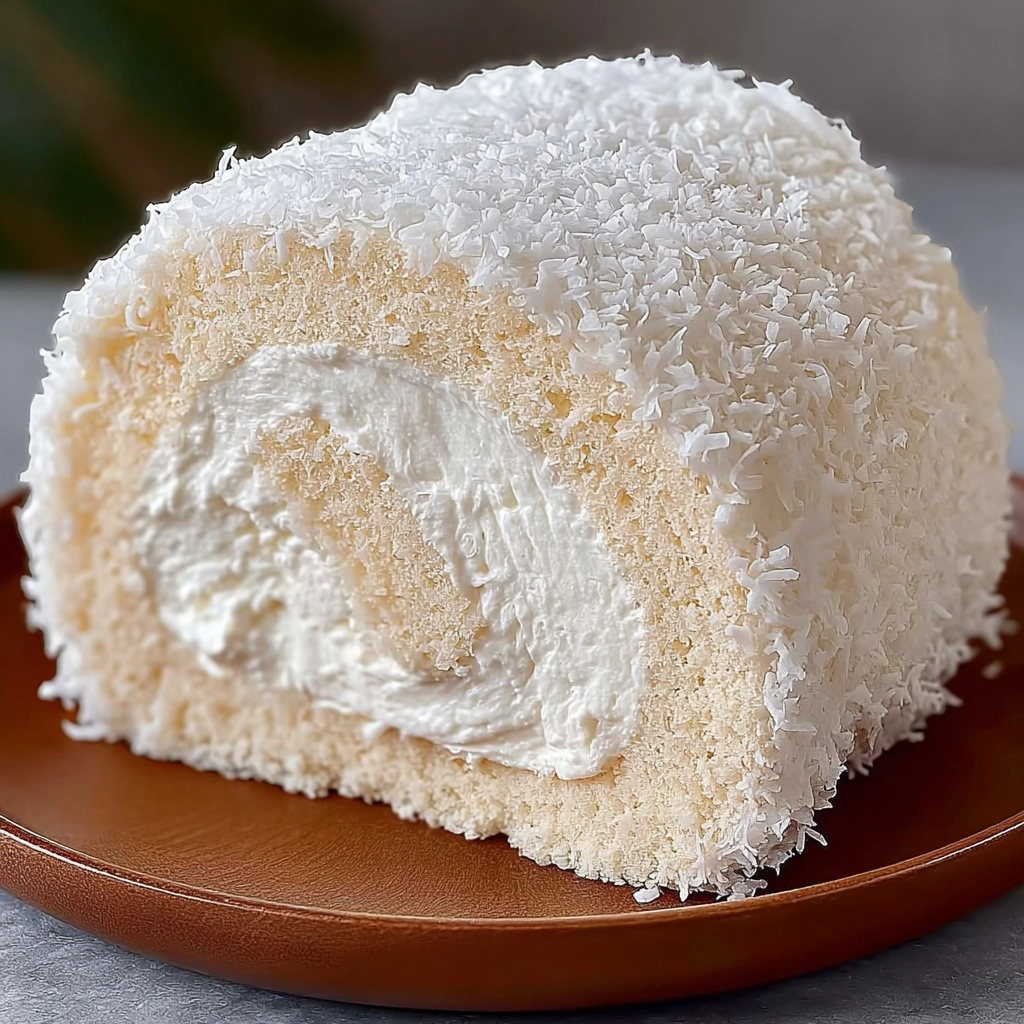
If you have a soft spot for light, fluffy cakes that transport you straight to a tropical paradise, then you are going to adore this Coconut Dream Roll Cake. This delightful dessert is a perfect blend of airy sponge and creamy coconut filling, rolled to perfection and coated in a generous layer of shredded coconut. It’s that dream come true for coconut lovers, combining simple ingredients in a way that creates a show-stopping cake with a luscious texture and a fresh, sweet flavor that will have everyone asking for seconds.
Ingredients You’ll Need
Every ingredient in this Coconut Dream Roll Cake plays an important role, from creating the delicate sponge to the creamy, coconut-infused filling. The beauty is in their simplicity, yet together, they form a dessert that feels truly special.
- 4 eggs: These provide structure and a light, airy texture when beaten properly.
- 100g sugar: Sweetens the sponge and helps achieve that golden color during baking.
- 80g flour: The base of the sponge, sifted to keep the cake tender.
- 1 tsp baking powder: Adds a gentle lift to keep the roll light, not dense.
- 200ml whipped cream: Creates a rich, smooth filling that balances the coconut perfectly.
- 100g shredded coconut: Injects that signature tropical flavor and adds delightful texture.
- 1 tsp vanilla extract: Enhances all the flavors with a warm, comforting aroma.
- Pinch of salt: Amplifies sweetness and rounds out the flavor profile.
How to Make Coconut Dream Roll Cake
Step 1: Prepare Your Oven and Baking Tray
Start by preheating your oven to 180°C to ensure it’s ready to go. Line a flat baking tray with parchment paper—this is key because your sponge needs a non-stick surface to bake evenly and roll nicely after baking.
Step 2: Whip Up the Egg and Sugar Mixture
Beat the eggs with sugar until the mixture becomes thick, pale, and quadruples in volume. This step is what gives your roll its airy softness. Then add the vanilla extract and a pinch of salt for flavor enhancement to the mix.
Step 3: Fold in the Dry Ingredients
Sift together the flour and baking powder, then gently fold them into the beaten egg mixture. Take your time here—fold carefully to maintain all that lovely air without over-mixing.
Step 4: Bake the Sponge
Spread the batter evenly over your prepared tray, smoothing the top for an even finish. Pop it in the oven and bake for about 10 to 12 minutes until the sponge is just set and springy to the touch.
Step 5: Roll While Warm
As soon as it comes out, cover the sponge with a clean towel and carefully roll it up. Rolling it warm helps train the sponge to form the roll shape without cracking. Let it cool completely while rolled.
Step 6: Add the Cream and Coconut Filling
Once the sponge has cooled, unroll gently. Spread whipped cream evenly over the surface and sprinkle with shredded coconut. Then skillfully re-roll the cake, encasing the filling inside.
Step 7: Chill and Coat
Chill the roll cake in the fridge for at least an hour to set the cream filling. Before serving, coat the roll generously with more shredded coconut to give that signature look and an extra burst of coconut flavor.
How to Serve Coconut Dream Roll Cake

Garnishes
To elevate this Coconut Dream Roll Cake visually and flavor-wise, try topping it with a few toasted coconut flakes or a light dusting of powdered sugar. Fresh tropical fruits like pineapple or mango slices on the side provide a bright, juicy contrast.
Side Dishes
This cake pairs wonderfully with a cup of lightly brewed green tea or a chilled glass of coconut water. For a decadent twist, serve it alongside a scoop of vanilla bean ice cream or a drizzle of passionfruit coulis to complement the tropical notes.
Creative Ways to Present
Slice the roll into delicate rounds and arrange on a decorative plate with edible flowers or mint leaves for a show-stopping party presentation. You can also serve individual mini slices in small clear cups, layering them with extra whipped cream and toasted coconut for a pretty trifle effect.
Make Ahead and Storage
Storing Leftovers
Keep any leftover Coconut Dream Roll Cake wrapped tightly in plastic wrap and stored in the refrigerator. It will stay fresh and moist for up to 3 days so you can enjoy its tropical charm without worry.
Freezing
If you want to save the cake for longer, wrap it carefully in cling film and place it in an airtight container or freezer bag. Freeze for up to 1 month. When ready to eat, thaw overnight in the fridge to preserve the delicate texture.
Reheating
This roll cake is best enjoyed chilled or at room temperature, so reheating is not recommended as it may affect the cream filling and sponge texture. Simply remove it from the fridge a little before serving for the best flavor.
FAQs
Can I make the cake without shredded coconut inside?
Absolutely! You can omit or reduce the shredded coconut inside if you prefer a less textured filling, but the coconut flavor and final coat really make this roll special.
Can I use a different type of cream for the filling?
Whipped cream is ideal for that light, airy texture, but you could try mascarpone or cream cheese for a richer, tangier alternative.
What if I don’t have a baking tray of the exact size?
Use the closest size available and adjust the batter thickness accordingly. Just spread the batter evenly for consistent baking.
Is it necessary to roll the cake while warm?
Rolling while warm is key to prevent cracks and keep the sponge flexible. If it cools unrolled, it can crack when trying to shape it later.
Can this recipe be doubled for a larger crowd?
Yes! Double the ingredients and bake in two trays or larger pans. Keep an eye on baking time, as larger amounts may require a bit longer in the oven.
Final Thoughts
This Coconut Dream Roll Cake is a beautiful celebration of simple ingredients coming together to create something truly special and unforgettable. Whether you’re making it for a family gathering or a cozy weekend treat, it’s a fantastic way to share a little taste of sunshine and happiness. Don’t hesitate—give this recipe a try and let your friends and family discover why the Coconut Dream Roll Cake is one of those desserts you’ll want to keep coming back to again and again.


Your email address will not be published. Required fields are marked *