

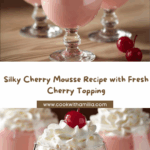
Nothing feels quite as delightful as a light, airy dessert that balances fruity brightness with creamy softness. This Cherry Mousse Dessert Recipe is exactly that kind of treat—silky, pastel-pink, and bursting with the fresh essence of cherries in every bite. Imagine spooning into a cloud of whipped cream infused with sweet cherry juice, crowned with luscious fresh cherries on top. Whether you’re impressing guests or simply indulging yourself, this recipe is an absolute gem that combines ease and elegance effortlessly.

Ingredients You’ll Need
To bring this Cherry Mousse Dessert Recipe to life, you’ll rely on a handful of simple but essential ingredients. Each plays a crucial role, from providing the fruity base and creamy texture to the light structure that makes the mousse so irresistible.
- Cherry juice or puree: The heart of the dessert, offering authentic cherry flavor and vibrant color.
- Sugar: Adds the perfect touch of sweetness, adjustable to your taste preference.
- Gelatin powder or sheets: The magical ingredient that helps the mousse set to a silky, soft consistency.
- Cold water: Used to bloom the gelatin, ensuring it dissolves smoothly without lumps.
- Heavy cream, chilled: Whipped to add richness and the signature fluffy texture of the mousse.
- Whipped cream (sweetened) for topping: Adds an extra layer of creamy indulgence.
- Fresh cherries with stems: The perfect garnish that gives a fresh and inviting finish.
How to Make Cherry Mousse Dessert Recipe
Step 1: Prepare the Gelatin Base
Begin by sprinkling the gelatin over cold water and allowing it to bloom for about 5 minutes, which softens it and helps it dissolve evenly. Meanwhile, gently heat the cherry juice with sugar until it’s warm but not boiling, just enough to melt the sugar. Stir in the bloomed gelatin carefully, making sure it dissolves fully into the cherry mixture. Once smooth, set it aside to cool down to room temperature, preventing gelatin from firming too early when combined with cream.
Step 2: Whip the Cream
In a chilled bowl, whip the heavy cream until soft peaks form—this is the stage where the cream is fluffy but still silky. Soft peaks ensure your mousse will be light and airy rather than too dense. Then, gently fold the cooled cherry mixture into the whipped cream in batches. Folding is key here to keep the mixture light and airy, so use a spatula and move slowly to combine everything without deflating your whipped cream.
Step 3: Chill the Mousse
Pour the blended mousse mixture into pretty dessert glasses or bowls. Refrigerate them for at least 2 to 3 hours so the mousse can fully set and develop its beautiful, silky texture. This waiting time is perfect for prepping your garnishes or simply relaxing before dessert time arrives!
Step 4: Decorate
Once set, top the mousse with swirls of sweetened whipped cream for an extra touch of indulgence. Add fresh cherries with stems atop this cloud to create a picture-perfect presentation and a burst of juiciness in each bite. The contrast between the creamy mousse and the fresh cherries makes every spoonful a delight.
How to Serve Cherry Mousse Dessert Recipe

Garnishes
The beauty of this Cherry Mousse Dessert Recipe lies in its simple yet elegant garnishes. Sweetened whipped cream piped in pretty swirls provides a smooth creaminess, while fresh cherries bring a natural, tangy pop of flavor and vibrant color that invites you to dig in.
Side Dishes
Serve your cherry mousse alongside a crisp biscotti or thin almond cookies to add some texture contrast. A small glass of sparkling rosé or a light dessert wine also pairs wonderfully with the fruity sweetness and creamy nature of this mousse.
Creative Ways to Present
Elevate your dessert presentation by layering the mousse with fresh cherry compote or chocolate shavings in a parfait glass. Alternatively, use elegant crystal dessert bowls or mini mason jars tied with a festive ribbon for a charming individual serving that’s as delightful to look at as it is to eat.
Make Ahead and Storage
Storing Leftovers
If you happen to have any leftovers, cover the dessert glasses tightly with plastic wrap and store them in the refrigerator. They will stay fresh and creamy for up to 2 days, allowing you to enjoy a second helping whenever craving strikes.
Freezing
Freezing is not recommended for this mousse, as the texture can be compromised. The delicate airy structure might become grainy or watery after freezing and thawing, so it’s best enjoyed fresh or within a couple of days refrigerated.
Reheating
This mousse is best served chilled and never reheated. Its soft, creamy consistency is designed to be savored cold, so it’s perfect for keeping in the fridge right up until serving time.
FAQs
Can I use frozen cherries for this Cherry Mousse Dessert Recipe?
Yes, you can use frozen cherries if fresh ones aren’t available. Just thaw and drain them well before using as garnish to avoid extra moisture affecting the mousse’s texture.
Is there a vegetarian alternative to gelatin?
Absolutely! You can substitute gelatin with agar-agar powder, a plant-based gelling agent. However, note that agar-agar sets differently and may require slightly different preparation steps.
Can I adjust the sweetness in this recipe?
Definitely. The amount of sugar can be increased or decreased based on your preference and how sweet your cherry juice or puree is. Taste as you go to find the perfect balance for you.
How long does it take to make this mousse from start to finish?
Active prep time is about 15-20 minutes, but you’ll need to factor in 2-3 hours chilling time for the mousse to set properly before serving.
Can I make this recipe for a larger group?
Yes, this recipe scales easily. Just multiply the ingredients accordingly and use a larger bowl or several smaller dessert glasses. Be mindful to allow enough chilling time for larger quantities.
Final Thoughts
This Cherry Mousse Dessert Recipe is one of those magical desserts that feels fancy but is wonderfully straightforward to make. Its light texture, balanced sweetness, and fresh cherry flavor come together to make every spoonful feel like a little celebration. I hope you have as much fun making and enjoying this dessert as I do sharing it with friends. Go ahead, treat yourself to a scoop of this creamy, dreamy delight—it’s pure joy in a glass!
Your email address will not be published. Required fields are marked *