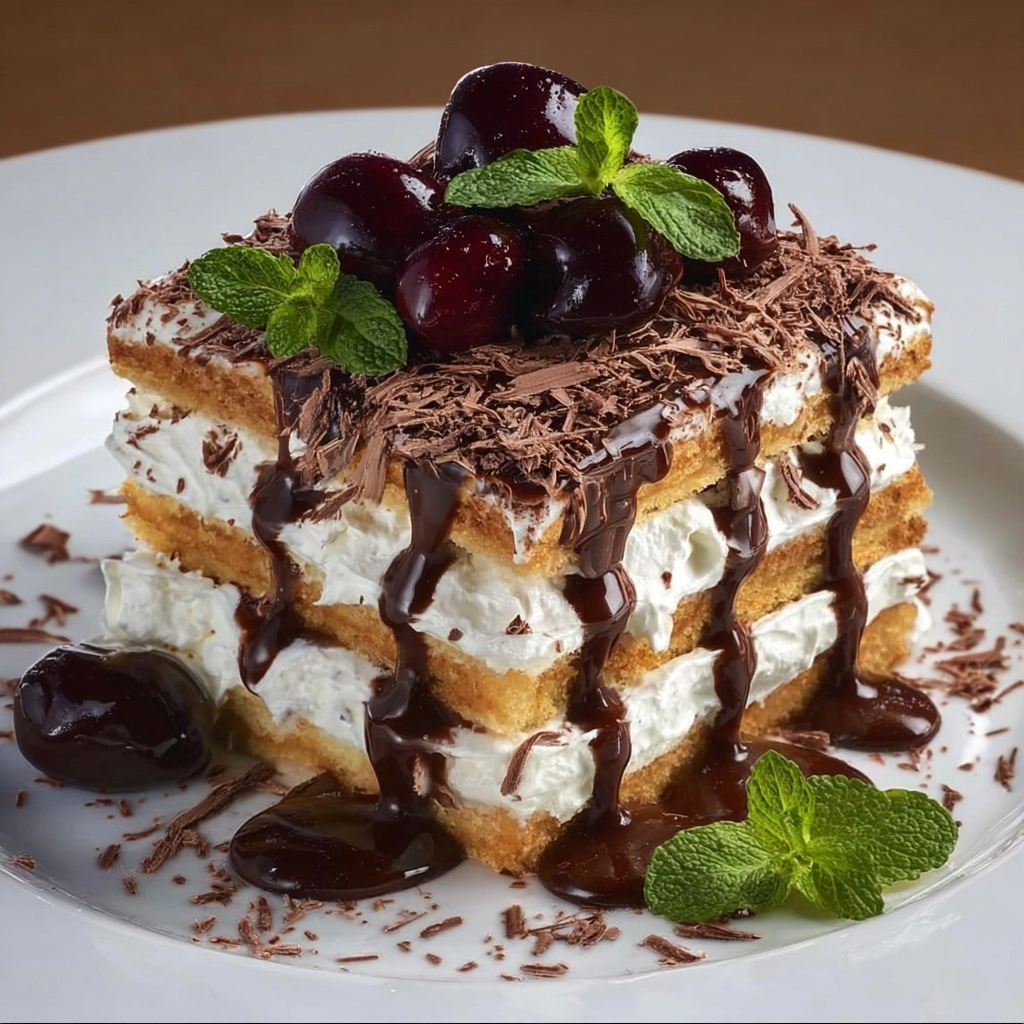
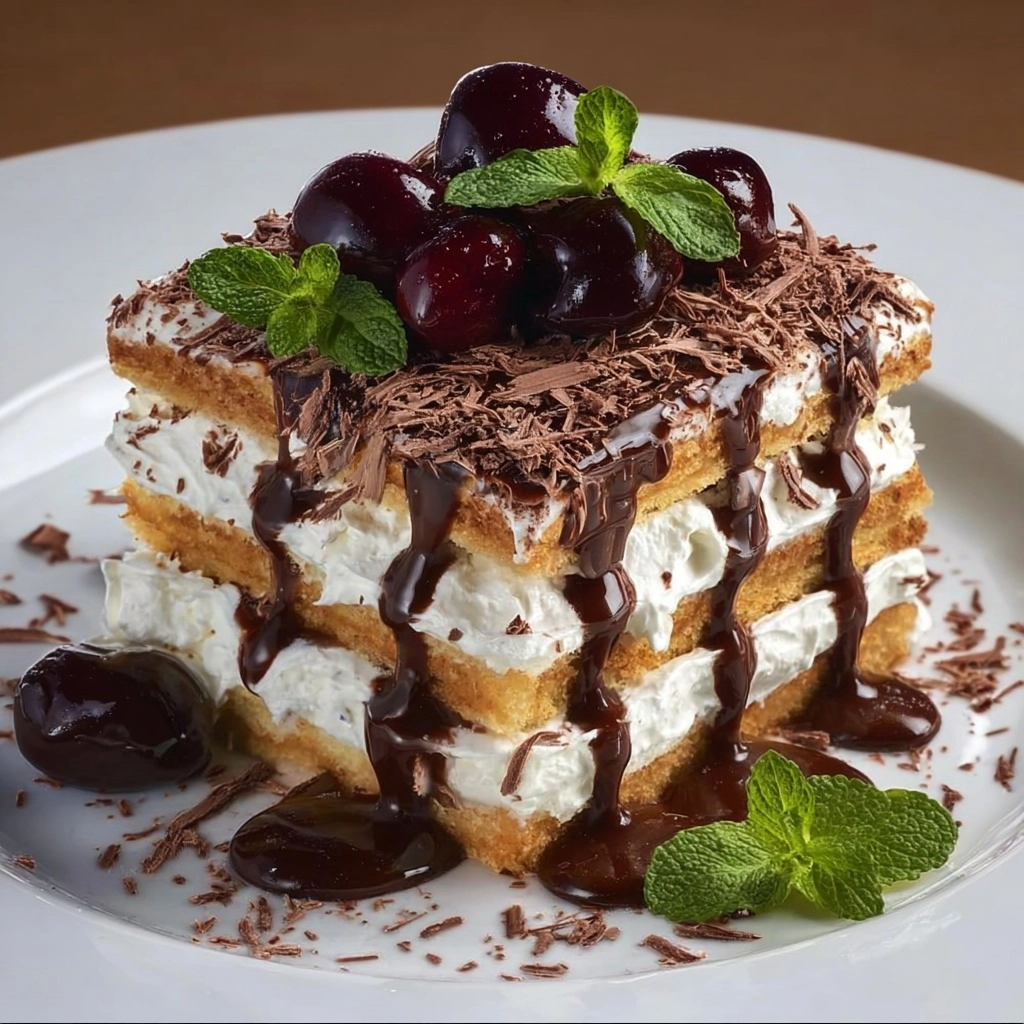
If you’re looking for a true showstopper for your next gathering, the Cherry Chocolate Tiramisu Cake delivers pure delight. This dessert weaves together layers of fluffy sponge (or classic ladyfingers), dreamy mascarpone cream, luscious chocolate, and the juiciest cherries, making every bite a harmonious blend of rich and refreshing flavors. Whether you’re a tiramisu traditionalist or love a creative twist, this recipe promises to impress your guests—and secretly, you might find yourself sneaking back for “just one more sliver.” Let’s dive in and make this Cherry Chocolate Tiramisu Cake your new obsession!
Ingredients You’ll Need
Ingredients You’ll Need
The ingredients for Cherry Chocolate Tiramisu Cake are simple, but each one adds something magic—texture, depth, or that pop of color you already crave. Don’t be tempted to swap them out; every item truly earns its place in this dreamy dessert!
- Eggs: Provide the sponge cake with impressive lift and a delicate crumb—be sure they’re at room temperature for the fluffiest results.
- Sugar: Sweetens each layer and helps create that beautifully tender cake base.
- All-purpose flour: The foundation for a soft and airy sponge—use a gentle hand when folding it in to avoid deflating your batter.
- Baking powder: Gives the cake a reliable rise, ensuring every bite is light and irresistible.
- Vanilla extract: Enhances the flavors of both the cake and cream, bringing warmth and depth throughout the dessert.
- Heavy cream: Chilled and whipped, this is the secret to the cream filling’s cloudlike texture.
- Mascarpone cheese: Luxurious and rich, mascarpone takes the cream filling to an authentically Italian, velvety level.
- Powdered sugar: Blends effortlessly for the smoothest cream filling and just the right touch of sweetness.
- Brewed espresso or strong coffee: Brings bold, bittersweet notes that accentuate both cherry and chocolate flavors.
- Cherry liqueur (optional): A splash elevates the dessert with festive fruitiness—perfect for special occasions!
- Dark chocolate (shaved): Lends decadence on top, stacking up visual appeal and an irresistible bittersweet snap.
- Chocolate syrup: Adds dramatic swirls of chocolatey indulgence—don’t hold back!
- Fresh cherries: Their juicy brightness balances out the richness and screams celebration.
- Fresh mint leaves: Finish with a burst of color and a spark of fresh flavor for the perfect garnish.
How to Make Cherry Chocolate Tiramisu Cake
Step 1: Bake the Sponge Cake
Let’s start by making the base for our star, the Cherry Chocolate Tiramisu Cake. Preheat your oven to 175°C (350°F) and line a rectangular baking pan for easy release. Whisk the eggs and sugar until the mixture triples in volume, turning pale and pillowy—don’t rush this, as it makes the sponge impossibly soft. Gently sift in the flour and baking powder, folding with a loving, light touch to retain all that air. Add a splash of vanilla extract, then pour the batter into your pan. Bake for 20 to 25 minutes, until just golden and springy in the center. Cool thoroughly and, using a serrated knife, carefully slice into layers. (Short on time? No shame in swapping for classic store-bought ladyfingers instead!)
Step 2: Make the Cream Filling
Time for that classic tiramisu cream, with a fresh twist for this Cherry Chocolate Tiramisu Cake! In a cold bowl, whip chilled heavy cream to stiff peaks. In a separate bowl, beat mascarpone, powdered sugar, and vanilla extract until irresistibly smooth. Gently fold your whipped cream into the mascarpone—this step gives you an airy yet rich filling that melts in your mouth. Resist the urge to overmix; a few streaks are totally fine and keep things light.
Step 3: Layer the Cake
The fun begins—layering! Place your first layer of sponge (or line up your ladyfingers) on a serving platter. Make a simple syrup by mixing bold espresso or strong coffee cooled to room temperature and, if you’re feeling festive, that optional cherry liqueur. Brush the layer generously for that signature tiramisu soak. Dollop and spread on a thick layer of the mascarpone cream. Repeat with your second sponge layer. End with a glorious swirl of cream, using a spatula to smooth the top. The layering is what makes your Cherry Chocolate Tiramisu Cake so visually inviting!
Step 4: Garnish
Here’s where the magic happens. Drizzle a lavish amount of chocolate syrup across the top, then lavish with dark chocolate shavings for texture and flair. Sheer beauty—crown the cake with glossy whole fresh cherries (stems on for extra effect) and a handful of mint leaves for a refreshing pop of color and scent. It’s hard not to admire your work at this stage!
How to Serve Cherry Chocolate Tiramisu Cake
Garnishes
When it’s time to serve, let the artistry shine! Sprinkle a few extra dark chocolate shavings on each slice and perch a fresh cherry right on top—those colors just burst off the plate. For extra finesse, a couple of small mint leaves add the perfect finishing touch. The chocolate, cherries, and greens make every serving worthy of celebration.
Side Dishes
Although Cherry Chocolate Tiramisu Cake is the main event on any dessert table, it also pairs wonderfully with simple sides. Offer espresso or a silky cappuccino to amplify the cake’s coffee notes, or a bowl of lightly sweetened whipped cream for an even more luscious bite. If you want something lighter, fresh berries are a beautiful, complementary addition.
Creative Ways to Present
Let your creativity run wild! Try assembling the Cherry Chocolate Tiramisu Cake into individual mason jars for a fun, portable treat, or make mini versions in ramekins for a dinner party. Use a tall trifle bowl for dramatic, layered presentation. No matter the shape, a generous drizzle of chocolate and scattering of cherries always wins hearts!
Make Ahead and Storage
Storing Leftovers
Store any leftover Cherry Chocolate Tiramisu Cake in an airtight container in the fridge. Thanks to the mascarpone and fresh cherries, the cake stays moist and flavorful for up to three days—just know that the flavors get even better as they mingle!
Freezing
To freeze, wrap individual slices in plastic wrap and a layer of foil, then place in a freezer-safe bag or container. The cake holds beautifully in the freezer for up to one month. For the best texture, garnish with fresh cherries and mint only after thawing.
Reheating
Cherry Chocolate Tiramisu Cake is absolutely best served chilled, with no reheating required. If frozen, thaw slices overnight in the fridge before serving—this preserves the creamy layers and keeps everything decadently smooth.
FAQs
Can I make Cherry Chocolate Tiramisu Cake without alcohol?
Absolutely! Simply omit the cherry liqueur in the syrup. The cake will still taste luscious and you won’t miss a beat—the espresso and cherries bring plenty of flavor on their own.
What’s the best way to get clean slices?
Use a long, sharp knife and wipe it clean between each cut. Chilling the cake thoroughly (at least two hours, or overnight) helps the layers set and gives those beautiful, bakery-worthy slices.
Can I use frozen cherries instead of fresh?
Fresh cherries do look and taste best on top, but if they aren’t in season, thawed and patted-dry frozen cherries will work in a pinch. Just skip using whole cherries as a garnish, since they’re less visually dramatic.
Is it possible to make this gluten-free?
You can! Substitute a trusted gluten-free flour blend for the all-purpose flour in the sponge, or choose gluten-free ladyfingers. Just double-check that your chocolate ingredients are gluten-free as well.
How far ahead can I make Cherry Chocolate Tiramisu Cake?
This dessert is a dream for advance prep! You can assemble it a full day ahead and chill overnight. The flavors develop even more depth, making it perfect for parties or family celebrations.
Final Thoughts
Whether you’re celebrating something special or feel like treating yourself, there’s nothing quite like a homemade Cherry Chocolate Tiramisu Cake. Give it a try—and don’t be surprised when the “oohs” and “aahs” start the moment you place it on the table!


Your email address will not be published. Required fields are marked *