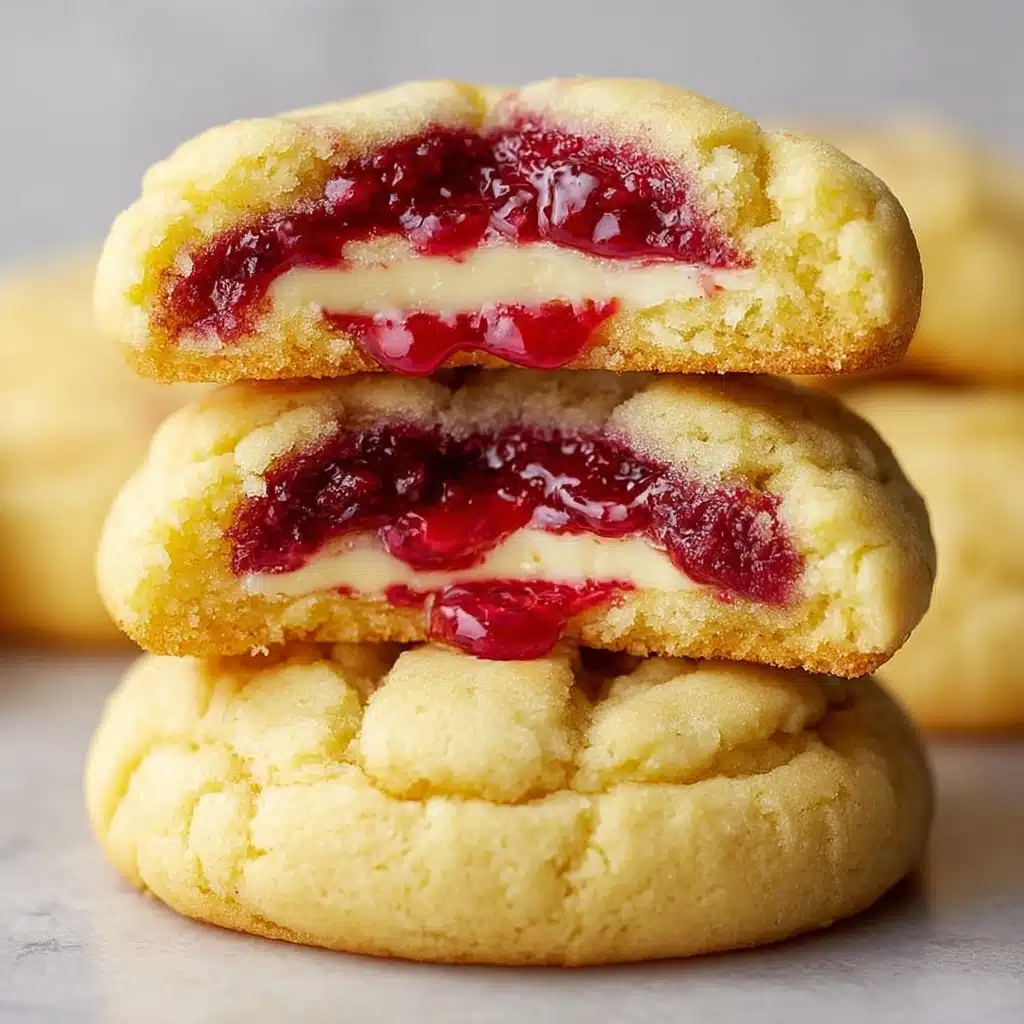
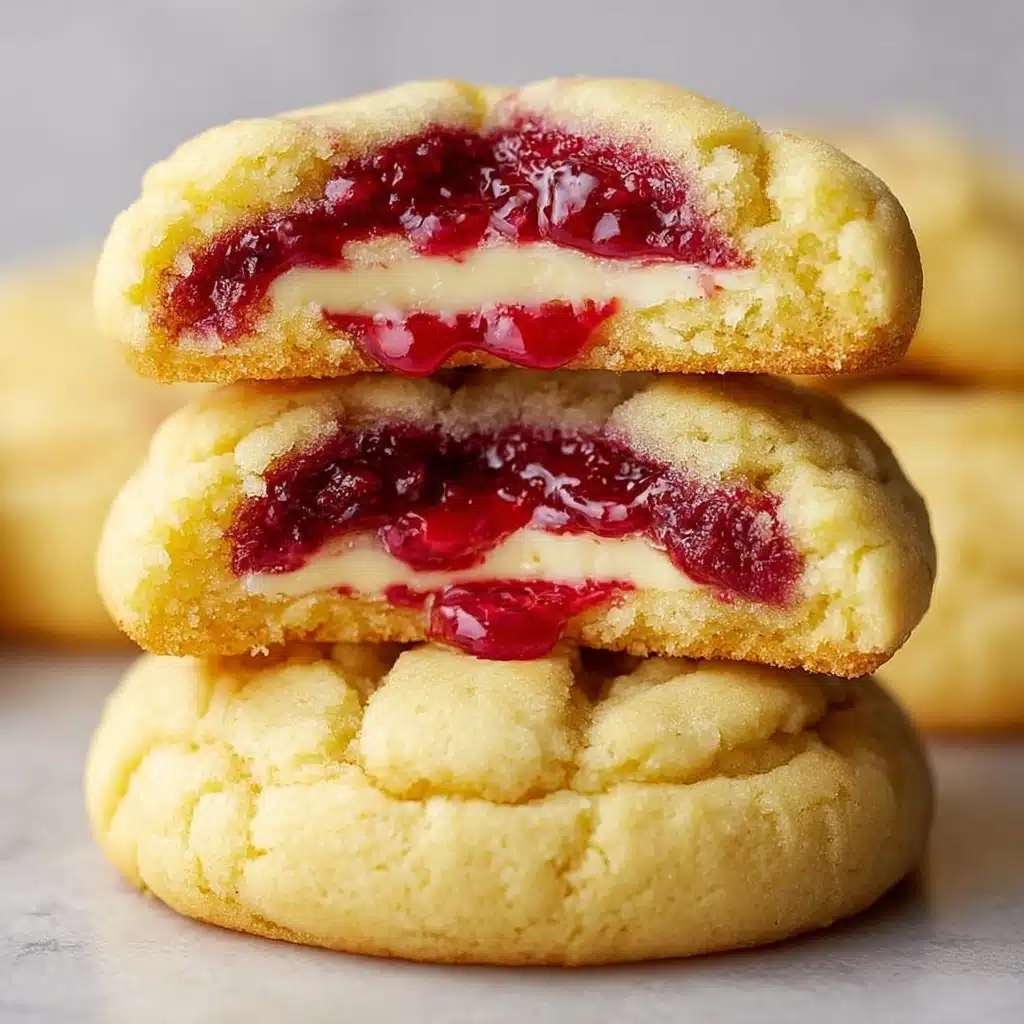
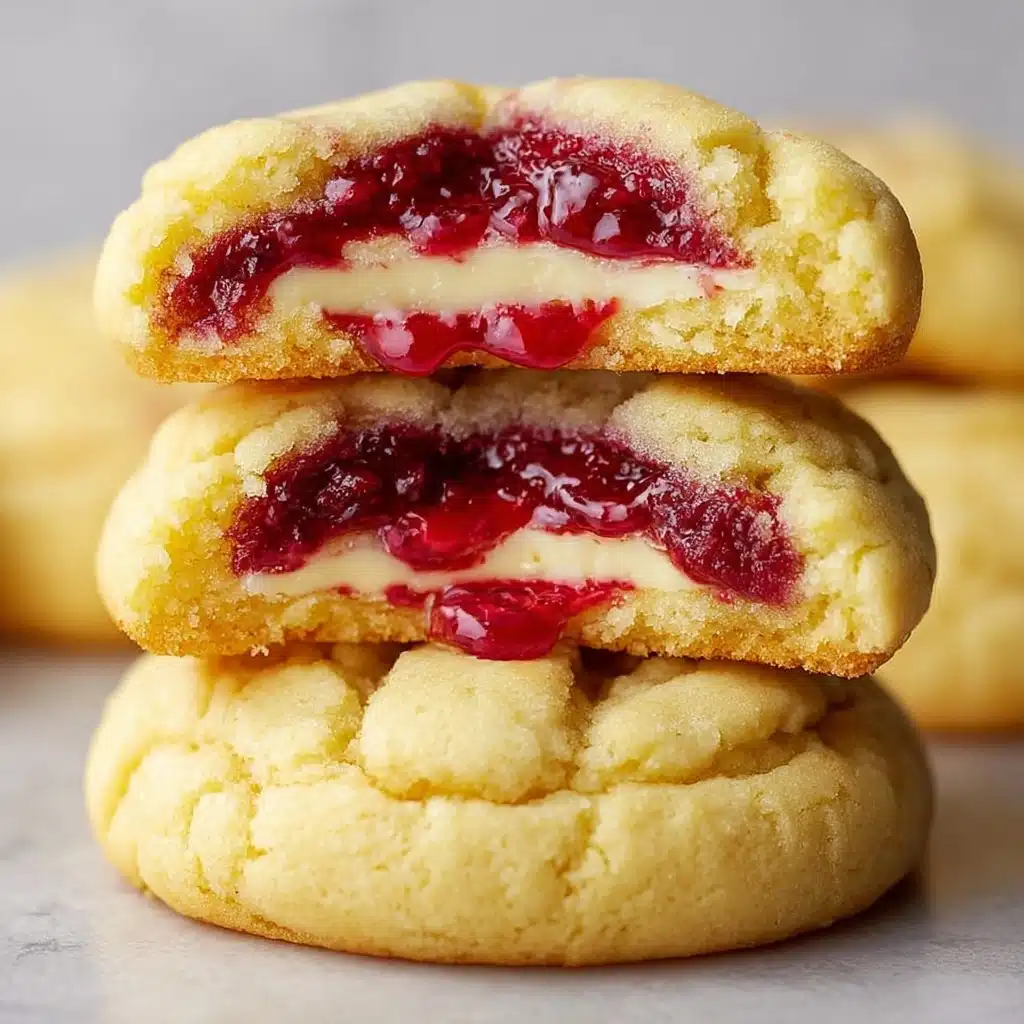
If you’re ready for a truly show-stopping homemade treat, look no further than these Cherry Cheesecake Stuffed Cookies – Gooey & Delicious! Imagine the best part of your favorite bakery cookie, but upgraded with a tangy-sweet surprise hidden inside: luscious cheesecake filling and a dollop of real cherry pie filling, all wrapped in tender, buttery cookie dough. Each bite bursts with creamy, fruity, and gooey decadence, making them an instant favorite for dessert aficionados and cookie lovers alike.
Ingredients You’ll Need
Ingredients You’ll Need
Sometimes magic happens with the simplest things, and these Cherry Cheesecake Stuffed Cookies – Gooey & Delicious are proof. Every ingredient here plays a role in creating melt-in-your-mouth cookies with a surprise cheesecake-and-cherry center, fluffy texture, and just the right touch of sweetness.
- Unsalted butter: Brings moisture and tenderness for a rich, classic cookie base—always start with softened butter for the best creaming!
- Granulated sugar: Adds sweetness and helps the cookies spread just right in the oven.
- Light brown sugar: Provides extra depth of flavor and results in delightfully chewy edges.
- Large eggs: Eggs are key for structure and help bind all the cookie goodness together.
- Vanilla extract: Rounds out both the cookie dough and cheesecake filling with warm, aromatic notes.
- All-purpose flour: A trusty staple, it creates the perfect canvas for all the delicious fillings.
- Baking soda & baking powder: Both leavening agents work together for thick, soft, bakery-style cookies.
- Salt: Just a small amount balances all the sweet and enhances every single flavor.
- White chocolate chips (optional): Fold these in for extra sweetness and little pops of creamy texture—highly recommended for white chocolate fans!
- Cream cheese: The heart of the cheesecake filling, it delivers a tangy, velvety center.
- Powdered sugar: This keeps the cheesecake filling smooth and gives it just the right level of sweetness.
- Cherry pie filling: Use whole cherries if you can—they create pockets of gooey fruitiness that make these cookies totally irresistible.
How to Make Cherry Cheesecake Stuffed Cookies – Gooey & Delicious
Step 1: Prepare the Cheesecake Filling
The magic begins here! Beat the softened cream cheese, powdered sugar, and vanilla until your filling is super smooth. Then, portion out tiny teaspoon-sized scoops onto a parchment-lined tray. Don’t rush this step—pop them in the freezer for at least an hour so they’re nice and firm. This trick ensures the filling stays thick and creamy (not runny) inside your cookies.
Step 2: Make the Cookie Dough
Grab your mixer and blend the butter with both sugars until it’s fluffy and pale, which means you’re building an airy cookie base. Add eggs one at a time for silky-smooth dough, and splash in the vanilla for that bakery-style aroma. This step gives your cookies incredible flavor and crumb!
Step 3: Combine Dry Ingredients
In a separate bowl, whisk together the flour, baking soda, baking powder, and salt. This little side task keeps your leavening agents evenly distributed and prevents any mid-bite surprises. Gradually mix these into the wet mixture, then gently fold in white chocolate chips if you love a little extra indulgence.
Step 4: Assemble the Cookies
This is where the fun starts! Scoop up a heaping tablespoon of dough, flatten it in your palm, and nestle a frozen cheesecake filling ball right in the center. Add a small spoonful of cherry pie filling on top, but don’t overdo it—a little goes a long way for gooey satisfaction. Cover with another scoop of dough, then pinch it well to seal. Repeat with all the dough for a batch of Cherry Cheesecake Stuffed Cookies – Gooey & Delicious that are ready to bake.
Step 5: Bake to Golden Perfection
Preheat your oven to 350°F (175°C) and line your trays with parchment (for easy cleanup). Set your stuffed cookies at least two inches apart since they’ll spread a bit. Bake for 12–15 minutes until the edges turn golden but the centers still look a little soft. This gives you those dreamy gooey centers we all crave—keep a close eye near the end!
Step 6: Cool and Serve
The hardest part: let the cookies cool on the tray for about five minutes before moving them to a wire rack. They’ll firm up just enough without losing their gooey magic. For the ultimate Cherry Cheesecake Stuffed Cookies – Gooey & Delicious experience, enjoy them slightly warm while the centers are creamy and luscious!
How to Serve Cherry Cheesecake Stuffed Cookies – Gooey & Delicious

Garnishes
Dress up your cookies by dusting them with powdered sugar or drizzling melted white chocolate over the tops for a glossy finish. If you’re feeling extra, a few more cherries or a swirl of cherry sauce make each cookie look bakery-fresh and extra luxurious.
Side Dishes
These cookies are star desserts all on their own, but for a special treat, try serving them with a scoop of vanilla or cherry ice cream. Fresh fruit salad, whipped cream, or even a little mug of hot chocolate can make snack time feel like a true celebration.
Creative Ways to Present
Stack your Cherry Cheesecake Stuffed Cookies – Gooey & Delicious on a pretty cake stand for parties, or wrap individual cookies in parchment and tie them with string—perfect for gifts or a bake sale. You can even serve them as part of a dessert platter with fresh berries and cheesecake bites for an unforgettable spread!
Make Ahead and Storage
Storing Leftovers
If you manage to have leftovers (let’s be honest, it’s rare!), keep them in an airtight container at room temperature for up to two days or in the fridge for up to a week. Chilling preserves the gooey centers and helps the cheesecake filling stay creamy.
Freezing
These cookies freeze beautifully! Place cooled cookies in a single layer on a baking sheet to freeze solid, then transfer to a zip-top bag. Store them for up to three months, and simply thaw at room temperature whenever a craving for Cherry Cheesecake Stuffed Cookies – Gooey & Delicious strikes.
Reheating
To recapture that fresh-baked, gooey magic, pop cold cookies in the microwave for about 10-15 seconds. The filling gets lusciously creamy again, so they taste like they just came out of the oven.
FAQs
Can I use a different fruit for the filling?
Absolutely! If cherries aren’t your thing, you can swap in blueberry, raspberry, or even strawberry pie filling. Just make sure to use whole fruit and avoid overly wet fillings so your cookies hold together beautifully.
Do I have to freeze the cheesecake filling?
Yes, this step is key for keeping the cheesecake layer inside the cookie while baking. Freezing the filling makes assembly easier and prevents the centers from leaking or melting out too quickly.
How do I prevent the cookies from spreading too much?
Make sure your dough is not too warm—if it is, pop it in the fridge for 20-30 minutes before assembling. Also, use parchment-lined trays and measure flour carefully for the perfect thick, bakery-style cookies.
Can I make these cookies gluten-free?
With a good 1:1 gluten-free flour blend, you can definitely try it! The results are typically just as delicious, though the texture may turn out slightly different. Always check that your other ingredients are gluten-free as well.
What’s the best way to get perfect gooey centers?
The secret is a slightly underbaked center. Pull cookies from the oven when the edges are golden but the middle looks just set—this guarantees every bite is full of irresistible Cherry Cheesecake Stuffed Cookies – Gooey & Delicious goodness.
Final Thoughts
If you have a soft spot for decadent cookies with a fruity twist, you owe it to yourself (and your friends and family!) to make these Cherry Cheesecake Stuffed Cookies – Gooey & Delicious. They’re a joyful, impressive treat that’s as much fun to bake as they are to eat. Take a bite, share a batch, and watch these beauties disappear right before your eyes!


Your email address will not be published. Required fields are marked *