

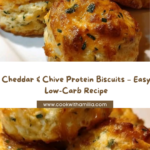
If you’re looking for a delightful, protein-packed treat that balances savory flavors with a tender crumb, these Cheddar & Chive Protein Biscuits are exactly what you need in your kitchen repertoire. Bursting with sharp cheddar and fresh chives, these biscuits bring a perfect combination of cheesy richness and herbaceous brightness wrapped into a moist, satisfying bite. Whether you’re fueling up for the day or need a savory snack to keep you going, these biscuits are a delicious way to enjoy a wholesome, protein-rich snack that feels indulgent yet nourishing.

Ingredients You’ll Need
This recipe shines because of its simplicity and purposeful ingredient choices. Each component plays a crucial role in creating the texture, flavor profile, and nutritional punch of these biscuits.
- Almond flour: Provides a grain-free base with a rich, nutty flavor and moisture that keeps the biscuits tender.
- Shredded cheddar cheese: Adds sharpness and gooey richness that makes each biscuit so irresistible.
- Chopped chives: Deliver a fresh, mild onion flavor that brightens up the overall taste.
- Greek yogurt: Adds moisture and a slight tang, plus boosts the protein content.
- Large eggs: Bind ingredients together while enriching flavor and structure.
- Baking powder: Ensures these biscuits rise perfectly for a light, fluffy texture.
- Garlic powder: Injects subtle savory depth without overpowering the other flavors.
- Salt: Balances and enhances all flavors.
- Black pepper: Adds a gentle kick to complement the cheddar and chives.
How to Make Cheddar & Chive Protein Biscuits
Step 1: Preheat & Prepare
Start by preheating your oven to 375°F (190°C) to ensure it’s ready when your dough is mixed. Line a baking sheet with parchment paper to prevent sticking and allow for easy cleanup—this small prep step will save you a lot of hassle later.
Step 2: Mix Dry Ingredients
In a large bowl, whisk together the almond flour, baking powder, garlic powder, salt, and black pepper. Combining these first ensures the rising agents and spices are evenly distributed, which is key for consistent texture and flavor throughout your Cheddar & Chive Protein Biscuits.
Step 3: Add Wet Ingredients
In a separate bowl, beat the Greek yogurt with the eggs and fold in the chopped chives. Then stir in the shredded cheddar cheese so the savory richness is thoroughly mixed into the wet ingredients, bringing creaminess and depth to the biscuits.
Step 4: Combine & Shape
Pour the wet mixture into the dry ingredients and gently stir until just combined—overmixing can make the dough tough, so keep it light. Scoop the dough onto your prepared baking sheet to form roughly equal-sized biscuits, giving them space to spread and rise as they bake.
Step 5: Bake
Bake your Cheddar & Chive Protein Biscuits for 15 to 20 minutes or until the tops turn a warm golden brown and a toothpick inserted into the center comes out clean. The smell of baked cheese and herbs filling your kitchen at this point is simply irresistible!
How to Serve Cheddar & Chive Protein Biscuits

Garnishes
These biscuits love company, especially when you add a pat of butter that melts into the warm, cheesy layers. You can also sprinkle on a few extra fresh chives or a dusting of smoked paprika to elevate their presentation and flavor with minimal effort.
Side Dishes
For a satisfying meal, pair these biscuits with a fresh, crisp salad dressed with lemon vinaigrette or alongside a bowl of steaming soup—think tomato basil or creamy mushroom. The biscuits’ rich flavor beautifully complements light, fresh additions, creating a balanced plate.
Creative Ways to Present
Looking to impress at brunch or a casual dinner? Slice the Cheddar & Chive Protein Biscuits in half and stack them with deli meats, avocado slices, or even a fried egg for a gourmet sandwich twist. They’re also fantastic served alongside scrambled eggs or nestled with smoked salmon for a savory picnic spread.
Make Ahead and Storage
Storing Leftovers
Once cooled, store your Cheddar & Chive Protein Biscuits in an airtight container in the refrigerator. They’ll stay fresh and delicious for up to 3 days, perfect for quick snacks or breakfast on busy mornings.
Freezing
If you want to keep them longer, freeze the biscuits in a sealed bag or container. They retain their flavor and texture wonderfully when frozen, so you can enjoy a batch anytime you crave a savory protein boost.
Reheating
To reheat, simply warm your biscuits in a toaster oven or conventional oven at 350°F for 5 to 7 minutes. This restores crispness on the outside while preserving their soft, cheesy centers, making each bite taste freshly baked.
FAQs
Can I use regular flour instead of almond flour?
Almond flour gives these biscuits their unique texture and protein boost, so switching to regular flour will change the flavor and nutrition. However, if you prefer, you can experiment with all-purpose or whole wheat flour, but expect a less tender biscuit.
Are these biscuits gluten-free?
Yes, because they are made with almond flour and contain no wheat, Cheddar & Chive Protein Biscuits are naturally gluten-free, making them a great option for those with gluten sensitivities.
Can I add other herbs or spices?
Absolutely! Feel free to get creative by adding thyme, rosemary, or even a pinch of cayenne pepper for heat. Just remember that chives provide a mild onion flavor, so balance any additions accordingly.
How much protein is in each biscuit?
Each biscuit packs about 6 grams of protein, thanks to the combination of almond flour, eggs, Greek yogurt, and cheddar cheese—ideal for a nourishing snack or part of a balanced meal.
What’s the best way to keep biscuits moist?
The Greek yogurt and cheddar cheese help keep these biscuits moist, but storing them in an airtight container and reheating gently will maintain their soft texture without drying out.
Final Thoughts
Once you try these Cheddar & Chive Protein Biscuits, you’ll want to make them again and again. They offer such a perfect balance of cheesy savoriness and fresh herb flavor while packing in protein that keeps you feeling full and satisfied. Whether as a hearty snack, a breakfast companion, or a snack to share, they never fail to impress. So go ahead and give this recipe a whirl—your taste buds will be so grateful you did!
Your email address will not be published. Required fields are marked *