

“`html
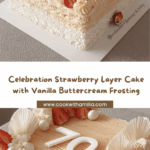
There is something truly magical about a cake that not only tastes incredible but radiates joy the moment you see it, and that’s exactly why the Celebration Strawberry Layer Cake has a place in my heart and kitchen. With fluffy vanilla layers enveloped in luscious buttercream and layered generously with fresh, juicy strawberries, this cake is the perfect centerpiece for any special occasion. It combines tender crumb, creamy sweetness, and the fresh zing of strawberries in a way that feels like a hug in dessert form. Whether it’s a birthday, anniversary, or just a day worth celebrating, this cake delivers smiles in every bite.

Ingredients You’ll Need
Simple ingredients are the secret heroes here, each playing a vital role in the ultimate flavor and texture of your Celebration Strawberry Layer Cake. From the buttery richness of the cake to the silky smooth frosting and fresh strawberries that brighten every layer, these components come together with harmony and ease.
- All-purpose flour: The foundation for a soft and tender vanilla cake crumb.
- Granulated sugar: Adds sweetness and helps create a moist cake texture.
- Baking powder: The key to a light, fluffy rise in the cake layers.
- Salt: Balances the sweetness and enhances all flavors.
- Unsalted butter (softened): Provides richness and moisture to both cake and frosting.
- Milk: Keeps the cake layers delectably moist and tender.
- Vanilla extract: Infuses a warm, aromatic flavor throughout the cake and frosting.
- Large eggs: Bind everything with structure and give the cake its tender texture.
- Powdered sugar: Sweetens and smooths the buttercream frosting perfectly.
- Heavy cream or milk: Helps achieve the perfect creamy and fluffy consistency in frosting.
- Fresh strawberries (sliced): The star of the show, offering juicy bursts of flavor and vibrant color.
- White chocolate balls or meringues (optional): Adds a playful crunch and elegance to the decoration.
- Edible gold or pearl sprinkles (optional): Brings a dazzling celebratory sparkle that enchants every slice.
How to Make Celebration Strawberry Layer Cake
Step 1: Prepare Your Cake Pans and Oven
Start by preheating your oven to 350°F (175°C). Grease and flour two 8 or 9-inch round cake pans or a 9×13 inch rectangular pan. For round pans, lining the bottom with parchment paper is a great tip to ensure your cakes come out perfectly without sticking. Getting this step right sets you up for flawless layers.
Step 2: Mix the Dry Ingredients
In a large bowl, whisk together the all-purpose flour, granulated sugar, baking powder, and salt. This dry mix is the base that ensures your cake rises beautifully and tastes balanced. Taking a moment to combine these well helps distribute every ingredient evenly.
Step 3: Combine Wet Ingredients and Batter
Add the softened butter, milk, vanilla extract, and eggs to the dry ingredients. Using an electric mixer, start on low speed to gently combine everything, then increase to medium and beat for two minutes. Don’t forget to scrape down the sides of your bowl as you go to keep the batter smooth and even. This step produces a luscious batter ready to turn into delightful cake layers.
Step 4: Bake
Pour the batter evenly into your prepared pans and bake in the preheated oven. For round pans, bake 25 to 30 minutes; for a rectangular pan, bake 30 to 35 minutes. Check doneness by inserting a wooden skewer into the center—if it comes out clean, your cake is ready. This bake time ensures a tender crumb with a beautiful golden crust.
Step 5: Cool Cakes
Once baked, let your cakes cool in the pans for about 10 minutes to set before turning them out onto a wire rack. Cooling completely is key because frosting warm cake will melt the buttercream and create a sticky mess. Patience here results in a stunningly smooth and neat cake later on.
Step 6: Make the Vanilla Buttercream Frosting
Beat the softened butter until light and fluffy with an electric mixer. Gradually add powdered sugar, one cup at a time, beating thoroughly after each addition. Then stir in the milk (or cream) and vanilla extract and beat on high until the frosting is silky, fluffy, and spreadable. Adjust the consistency by adding a little more milk if it feels too thick—this frosting is the creamy dream your cake deserves.
Step 7: Assemble and Decorate Your Celebration Strawberry Layer Cake
Level the tops of the cooled cakes with a serrated knife if needed. Place the first layer on a serving plate, spread a generous layer of buttercream, and arrange a layer of sliced strawberries on top. Add the second cake layer, then apply a thin crumb coat of frosting over the entire cake. Chill the crumb coat in the refrigerator for 15 minutes to set.
Once chilled, spread the remaining frosting generously all over, creating a softly textured finish by gently pressing with a spoon or spatula. For an extra festive touch, use a cake comb or press a delicate pattern into the frosting top before it sets. Pipe swirls or rosettes along the edges, then artfully place more sliced strawberries, white chocolate balls or meringues, and a sprinkling of edible gold or pearl dust. This final step transforms your cake into the dazzling Celebration Strawberry Layer Cake everyone will remember.
How to Serve Celebration Strawberry Layer Cake

Garnishes
A few fresh strawberry slices around the serving plate can echo the cake’s flavors beautifully. Complement this with a sprinkling of mint leaves or a light dusting of powdered sugar for extra charm. The optional white chocolate balls add subtle sweetness and a fun crunch that guests will love. Adding edible gold or pearl sprinkles elevates the cake’s presentation, making every slice feel like the main event.
Side Dishes
The Celebration Strawberry Layer Cake pairs wonderfully with simple sides like freshly brewed tea, sparkling lemonades, or a scoop of vanilla bean ice cream to balance the sweetness with creaminess. Fresh berries or a light fruit salad make for refreshing accompaniments that echo the strawberry theme without overwhelming the palate.
Creative Ways to Present
Try serving slices on pastel-colored plates or cake stands for a bright, festive touch. You could even add edible flowers around the cake for a stunning centerpiece effect that fits a garden party vibe. If you’re feeling adventurous, slicing the cake into petite, individual layered mini cakes or cupcakes creates fun, personalized servings for guests. No matter how you choose to present it, this cake always steals the show.
Make Ahead and Storage
Storing Leftovers
Once you’ve enjoyed your slice, store any leftovers in an airtight container in the refrigerator. The creamy buttercream and strawberries keep best when chilled, preserving the cake’s freshness for 2 to 3 days. Bringing the cake back to room temperature before serving ensures all those flavors and textures shine beautifully.
Freezing
To freeze your Celebration Strawberry Layer Cake, wrap it tightly in plastic wrap and then cover with foil or place inside a freezer-safe container. This protects it from freezer burn while maintaining moisture. Frozen cake can be stored for up to one month. When you’re ready to indulge again, thaw the cake in the refrigerator overnight for the best results.
Reheating
This cake is best enjoyed chilled or at room temperature; reheating isn’t recommended as the frosting and fresh strawberries don’t respond well to heat. Instead, enjoy the cake as is or let it sit out for about 30 minutes if it came straight from the fridge to bring the flavors to life.
FAQs
Can I use frozen strawberries instead of fresh for the Celebration Strawberry Layer Cake?
While fresh strawberries provide the best texture and flavor, frozen strawberries can be used in a pinch—but be sure to thaw and drain them well to avoid adding excess moisture that could make your frosting runny or the cake soggy.
Is this cake suitable for beginners?
Absolutely! The recipe is straightforward with easy-to-follow steps, and the ingredients are simple to source. Even if you’re new to baking, this Celebration Strawberry Layer Cake is a fantastic way to build confidence and impress your friends and family.
Can I substitute the buttercream with whipped cream?
You can swap in stabilized whipped cream for a lighter, fresher frosting, especially if you prefer less sweetness. Just keep in mind it’s more delicate and best enjoyed the same day.
How do I keep my cake layers moist?
Be careful not to overbake your cake layers. Also, brushing them lightly with a simple syrup before frosting helps lock in moisture, keeping your Celebration Strawberry Layer Cake delectably soft.
What can I do if I want more strawberry flavor in the cake?
You could fold finely chopped strawberries into the batter or swirl strawberry puree into the frosting for an extra burst of berry goodness that beautifully complements the fresh slices.
Final Thoughts
Baking the Celebration Strawberry Layer Cake is like creating a little edible party that brings warmth, sweetness, and joy to any gathering. From the first forkful to the last, it’s a testament to the beauty of simple ingredients treated with care and a lot of love. If you’re looking for a cake that stands out in taste, texture, and sheer happiness, I wholeheartedly encourage you to try this recipe. Your celebrations deserve a cake that makes memories as sweet as the strawberries inside.
“`
Your email address will not be published. Required fields are marked *