

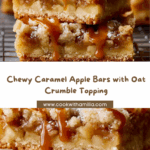
If you’re dreaming of a dessert that perfectly captures the cozy, warm flavors of fall, your wish just came true with these irresistible Caramel Apple Bars. Imagine tender chunks of cinnamon-kissed apples nestled beneath a buttery oat crumble, all luxuriously draped with rich caramel sauce. Every bite is a symphony of textures and tastes that feels like a comforting hug. Whether you’re sharing them with family or sneaking one for yourself, these bars are bound to become a favorite in your recipe collection.

Ingredients You’ll Need
These ingredients are delightfully simple yet essential, each playing a crucial role in the flavor, texture, and overall magic of the bars. From the crisp apples providing a juicy sweetness to the oats adding that perfect crumbly bite, every component is worth savoring.
- 1 1/2 cups all-purpose flour: The foundation that gives structure to the bars, creating a tender yet sturdy base.
- 1 1/2 cups rolled oats: Adds a hearty, wholesome texture that balances the soft apples and gooey caramel.
- 3/4 cup brown sugar: Brings a deep, molasses-like sweetness that complements the apples beautifully.
- 3/4 cup unsalted butter, melted: Infuses richness and helps bind the crumbly oat topping together perfectly.
- 1/2 tsp baking soda: Provides just a touch of lift and helps keep the crumb light.
- 1/2 tsp cinnamon: The warm spice that makes this dessert unmistakably autumnal.
- 2 medium apples, peeled & diced: The star ingredient offering juicy bursts of fresh fruit in every bite.
- 1 cup caramel sauce (store-bought or homemade): The luscious, gooey drizzle that takes these bars straight to dessert heaven.
- 1 tbsp flour (for apples): Helps the apple pieces hold their shape and prevents them from making the crust soggy.
How to Make Caramel Apple Bars
Step 1: Prepare the Crust and Oat Mixture
First, warm your oven to 350°F (175°C) and get ready for some simple mixing. Combine the flour, rolled oats, brown sugar, cinnamon, and baking soda in a large bowl. Pour in the melted butter and mix until everything becomes crumbly and well coated. This mixture is your base and topping, delivering that perfect buttery oat texture that holds everything together.
Step 2: Form the Base Layer
Take about two-thirds of your oat mixture and press it firmly into a parchment-lined 8×8 inch baking pan. This layer will be the sturdy yet tender crust that supports the juicy apples and caramel. Pressing firmly ensures your bars won’t crumble apart when sliced.
Step 3: Prepare and Layer the Apples
Toss the diced apples with a tablespoon of flour — this little trick keeps them from releasing too much liquid during baking and keeps your bars from turning soggy. Spread the apples evenly over the pressed crust, making sure every bite has a sweet burst of apple goodness.
Step 4: Add the Caramel Drizzle
Drizzle the entire cup of caramel sauce generously over the layered apples. Whether you opt for homemade or store-bought, that luscious caramel is what transforms these bars into an indulgent treat. Don’t be shy with this step, caramel is the heart of these bars!
Step 5: Finish with Crumbly Topping and Bake
Sprinkle the remaining oat mixture evenly over the caramel layer. This topping bakes into a golden, crunchy crown that contrasts beautifully with the soft apple filling beneath. Pop the pan in the oven and bake for 30 to 35 minutes, or until the top is a gorgeous golden brown and the caramel is bubbling happily around the edges.
Step 6: Cool and Slice
Patience pays off here: let the bars cool completely in the pan before slicing. This cooling time allows the caramel to set so your bars have clean, tidy edges instead of sticky messes. Once cool, cut into 16 bars and get ready for a taste sensation.
How to Serve Caramel Apple Bars

Garnishes
A simple dusting of powdered sugar or a sprinkle of extra cinnamon on top enhances the rustic charm of these bars. For an added touch of indulgence, a small dollop of whipped cream or a scoop of vanilla ice cream takes the experience to another level. Fresh mint leaves can also add a lovely pop of color and freshness.
Side Dishes
These bars pair beautifully with a warm cup of spiced chai tea or a robust coffee to complement their sweetness. For a cozy gathering, consider serving alongside a sharp cheddar cheese or a creamy brie to balance the sweet caramel and apple flavors with some savory notes.
Creative Ways to Present
Transform your Caramel Apple Bars into a charming fall dessert platter by arranging them atop decorative parchment paper with autumn leaves or cinnamon sticks scattered around. Alternatively, serve individual bars on mini plates with a drizzle of extra caramel and a sprinkle of toasted nuts for texture contrast. You could even layer crumbled bars into parfait glasses with whipped cream for a fun twist.
Make Ahead and Storage
Storing Leftovers
Store your leftover Caramel Apple Bars in an airtight container at room temperature for up to two days, or in the fridge for up to a week. They hold their delicious flavors well and the texture remains delightfully soft and crumbly.
Freezing
If you want to save some for later, wrap each bar tightly in plastic wrap and place them in a freezer-safe container or bag. Frozen Caramel Apple Bars can last up to 3 months and thaw quickly at room temperature for an easy dessert anytime.
Reheating
For warm, gooey bars, reheat leftovers in the oven at 300°F (150°C) for about 10-12 minutes or until warmed through. Microwaving is quicker but can make the oat topping a bit soft, so the oven is ideal if you want to keep that delightful crunchy texture.
FAQs
Can I use different types of apples for these bars?
Absolutely! Crisp apples like Granny Smith, Honeycrisp, or Fuji work best because they hold their shape and bring a nice balance of tartness and sweetness.
Is it possible to make the caramel sauce from scratch?
Yes, homemade caramel sauce adds an extra special touch. You can make a simple caramel by melting sugar and butter with cream, then drizzle it over the apples before baking.
Can I make these bars gluten-free?
Definitely! Substitute the all-purpose flour with a gluten-free flour blend and double-check that your oats are gluten-free certified to keep this dessert safe for gluten-sensitive friends.
What if I want to make smaller or larger bars?
You can adjust the size easily. Just remember to keep the total baking time roughly the same, checking for a golden top and bubbling caramel as your cues.
How do I prevent the bars from becoming soggy?
Tossing the apples with flour before layering and allowing the bars to cool completely before slicing are the secrets to keeping them firm and clean-cut rather than soggy.
Final Thoughts
Once you try these Caramel Apple Bars, you’ll understand why they’re the ultimate blend of fruity, caramel sweetness and buttery, crumbly texture all rolled into one delicious bar. They’re simple enough for a weeknight treat yet impressive enough to share at any gathering. So go ahead, bake a batch and watch as these bars quickly become the new favorite everyone asks for again and again.
Your email address will not be published. Required fields are marked *