

“`html
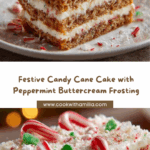
If you’re looking to capture the festive spirit with a delicious showstopper, this Candy Cane Cake is an absolute must-try. Imagine layers of moist, buttery cake infused with just the right balance of vanilla and creaminess, embraced by a dreamy peppermint buttercream that gives every bite a delightful hint of holiday magic. Topped with crunchy crushed candy canes and playful mini candy canes, this cake is not only a feast for your taste buds but a visual celebration of Christmas cheer. Whether for a holiday gathering or a cozy night in, the Candy Cane Cake brings warmth, sweetness, and that unmistakable minty spark that makes the season so special.

Ingredients You’ll Need
Getting started with this Candy Cane Cake is simpler than you might think. Each ingredient plays its part perfectly, building layers of flavor and giving the cake its soft texture and festive flair.
- All-purpose flour (2 ½ cups / 312 g): The sturdy base that gives structure and softness to the cake layers.
- Granulated sugar (1 ½ cups / 300 g): Sweetens the cake while helping create a tender crumb.
- Unsalted butter (1 cup / 226 g softened for cake, plus 1 ½ cups / 340 g softened for frosting): Adds richness, moisture, and a velvety texture throughout.
- Large eggs (4): Bind ingredients and add lift and richness.
- Whole milk (1 cup / 240 ml): Keeps the batter moist and smooth for that perfect crumb.
- Vanilla extract (1 tbsp for cake, 1 tsp for frosting): Brings warmth and depth to every bite.
- Baking powder (2 tsp) and baking soda (½ tsp): The dynamic duo that makes the cake rise beautifully and stay light.
- Salt (½ tsp): Balances sweetness and enhances other flavors.
- Powdered sugar (4 cups / 500 g): Essential for the peppermint buttercream’s smooth sweetness.
- Heavy cream (¼ cup / 60 ml): Gives the frosting a luscious, airy finish.
- Peppermint extract (1 ½ tsp): The signature festive flavor that defines the Candy Cane Cake.
- Red food coloring (a few drops, optional): Adds gorgeous peppermint swirl vibes.
- Crushed candy canes (½ cup / 75 g): Adds both texture and that iconic peppermint crunch inside the frosting.
- Mini candy canes and extra crushed candy canes: For garnish and festive presentation.
How to Make Candy Cane Cake
Step 1: Prepare Your Pans and Preheat
First thing’s first, heat your oven to 350°F (175°C). Butter your cake pans generously, line them with parchment paper, and dust with flour to ensure your beautiful layers release perfectly once baked. This extra step makes cake removal stress-free and keeps your layers intact and flawless.
Step 2: Cream Butter and Sugar
In a bowl, beat the softened butter and granulated sugar until pale and fluffy—it should look almost like whipped snow. This process creates airiness, which is what gives your cake that irresistible lightness.
Step 3: Add Eggs and Vanilla
Next, add the eggs one at a time, beating well after each addition so everything combines smoothly and gains body. A generous splash of vanilla extract not only enhances the sweetness but also adds warmth and complexity.
Step 4: Combine Dry Ingredients
In a separate bowl, whisk together the flour, baking powder, baking soda, and salt. This helps evenly distribute your leavening agents for a consistent rise and flavor throughout the layers.
Step 5: Mix Dry Ingredients and Milk into Wet
Alternately add the dry ingredients and milk to your butter mixture—start and end with the dry—for a silky smooth batter. Mixing just until combined is key to keeping the cake tender and not overworked.
Step 6: Bake to Perfection
Divide the batter evenly into your prepared pans, smoothing the tops. Bake until the cake layers are golden and springy to the touch, around 25–30 minutes. Once out of the oven, let them cool completely to prepare for frosting.
Step 7: Make the Peppermint Buttercream
Beat your softened butter until light and airy. Gradually add powdered sugar, heavy cream, and vanilla, creating that fluffy, creamy frosting. Finally, blend in peppermint extract for the holiday sparkle and stir in crushed candy canes to add that signature minty crunch.
Step 8: Add the Swirl (Optional)
If you want to elevate your Candy Cane Cake visually, gently fold a few drops of red food coloring through the frosting. This creates beautiful peppermint ribbon effects that look simply stunning when spread on the cake.
Step 9: Assemble Your Cake
Place the first cake layer on your serving plate. Spread a generous layer of peppermint buttercream, sprinkling in crushed candy canes as you go for little bursts of texture. Stack the remaining layers, frosting each one thoroughly, then coat the entire cake smoothly.
Step 10: Garnish and Celebrate
Crown your cake with mini candy canes and a shower of crushed candy canes. The colors and crunch bring the whole Candy Cane Cake to life, making it the perfect festive centerpiece that’s as fun to look at as it is to eat.
How to Serve Candy Cane Cake

Garnishes
Mini candy canes and crushed peppermint make for classic, festive garnishes that bring both texture and holiday spirit. Sprinkle them generously on top or alongside the cake slices for a charming, colorful touch that excites the senses before the first bite.
Side Dishes
Keep it light with a simple cup of hot cocoa or a peppermint mocha to complement the cool flavors of your Candy Cane Cake. A dollop of freshly whipped cream or a scoop of vanilla bean ice cream also pairs beautifully, balancing sweet, fresh, and creamy notes in every mouthful.
Creative Ways to Present
For a whimsical twist, serve slices on festive plates with edible glitter or place the cake on a lighted cake stand to mimic twinkling holiday lights. You can also layer it in miniature versions as cupcakes or cake jars, making it easy to serve and enjoy at any party or family gathering.
Make Ahead and Storage
Storing Leftovers
Leftover Candy Cane Cake keeps best in an airtight container in the refrigerator for up to 4 days. This helps retain the freshness of the frosting and the soft cake texture. Before serving, let it sit at room temperature for 20-30 minutes for the best flavor experience.
Freezing
You can freeze this cake either baked (unfrosted) or fully assembled. Wrap tightly in plastic wrap and then in foil to prevent freezer burn. It stores well for up to 2 months. Thaw overnight in the refrigerator before bringing it to room temperature and serving.
Reheating
Unlike many cakes, reheating isn’t necessary or typically recommended since this Candy Cane Cake is meant to be enjoyed cool or at room temp for the best texture. But if desired, a few minutes at room temperature will soften it up beautifully without melting the frosting.
FAQs
Can I make this cake without peppermint extract?
You absolutely can, though peppermint is what gives this cake its signature festive twist. If you skip it, consider adding a hint of almond or vanilla extra for flavor, or simply enjoy it as a wonderful vanilla buttercream cake.
How do I get the perfect peppermint swirl in the frosting?
After making your buttercream, gently drip a few drops of red food coloring over the surface and use a spatula or toothpick to fold it lightly. Avoid overmixing to keep those distinct, beautiful swirls intact.
What’s the best way to crush candy canes?
Place candy canes in a sealed plastic bag and gently tap with a rolling pin or the back of a spoon until you get small pieces and some fine bits. This method keeps it tidy and perfect for sprinkling into your frosting or using as garnish.
Can I use cake flour instead of all-purpose flour?
Yes! Cake flour will yield a softer, even more tender crumb, which works wonderfully for this cake. Just keep the amount equal and sift it well with other dry ingredients before mixing.
Is this cake suitable for large holiday gatherings?
Definitely! This Candy Cane Cake can be doubled or tripled and assembled in larger pans or tiered layers, making it an impressive and crowd-pleasing addition to any festive table.
Final Thoughts
I can’t recommend the Candy Cane Cake enough for anyone looking to bring a little extra magic and joy into their holiday celebrations. It’s the perfect balance of creamy, minty, and sweet, wrapped up in a visually stunning package that will impress every guest. Don’t wait for a special occasion—make it for yourself and fall in love with the season all over again!
“`
Your email address will not be published. Required fields are marked *