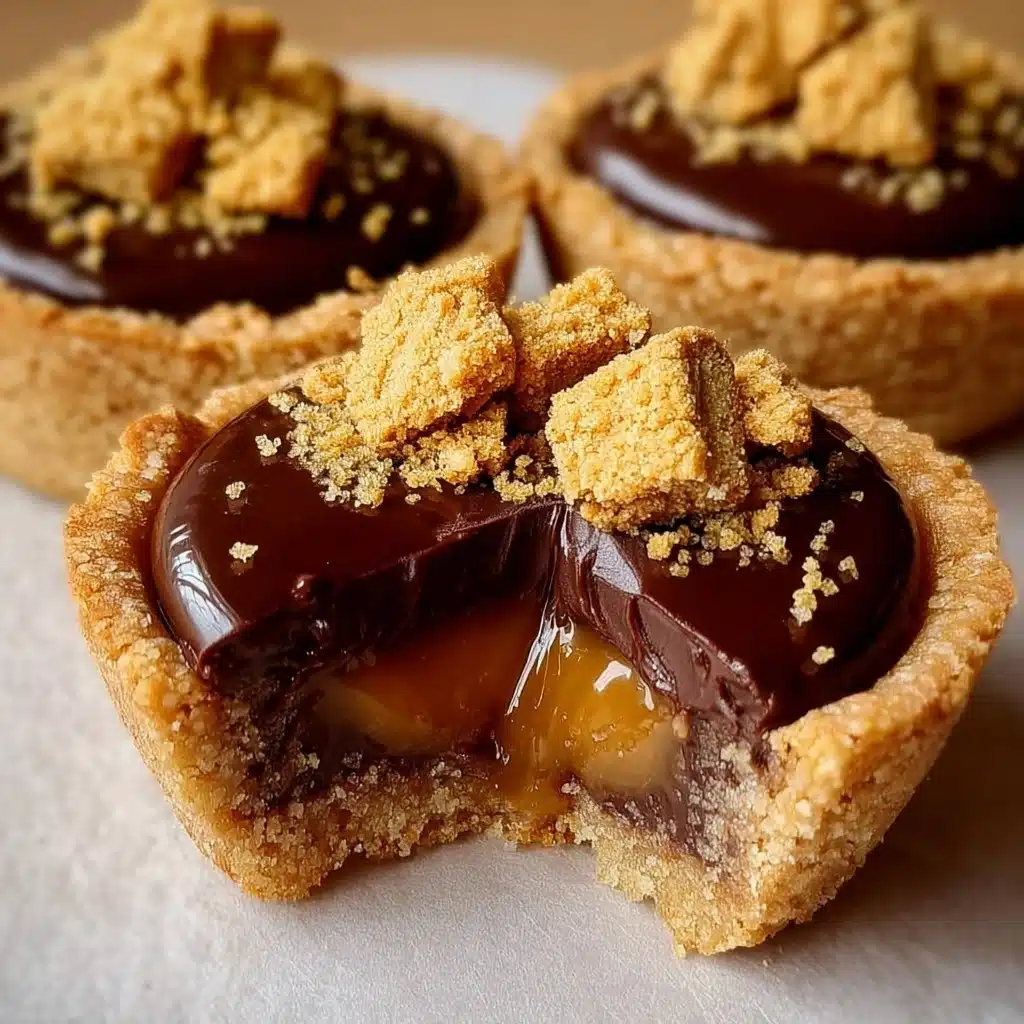
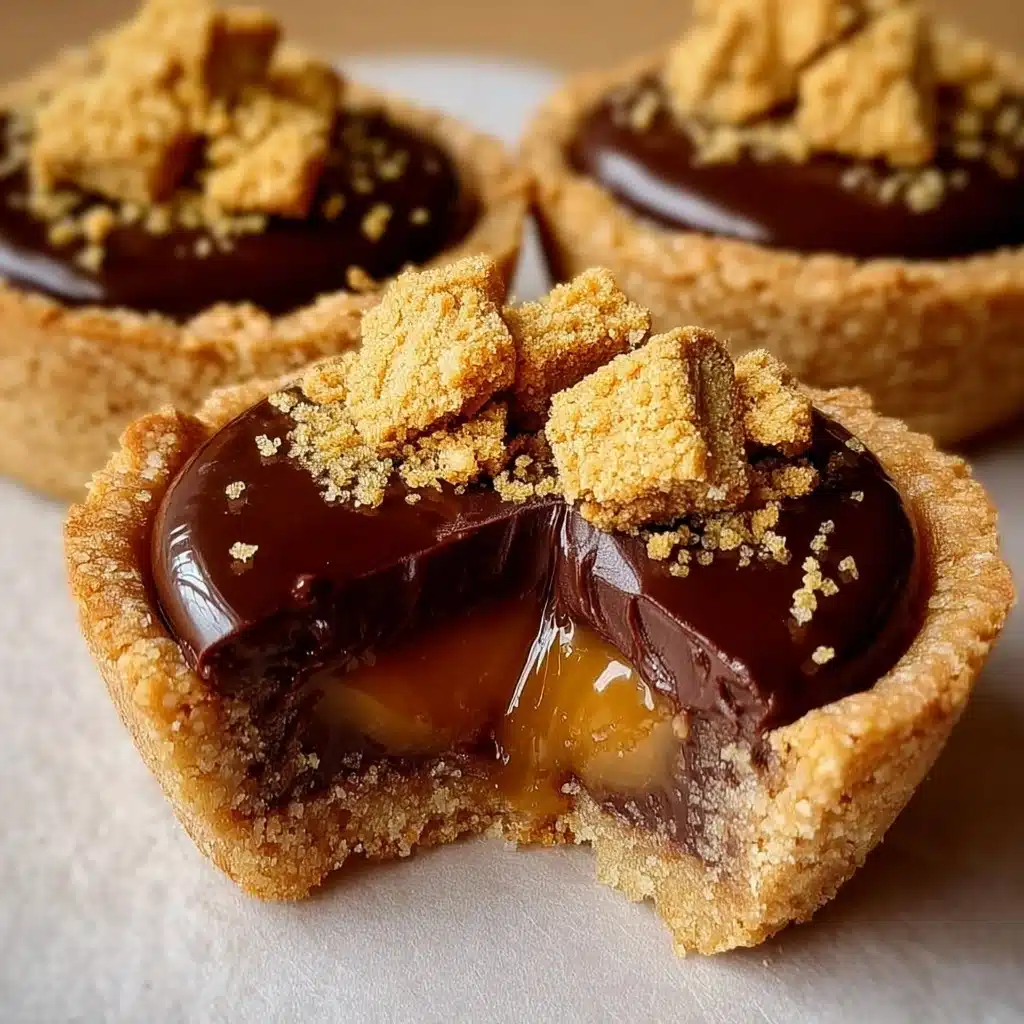
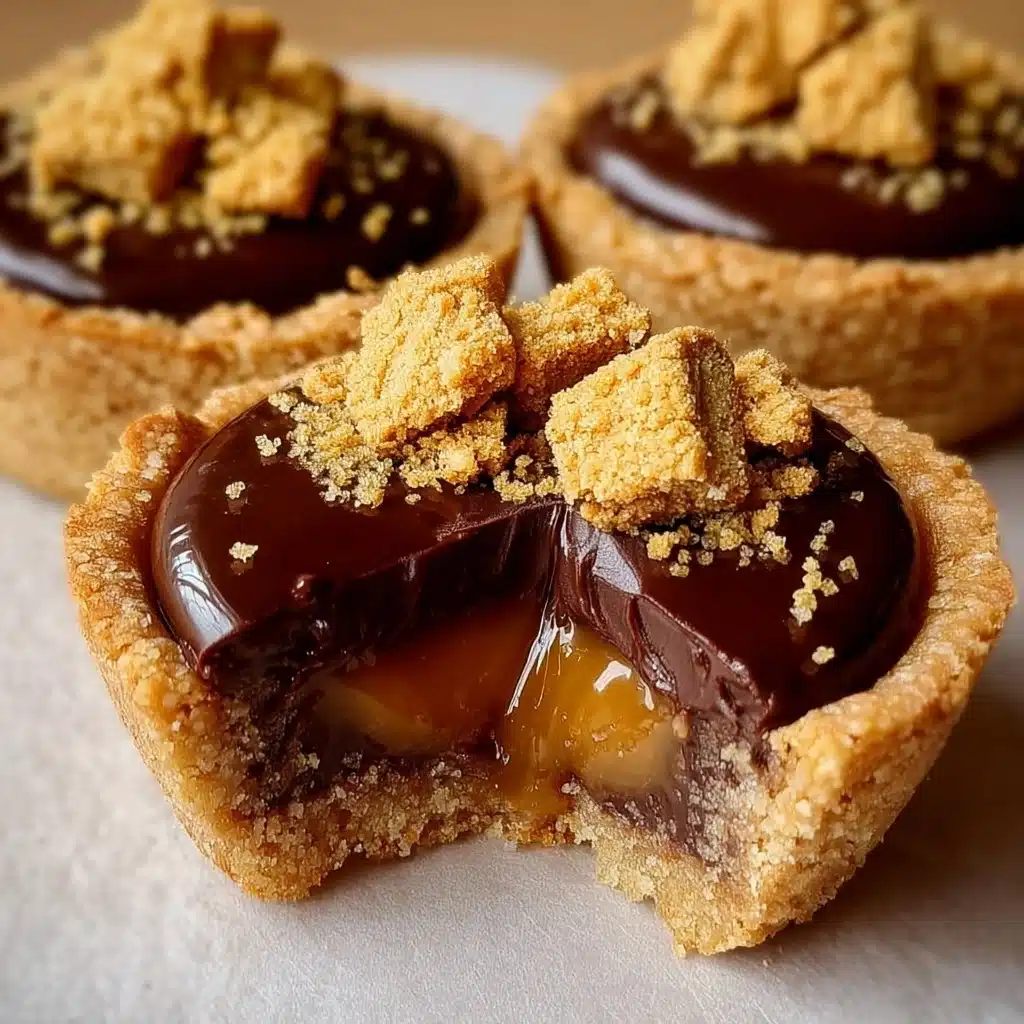
If you crave that perfect balance of chewy caramel, rich chocolate, and crispy peanut butter candy, you’re going to fall completely in love with these Butterfinger Caramel Crunch Mini Pies. Each bite is a playful burst of buttery crust, silky homemade caramel, luscious ganache, and those iconic Butterfinger shards on top. They’re stunning, easy to serve at parties, and guaranteed to turn heads—because who can resist a handheld treat packed with so much personality?
Ingredients You’ll Need
This recipe calls for humble yet magical ingredients, all working together to create layers of flavor and texture. Every element brings something special—sweetness, creaminess, crunch, or that extra pop of color and shine.
- Sweetened condensed milk: The foundation of our caramel layer, lending a luxurious texture and rich flavor that’s impossible to fake.
- Brown sugar: Adds deep, molasses-like sweetness that rounds out the caramel beautifully.
- Butter: For that melt-in-your-mouth quality—richness is king here.
- Heavy cream (for caramel and ganache): Keeps everything impossibly creamy and lush, no shortcuts allowed!
- Vanilla extract: Just a half teaspoon for that aromatic, bakery-worthy depth.
- Mini tart shells: Store-bought ones work great for speed, or go homemade if you love a baking project.
- Semi-sweet chocolate chips: These melt down into a shiny, thick ganache, balancing out all the sweetness.
- Butterfinger candy bars, crushed: The star crunch! Nothing says party like these iconic, nutty, crispy bits.
How to Make Butterfinger Caramel Crunch Mini Pies
Step 1: Preheat and Prep the Tart Shells
Set your oven to 350°F (175°C) to get things going. If you’re using store-bought mini tart shells (which I highly recommend for ease), pop them in the oven for 5 to 8 minutes until they’re just barely golden. This step brings out their buttery flavor and ensures crispness. Let them cool on a wire rack so they’re ready for all the delicious layers to come.
Step 2: Make the Caramel
In a saucepan, combine the sweetened condensed milk, brown sugar, butter, and a quarter cup of heavy cream. Set the heat to medium and stir constantly—caramel waits for no one! After about eight to ten minutes, your mixture should thicken up and turn a beautiful golden hue. Take it off the heat, stir in the vanilla, and set it aside to cool just a bit. You want it to be pourable, not scorching.
Step 3: Fill the Tart Shells
Spoon that silky caramel into each cooled tart shell, dividing evenly. Use the back of your spoon to smooth the tops. It should look glossy and inviting—almost too good to cover up!
Step 4: Make the Chocolate Ganache
While the caramel sets slightly, tackle the ganache. Heat another quarter cup of heavy cream in a small saucepan or microwave until you see gentle bubbles around the edges. Pour it directly over the semi-sweet chocolate chips. Wait a minute or two for the chocolate to melt, then stir until it’s completely smooth and glossy. That’s your chocolate magic, ready to drape over caramel.
Step 5: Top with Ganache
Add a generous spoonful of ganache to each mini pie, spreading to cover the caramel. The warm ganache will marry perfectly with the still-slightly-warm caramel layer, creating a decadent barrier ready for crunch.
Step 6: Crunch Time with Butterfinger!
Now for the pièce de résistance: sprinkle those crushed Butterfinger bits high and plentiful over the top of every pie. Don’t hold back! That peanut buttery crunch is the signature finishing touch. The golden-orange flecks turn every mini pie into a showstopper.
Step 7: Chill
Slide your filled tart shells into the fridge for at least an hour, or until everything is fully set. This helps the layers meld together so every bite stays neat and delicious (and the flavors deepen, if you can possibly wait that long!).
How to Serve Butterfinger Caramel Crunch Mini Pies

Garnishes
For a little flourish, try a dollop of whipped cream or a drizzle of extra caramel over each mini pie. If you’re feeling extra, add more Butterfinger pieces just before serving for that just-crushed look and texture. You could even top with a chocolate curl or sprinkle of sea salt if you adore the sweet-salty combo.
Side Dishes
Since Butterfinger Caramel Crunch Mini Pies pack so much excitement in every bite, keep side dishes simple: fresh strawberries, raspberry coulis, or even a scoop of vanilla ice cream. These lighter, fruity elements cut through the richness and turn dessert into a beautiful, balanced course.
Creative Ways to Present
For gatherings, display the mini pies on a fancy tiered dessert tray or arrange them on a platter lined with parchment and scattered with more Butterfinger crumbs. If you want to channel a “dessert flight” vibe, serve each pie in a parchment cupcake liner and invite friends to build their own with extra toppings from a DIY bar.
Make Ahead and Storage
Storing Leftovers
Place any leftover Butterfinger Caramel Crunch Mini Pies in an airtight container in the fridge. Thanks to the ganache and caramel layers, they stay fresh and fabulous for up to 4 days. A quick tip: a sheet of parchment between layers can help prevent sticking or candy crush overload.
Freezing
Yes, you can freeze these mini pies for up to a month! Store them in a single layer or separate layers with wax paper to keep that gorgeous topping intact. Thaw overnight in the refrigerator (never at room temp—otherwise the caramel can start to sweat).
Reheating
For best results, enjoy Butterfinger Caramel Crunch Mini Pies chilled, straight from the fridge. If you’re after a meltier experience, a super-quick 5 to 10 seconds in the microwave will soften the caramel and ganache. Keep a close eye—overheating can make the crust too soft and melt the crunch.
FAQs
Can I make the tart shells from scratch?
Absolutely! Homemade tart shells taste incredible and let you play with flavors—think chocolate, vanilla, or even nut-based crusts. Just ensure they’re fully baked and cooled before adding the caramel.
Do Butterfinger Caramel Crunch Mini Pies need to be refrigerated?
Yes, because of the creamy caramel and ganache, refrigeration is key for setting the layers and keeping the pies fresh. Take them out just before serving for the best texture and taste.
Can I use a different candy bar?
Of course! Try toffee bits, crushed Snickers, or chopped Reese’s for other fun spins. Each will bring its own magic, but nothing quite matches Butterfinger’s crispety, crunchety, peanut buttery charm.
Is there a way to make these gluten-free?
Absolutely—simply opt for a gluten-free mini tart shell (store-bought or homemade), and double-check your other ingredients. The rest of the recipe is naturally gluten-free.
Can I double or halve the recipe?
It’s super flexible! Double everything for a big party, or halve for a smaller treat batch. The ratios stay the same, so scale with confidence!
Final Thoughts
If you’re ready to dazzle your family, friends, or just your own sweet tooth, Butterfinger Caramel Crunch Mini Pies are a sure winner. They’re everything you want in a bite-sized dessert: simple to make yet outrageously scrumptious. Gather your ingredients and dive in—you’ll be dreaming about that first crunchy, caramel-filled bite for weeks to come!


Your email address will not be published. Required fields are marked *