

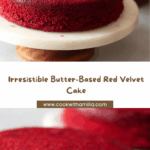
If you’re craving a showstopping cake that’s as luscious as it is eye-catching, this Butter-Based Red Velvet Cake delivers the magic every single time. The buttery crumb gives this classic Southern favorite an irresistibly rich texture, while the iconic crimson hue makes every slice a celebration. This recipe is a go-to for birthdays, holidays, or whenever you’re looking to wow family and friends. With its subtle chocolate notes, tangy undertones, and melt-in-your-mouth softness, you’ll find yourself reaching for another slice (and maybe sneaking a forkful before breakfast too).

Ingredients You’ll Need
Every ingredient in this Butter-Based Red Velvet Cake brings something special to the party! From the essential cocoa that hints at chocolate to the generous butter that promises moistness and flavor, each one helps define the cake’s signature taste, hue, and plush texture.
- All-purpose flour: Gives this cake structure and a soft, tender crumb—important for keeping each slice light without being airy.
- Unsweetened cocoa powder: Just enough to introduce that signature red velvet flavor without overpowering the vanilla and buttermilk notes.
- Baking soda: Keeps your cake beautifully risen and fluffy, especially when activated by buttermilk and vinegar.
- Salt: A pinch brings out all those chocolate and vanilla flavors—don’t skip it!
- Unsalted butter, softened: The hero of this Butter-Based Red Velvet Cake, creating richness and a melt-in-your-mouth texture.
- Granulated sugar: Adds gentle sweetness and helps cream beautifully with butter to build lift into the batter.
- Eggs: Bind the ingredients together and lend additional structure, ensuring each bite is satisfyingly plush.
- Buttermilk: Brings a tangy flavor and tender crumb—essential for authentic red velvet!
- Red food coloring: Choose liquid for bold coloring or gel for an even more vibrant, deep red aesthetic.
- Vanilla extract: Adds deep, aromatic sweetness and perfectly balances the cocoa and buttermilk.
- White vinegar: Boosts the cake’s tender texture and, combined with baking soda, creates that signature velvety crumb.
How to Make Butter-Based Red Velvet Cake
Step 1: Prep Your Pans and Preheat
Start by setting your oven to 175°C (350°F), so it’s good and hot when you’re ready to bake. Grease and flour two 8-inch (20cm) round cake pans—no skimping here! Lining the bottoms with parchment paper guarantees a flawless release, ensuring your Butter-Based Red Velvet Cake comes out in perfect form every time.
Step 2: Mix the Dry Ingredients
In a medium bowl, whisk together the flour, cocoa powder, baking soda, and salt until everything is evenly incorporated. Whisking not only blends the ingredients, but also aerates the flour slightly for a finer, more delicate crumb in your finished cake.
Step 3: Cream the Butter and Sugar
Grab your largest mixing bowl and beat the softened butter and granulated sugar together on medium speed until the mixture turns pale and fluffy. This step is where the magic happens for a rich Butter-Based Red Velvet Cake: creaming the butter and sugar adds air, which leads to a lighter, more velvety cake. Add the eggs one at a time, mixing well after each, for the silkiest, smoothest batter.
Step 4: Combine the Wet Ingredients
In a small, separate bowl, blend together the buttermilk, food coloring (liquid or gel), and vanilla extract. This colorful mixture not only transforms your cake into a visually stunning treat, but also infuses every layer with tangy-sweet flavor and aroma.
Step 5: Bring It All Together
With your mixer on low, alternate adding the dry ingredients and the buttermilk mixture to your creamed butter. Always start and finish with the dry mix—this helps maintain the perfect consistency without over-mixing, which could toughen your Butter-Based Red Velvet Cake. Stop mixing as soon as the last streak of flour disappears.
Step 6: Stir in the Vinegar
Gently fold the vinegar into the batter by hand. This little step does wonders: it reacts with the baking soda and buttermilk to ensure a soft, tender crumb. Give it a couple of careful stirs to make sure it’s distributed, but don’t overdo it!
Step 7: Divide and Bake
Evenly divide the lush red batter between your prepared cake pans and smooth the tops. Bake for 30 to 35 minutes, just until a toothpick comes out mainly clean with a few moist crumbs. Overbaking can dry out your Butter-Based Red Velvet Cake, so keep an eye on it during the last few minutes.
Step 8: Cool and Frost
Let the cakes cool in their pans for about 10 minutes (just enough time for the crumbs to set), then turn them out onto wire racks to cool completely. Only frost once fully cooled! Classic cream cheese frosting is a dreamy companion for this cake, but your favorite buttercream would also be divine.
How to Serve Butter-Based Red Velvet Cake

Garnishes
This Butter-Based Red Velvet Cake really comes to life with a final flourish. Top generously with cream cheese frosting and scatter a few red velvet cake crumbs or white chocolate curls over the top for irresistible charm. Fresh berries add pops of color and a zingy contrast to the cake’s richness.
Side Dishes
The best partners for a slice of this cake are simple and light: try serving with a dollop of whipped cream, a scoop of vanilla ice cream, or even a fresh fruit salad. A good cup of coffee, tea, or sweet iced latte also makes each bite feel extra special.
Creative Ways to Present
Go beyond just the usual round layer cake! Consider cutting the Butter-Based Red Velvet Cake into cubes for a playful trifle, or bake in a sheet pan and use cookie cutters for fun shapes at parties. Mini individual cakes or layer jars make a striking presentation for baby showers and birthdays.
Make Ahead and Storage
Storing Leftovers
If you have leftover Butter-Based Red Velvet Cake, simply wrap slices tightly in plastic wrap or store in an airtight container at room temperature for up to two days. If you’ve frosted the cake, refrigerate it to keep that cream cheese frosting fresh, and allow it to sit at room temperature for about 30 minutes before serving again for the best texture.
Freezing
This cake freezes beautifully! Wrap unfrosted cake layers individually in plastic wrap and then foil, and freeze for up to 2 months. To freeze frosted cake, freeze individual slices on a baking sheet, then wrap and store in a freezer-safe container. Thaw overnight in the refrigerator before enjoying your Butter-Based Red Velvet Cake again.
Reheating
If you prefer your cake just slightly warm, a brief stint in the microwave—around 10 seconds per slice—will do the trick. However, Butter-Based Red Velvet Cake is best enjoyed at room temperature so the crumb is tender and the frosting creamy; remove from the fridge about 30 minutes before serving.
FAQs
Can I use oil instead of butter in this cake?
The unique richness and flavor come from using butter, which is why this recipe is a true Butter-Based Red Velvet Cake. Swapping for oil would change the texture and taste dramatically, and you’d miss out on that signature buttery bite.
Do I have to use buttermilk, or is there a substitute?
Buttermilk is key for the tangy flavor and tender crumb, but if you’re in a pinch, you can make your own: just add 1 tablespoon of vinegar or lemon juice to 1 cup milk, stir, and let sit for 5 minutes before using.
Why add vinegar to the batter?
Vinegar reacts with baking soda and buttermilk to tenderize the crumb and set the vibrant red color. It also contributes a subtle tang that helps define the classic Butter-Based Red Velvet Cake flavor profile.
Can I make this cake as cupcakes?
Absolutely! Divide the batter among lined muffin tins, filling each two-thirds full, and bake for 18–22 minutes or until a toothpick comes out clean. You’ll get about 24 delicious red velvet cupcakes.
What’s the difference between gel and liquid food coloring?
Gel food coloring is more concentrated, so you’ll need less to get a deep red color, while liquid food coloring is more diluted. Both work great here, so feel free to use whatever’s handy to produce your dream Butter-Based Red Velvet Cake shade.
Final Thoughts
If you’re looking for a gorgeous, indulgent cake that ticks every box for flavor and celebration, this Butter-Based Red Velvet Cake is waiting for you. Give it a try and share the joy—your friends and family will be begging for seconds (and the recipe too) the moment they taste it!
Your email address will not be published. Required fields are marked *