

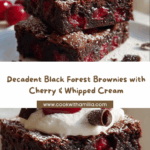
If you’re craving a dessert that perfectly balances rich chocolate and juicy cherries with a fluffy whipped topping, you’ve got to try these irresistible Black Forest Brownies. This delightful treat takes the classic fudgy brownie to another level by adding a luscious cherry layer and a cloud of sweet whipped cream, creating a dessert that’s as visually stunning as it is delicious. Whether you’re sharing with friends or treating yourself, Black Forest Brownies will quickly become your go-to showstopper for any occasion.

Ingredients You’ll Need
Every ingredient in this recipe plays a key role in achieving the perfect harmony of flavors and textures. From the velvety melted chocolate that forms the base to the bright cherries that add a burst of fruitiness, these simple ingredients come together in such a satisfying way.
- Unsalted butter: Helps create a moist, tender brownie with a rich buttery flavor.
- Dark chocolate (chopped): Provides deep, intense chocolate taste essential for decadent brownies.
- Granulated sugar: Adds sweetness and helps create a slightly crisp crust on the brownies.
- Brown sugar: Contributes moisture and a hint of caramel richness to the batter.
- Large eggs (room temperature): Bind the ingredients and give the brownies their structure and fudginess.
- Vanilla extract: Enhances all the flavors with a warm, aromatic touch.
- All-purpose flour: Provides the body and firmness without weighing the brownies down.
- Unsweetened cocoa powder: Boosts the chocolate intensity and adds a slightly earthy depth.
- Salt: Balances the sweetness and intensifies chocolate flavor.
- Cherry pie filling: Brings in the classic Black Forest fruitiness and natural sweetness.
- Kirsch (optional): A splash of this cherry brandy adds authenticity and a gentle kick.
- Heavy whipping cream (cold): Creates the luscious, fluffy whipped cream topping.
- Powdered sugar: Sweetens and stabilizes the whipped cream for smooth texture.
- Chocolate shavings or curls: Enhance presentation and add an extra chocolate punch.
- Extra cherries: Perfect for garnishing and making the dessert pop visually.
How to Make Black Forest Brownies
Step 1: Prepare the Brownie Batter
Start by preheating your oven to 350°F (175°C) and lining a 9×13-inch baking pan with parchment paper, which ensures an easy release after baking. Gently melt the unsalted butter and chopped dark chocolate together, stirring until the mixture is silky smooth—this creates the rich chocolate foundation your brownies will be built on. Next, whisk in both sugars until well combined, then add the eggs one at a time, mixing thoroughly for that perfect, even texture. Don’t forget the splash of vanilla extract—it lifts the flavors beautifully. Sift in the flour, cocoa powder, and salt to avoid lumps, then fold everything together gently but just enough to combine, so you keep the batter nice and tender.
Step 2: Layer the Brownies and Cherries
Spoon half of this luscious batter into your prepared pan, smoothing it into an even layer. Then comes the secret that transforms simple brownies into Black Forest Brownies: spread your cherry pie filling evenly on top. If you’re feeling fancy, a drizzle of kirsch over the cherries adds an unmistakable authentic flair. Now, carefully layer the remaining brownie batter on top—this two-layer approach ensures each bite bursts with that incredible cherry-chocolate combo.
Step 3: Bake and Cool
Bake your masterpiece for 35 to 40 minutes, watching for that perfect moment when the brownies are set but still fudgy in the center. This is key to a moist, decadent bite every time. Once out of the oven, let your brownies cool completely in the pan—cooling fully makes spreading the whipped cream topping a dream and keeps the layers intact when slicing.
Step 4: Whip the Cream and Assemble
Time to make that fluffy whipped cream topping! Beat cold heavy cream with powdered sugar and vanilla until you reach stiff peaks, which means the cream holds its shape beautifully without being over-whipped. Then, generously spread the whipped cream over your cooled brownies, smoothing it to cover every cherry-filled inch. Top off with chocolate shavings and a few extra cherries for a dessert that’s as inviting to look at as it is to eat. For best results, refrigerate for at least one hour before slicing into neat squares and serving.
How to Serve Black Forest Brownies

Garnishes
The cherry and chocolate combo is heavenly on its own, but garnishing your Black Forest Brownies with fresh cherries and delicate chocolate shavings not only adds to the visual delight but also enhances the multi-textured experience. Sprinkle a few cocoa nibs or even a dusting of extra cocoa powder for a rustic touch and an intensified chocolate punch.
Side Dishes
If you want to turn your brownies into a full dessert experience, consider serving with a scoop of vanilla bean ice cream or a drizzle of rich raspberry sauce to complement the cherry layer. Fresh berries like raspberries or sliced strawberries pair wonderfully for an added fruity freshness and pop of color on the plate.
Creative Ways to Present
For parties or special occasions, serve your Black Forest Brownies in individual glass cups layered with extra whipped cream and cherries, turning them into elegant parfaits. Alternatively, assemble brownie pops by inserting sticks and dipping them in melted chocolate for a fun, handheld dessert. No matter how you present them, these brownies are guaranteed to impress.
Make Ahead and Storage
Storing Leftovers
Once your Black Forest Brownies are made, cover them tightly with plastic wrap or store in an airtight container in the refrigerator. They’ll stay fresh and moist for up to 3 days, allowing you to indulge in delightful leftovers without losing any texture or flavor.
Freezing
If you want to keep these decadent treats on hand longer, freeze uncut brownies before adding the whipped cream topping. Wrap tightly in plastic and foil, then store in a freezer-safe container for up to 2 months. When ready to enjoy, thaw overnight in the refrigerator, then top with freshly whipped cream and garnishes.
Reheating
Since these brownies are best served cool due to the whipped cream, avoid reheating after assembly. If you prefer warm brownies, reheat individual plain brownie pieces (without topping) briefly in the microwave or oven, then add whipped cream just before serving.
FAQs
Can I use fresh cherries instead of canned cherry pie filling?
Absolutely! If you opt for fresh cherries, cook them down with a little sugar until they become saucy and soft to mimic the texture of canned pie filling. This adds a fresh, natural cherry flavor that’s lovely in Black Forest Brownies.
What is the purpose of kirsch in Black Forest Brownies?
Kirsch is a cherry brandy that gives an authentic Black Forest flavor to the dessert. It adds a subtle fruity warmth that complements the cherries beautifully, but it’s completely optional if you prefer to skip the alcohol.
Can I make these brownies gluten-free?
Yes! Substitute the all-purpose flour with a gluten-free baking blend that measures cup-for-cup, making sure it contains xanthan gum for structure. The brownies may be slightly more delicate but just as delicious.
How can I make the whipped cream topping more stable?
To keep the whipped cream from weeping or becoming runny, use cold heavy whipping cream and chill your mixing bowl. Adding a bit of powdered sugar not only sweetens but helps stabilize the cream for longer-lasting peaks.
Can these brownies be made ahead for a party?
They are perfect make-ahead desserts! Bake and cool the brownies, then refrigerate them without the whipped cream topping for up to a day. Whip the cream fresh and assemble just before serving to keep everything looking and tasting fantastic.
Final Thoughts
These Black Forest Brownies are truly a dessert lover’s dream come true—a delightful marriage of fudgy chocolate, tangy cherries, and fluffy cream that’s sure to win hearts at your next gathering. I can’t wait for you to bake these and experience that perfect slice of indulgence yourself. Trust me, once you try this recipe, Black Forest Brownies will have a permanent spot in your dessert rotation!
2suk09