

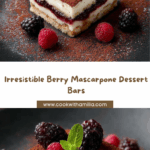
Imagine the creamiest of cheesecakes paired with a vibrant berry swirl and a touch of chocolate — that’s exactly what you get with these Berry Mascarpone Dessert Bars. Every bite offers a lush mascarpone filling, bursts of tangy berry, and the perfect crunch from a chocolatey graham cracker crust. Whether you’re hosting brunch, impressing friends at a potluck, or simply treating yourself after dinner, this make-ahead treat is as simple to pull together as it is stunning on the table. These bars are pure dessert magic, balancing richness with fruitiness in every dreamy, joyful square.

Ingredients You’ll Need
The beauty of Berry Mascarpone Dessert Bars lies in their simplicity. Each ingredient serves a special purpose: some lend depth and structure, some creamy luxury, and others a pop of color and tang. Gather everything below for guaranteed bar bliss.
- Graham cracker crumbs: The crumbly, buttery base that holds everything together — digestive biscuits are a tasty substitute too!
- Cocoa powder: Adds a hint of chocolate sophistication to the crust and makes every bite extra special.
- Unsalted butter, melted: Helps create a moist, rich crust that presses together perfectly.
- Sugar: Just the right touch of sweetness to balance the chocolate and berries.
- Heavy cream, chilled: Whips up into clouds of lightness for an irresistibly creamy filling.
- Mascarpone cheese, softened: The star of the filling, giving these bars their signature silky richness.
- Cream cheese, softened: Adds stability while amping up that irresistibly tangy, creamy texture.
- Powdered sugar: Dissolves smoothly into the filling for sweetness without any grit.
- Vanilla extract: Lends warmth and depth, rounding out the flavors beautifully.
- Mixed berry preserves: Choose good quality raspberry, blackberry, or blueberry for a punchy fruit layer.
- Lemon juice: Brightens up the preserves and balances the richness.
- Fresh raspberries, blackberries, or blueberries: Essential for that final burst of juicy, gorgeous color.
- Unsweetened cocoa powder (for dusting): Just a light dusting adds both flavor and a touch of drama.
- Fresh mint leaves: The ultimate finishing touch for freshness and presentation.
How to Make Berry Mascarpone Dessert Bars
Step 1: Prepare the Crust
Start by mixing the graham cracker crumbs, cocoa powder, sugar, and melted butter in a mixing bowl. Stir until the mixture looks like damp sand and everything is evenly coated. Line a square baking dish with parchment paper — this will make for easy removal and slicing later. Press the crust mixture firmly and evenly into the bottom of the pan, using the bottom of a measuring cup to really pack it down. Place the dish in the fridge for 20 minutes so the crust can chill and set; this will give you that sturdy, perfect bottom layer every time.
Step 2: Make the Mascarpone Filling
In a large, cold bowl, whip the heavy cream until stiff peaks form — you want it light and billowy. In a separate bowl, beat together the softened mascarpone cheese, cream cheese, powdered sugar, and vanilla extract until perfectly smooth and creamy. Gently fold the whipped cream into the mascarpone mixture using a spatula, taking care to keep as much air in as possible. The resulting mousse will be light, fluffy, and utterly luscious, providing that signature Berry Mascarpone Dessert Bars texture.
Step 3: Assemble the Layers
Now for the fun part: layer building! Gently spread half of the mascarpone filling over the chilled crust, smoothing it to the edges. Mix the berry preserves with the lemon juice to brighten the flavors, then carefully spread this fruity goodness over the mascarpone layer. Top it all off with the rest of the mascarpone mixture, smoothing the top with a spatula for bakery-style perfection.
Step 4: Chill
Cover your assembled bars and place them in the refrigerator for at least 4–6 hours — overnight is even better if you’ve got the patience. This chilling time is absolutely essential, letting the flavors meld and the layers firm up so you get those gorgeous, clean slices when serving.
Step 5: Finish and Garnish
When you’re nearly ready to serve, dust the chilled top with unsweetened cocoa powder for an elegant accent. Scatter fresh berries over the top, and don’t forget a few mint leaves for a pop of herbal freshness. The moment you slice into these Berry Mascarpone Dessert Bars, you’ll know it was all worth the wait!
How to Serve Berry Mascarpone Dessert Bars

Garnishes
Go big on the garnishes — those little touches genuinely elevate every square! Besides the essential fresh berries and mint leaves, try a sprinkle of grated dark chocolate or even a few edible blossoms for a stunning finishing flourish. Let your creativity (and your produce drawer) guide the final touches.
Side Dishes
While Berry Mascarpone Dessert Bars absolutely shine on their own, they pair beautifully with a mug of good coffee, a chilled glass of Moscato, or even a scoop of vanilla bean ice cream. If you’re aiming for an extra-special dessert plate, a side of whipped cream or a simple lemon sorbet would be divine.
Creative Ways to Present
Think outside the baking pan! Try cutting the bars into tiny cubes and threading them with berries on skewers for party-ready dessert kebabs. Or layer squares into mini glass jars with extra berries for a chic parfait-style presentation. Don’t be afraid to experiment with fun shapes using cookie cutters — they turn this recipe into eye-catching individual treats for showers, teas, or birthdays.
Make Ahead and Storage
Storing Leftovers
You’ll be happy to know that Berry Mascarpone Dessert Bars are just as heavenly the next day! Store any leftovers in an airtight container in the refrigerator for up to three days. Keep them chilled, as the mascarpone filling is best served cold and holds its structure beautifully in the fridge.
Freezing
If you’d like to make a batch ahead, you can absolutely freeze these bars. Once set, cut them into portions and wrap each piece well in plastic wrap, then place them all in a freezer-safe container. They’ll keep for about a month — just thaw overnight in the refrigerator before serving so the creamy texture is at its best.
Reheating
You’ll be glad to hear that reheating isn’t necessary; Berry Mascarpone Dessert Bars are meant to be served cold! If they’ve just come out of the freezer, allow enough time in the fridge for them to fully thaw. For extra freshness after storing, you can give the garnishes a quick refresh with new berries and mint before serving.
FAQs
Can I use homemade berry compote instead of preserves?
Absolutely! Swapping in a homemade berry compote gives a fresher, fruitier flavor and lets you control the sweetness. Just be sure to let your compote cool completely and strain off any excess liquid before layering it in for best results.
What’s the best way to cut neat bars?
For those sharp, bakery-perfect squares, use a large sharp knife dipped in hot water and wiped dry between cuts. Chilling the bars overnight also helps keep the layers neat and tidy when slicing.
Can I make these gluten-free?
Definitely! Just use gluten-free graham crackers or gluten-free digestive biscuits for the crust. Check your berry preserves as well to ensure they don’t contain any gluten-based thickeners.
What other fruits work well in this recipe?
Mixed berries are classic, but you can get creative — try sliced strawberries, cherries, or even a layer of stewed peaches for a summery twist. Just be sure to keep the fruit layer thick enough to shine without making the bars soggy.
How far ahead can I prepare Berry Mascarpone Dessert Bars?
You can assemble the bars (minus the final garnishes) up to two days ahead of time. Just garnish right before serving for the freshest look and taste. This makes them perfect for parties, holidays, or any kind of advance planning!
Final Thoughts
I can’t recommend these Berry Mascarpone Dessert Bars enough — they’re a total crowd-pleaser and truly effortless for all the wow factor they deliver. Give them a try the next time you want to celebrate something special or just treat yourself to a little extra joy. I hope you love every creamy, jammy bite!
Your email address will not be published. Required fields are marked *