

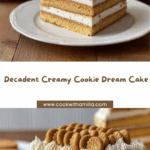
If you’re looking for a showstopper dessert that feels like pure nostalgia with every spoonful, Creamy Cookie Dream Cake is your answer. This indulgent treat features layers of velvety cream, a buttery graham cracker crust, fluffy whipped cream, and a playful crown of cookies. It’s the kind of cake that turns heads at gatherings and sends everyone back for seconds. Whether you’re celebrating a special occasion or just want to brighten up an ordinary day, Creamy Cookie Dream Cake is about to become your new favorite recipe to share with friends and family.

Ingredients You’ll Need
The magic of this Creamy Cookie Dream Cake lies in how a handful of simple ingredients create such an impressive bite. Each one plays a crucial role, from the crunch of the crust to the dreamily creamy top layer. Here’s what you’ll want to have ready:
- Graham cracker crumbs: These create a crumbly, flavorful base with that classic cookie flavor everyone loves.
- Unsalted butter, melted: Melted butter brings the crumbs together and adds rich, irresistible moisture to the crust.
- Granulated sugar: Adds the right amount of sweetness to both the crust and the filling, making every layer pop.
- Large eggs: Eggs provide structure, giving the cake its creamy yet sliceable texture.
- Heavy cream: This whips into the filling, ensuring a smooth and decadent result that feels luxurious.
- Vanilla extract: Vanilla brings a warm, fragrant note that ties all the flavors together beautifully.
- Whipped cream: A generous topping of whipped cream makes the cake ultra-light and dreamy.
- Vanilla wafer cookies: These cookies offer a decorative and delightful crunch—plus, they just look adorable perched on top.
- Powdered sugar: A dusting on top adds elegance and just a whisper of extra sweetness.
How to Make Creamy Cookie Dream Cake
Step 1: Build the Biscuit Base
Start by preheating your oven to 325°F (165°C). Combine your graham cracker crumbs, melted butter, and half of your granulated sugar in a bowl. Stir everything together until the mixture looks like wet sand—this is the magic moment where the crust starts to come alive. Press it firmly and evenly into a 9-inch springform pan. Use the back of a spoon or the bottom of a glass to get those edges neat and tidy; it’ll make the finished cake look picture-perfect.
Step 2: Bake the Crust
Pop the crust into the oven for 10 minutes. This quick bake locks everything together and delivers that satisfying crunch in every bite. Once it’s done, set it aside to cool while you work on the creamy filling. A cooled crust prevents sogginess and helps the cream filling set just right.
Step 3: Whip Up the Creamy Filling
In a large mixing bowl, beat together the eggs, heavy cream, vanilla extract, and your remaining granulated sugar. Whip until the mixture is completely smooth—the texture should be velvety and pourable but not runny. Pour this luscious custard over your prepared crust, smoothing the top with a spatula for an even layer.
Step 4: Bake to Perfection
Slide the cake back into the oven and bake for 40 to 45 minutes. You’re looking for a set but ever-so-slightly wobbly center. Once baked, let it cool completely on a wire rack. Resting the cake is crucial—this ensures the Creamy Cookie Dream Cake holds together when you finally slice in.
Step 5: Top and Decorate
Spread a thick layer of whipped cream all over the top of your cooled cake. Be as generous as you like; this is the “dream” in Creamy Cookie Dream Cake! After the whipped cream, lightly dust with powdered sugar for a touch of elegance. Finally, arrange your vanilla wafer cookies around the edges or in a pattern that lets your personality shine—this step is pure fun and instantly Instagram-worthy.
Step 6: Chill and Serve
To give all the flavors a chance to meld and the layers to set, chill your finished cake in the fridge for at least 2 hours. When it’s cold and ready, slice in for the most satisfying, creamy, and cookie-laden bite you’ll ever experience.
How to Serve Creamy Cookie Dream Cake

Garnishes
This cake is a canvas for your creativity! Some fresh berries scattered nearby lend a pop of color, and a drizzle of dark chocolate or caramel sauce takes the indulgence level up a notch. For just a little playful flair, add a sprig of mint or some extra crushed wafers on top right before serving.
Side Dishes
Creamy Cookie Dream Cake begs for something light alongside—think a bowl of fresh fruit salad or a zesty citrus sorbet. If you’re hosting, serve with a steaming espresso or a cool glass of milk to keep the attention squarely on the cake’s rich, dreamy filling and crunchy cookie crust.
Creative Ways to Present
Individual mini cakes are extra adorable—use small ramekins or mini springform pans for a personalized dessert. Or, try building a parfait: layer cubes of cake, whipped cream, and broken cookies in clear glasses for a playful Creamy Cookie Dream Cake trifle. However you slice it, presentation is half the fun!
Make Ahead and Storage
Storing Leftovers
Wrap any leftover Creamy Cookie Dream Cake snugly in plastic wrap or store in an airtight container. It will keep perfectly in the fridge for up to 3 days, maintaining that luscious creamy texture and crunchy crust. The cookies on top stay pleasantly crisp for a day or two, making every bite just as dreamy as the first.
Freezing
If you want to freeze the cake, do so before adding the whipped cream and cookies. Wrap the cooled, baked cake securely, then freeze for up to 1 month. When ready to enjoy, thaw overnight in the fridge and add your finishing touches fresh for the best Creamy Cookie Dream Cake experience.
Reheating
This dessert doesn’t need reheating—it’s best served chilled. If you find it a little too firm straight from the fridge, let slices sit for a few minutes at room temperature. This brings out the full creamy, dreamy texture and lets the flavors sing.
FAQs
Can I use chocolate wafer cookies instead of vanilla?
Absolutely! Substituting chocolate wafers adds a deeper flavor that pairs deliciously with the creamy filling, creating a fun twist on the classic Creamy Cookie Dream Cake.
Do I need a springform pan?
A springform pan makes removing the cake much easier and helps keep your crust looking tidy. If you don’t have one, a parchment-lined cake pan will do in a pinch—just take extra care during removal.
Can I make it gluten-free?
Yes! Simply use gluten-free graham crackers and vanilla wafer cookies. All the other ingredients are naturally gluten-free, so you can still enjoy every bite of Creamy Cookie Dream Cake.
Can I make this cake ahead for a party?
This recipe is ideal for making ahead! Prepare the cake up to 24 hours in advance, add the whipped cream and cookies on the day of serving, and keep it chilled for the dreamiest texture and flavor.
What if I don’t have heavy cream?
Heavy cream is key for the luxurious texture, but in a pinch, you can substitute with full-fat coconut milk or a combination of milk and extra whipped topping for a slightly lighter, still decadent Creamy Cookie Dream Cake.
Final Thoughts
Don’t be surprised if you catch yourself craving Creamy Cookie Dream Cake again and again—it’s one of those desserts that instantly sparks joy. Gather your ingredients, invite some friends, and savor every creamy, cookie-filled bite. This is baking at its most comforting and endlessly rewarding. Enjoy!
m33fgs