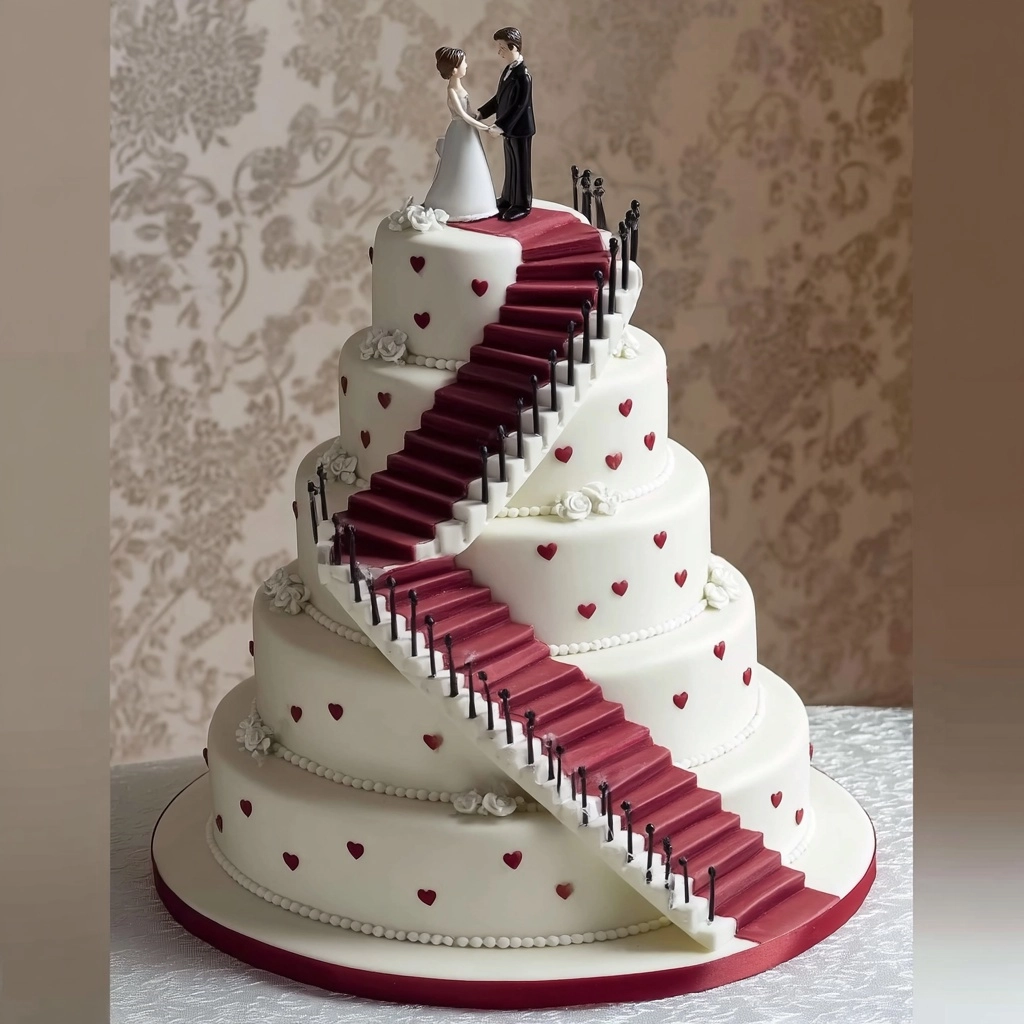
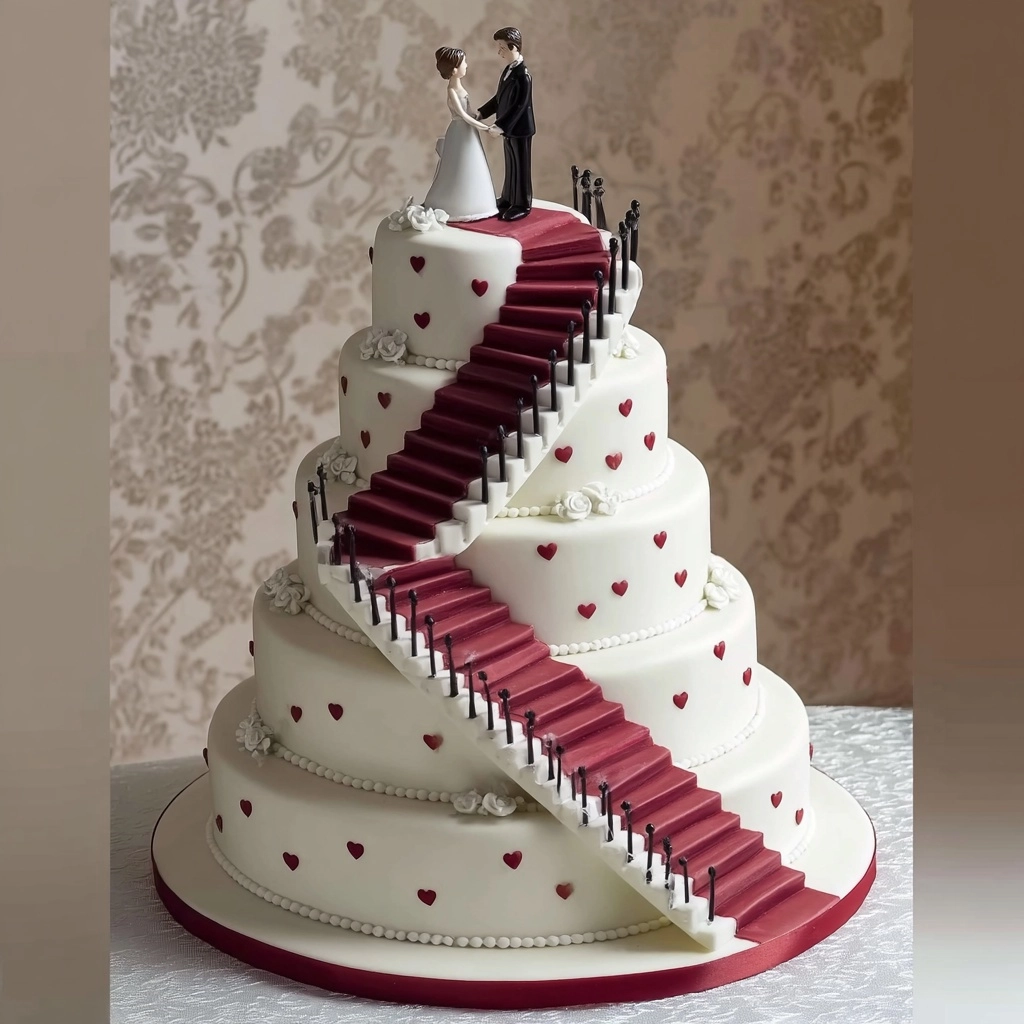
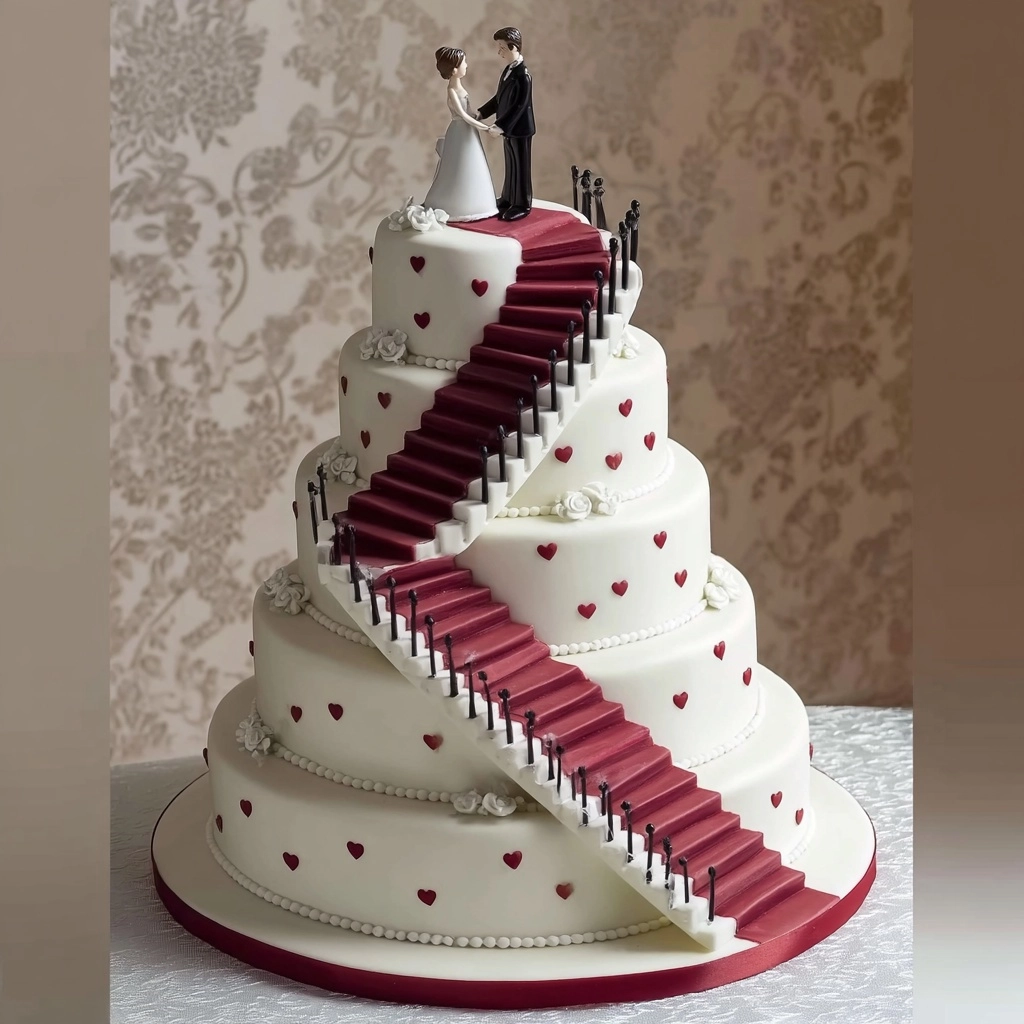
Every once in a while, a dessert comes along that doesn’t just taste heavenly—it steals the show and leaves people talking about it long after the last crumb. That’s exactly what the Grand Staircase Wedding Cake delivers. With its magnificent tiers, dreamy vanilla cake layers, rich vanilla buttercream, and the show-stopping fondant staircase topped with a “red carpet,” this cake is nothing short of spectacular. Whether you’re celebrating an actual wedding or just love dreaming up fairytale desserts, making this cake at home transforms any gathering into an event worthy of confetti. The Grand Staircase Wedding Cake isn’t just a treat—it’s an experience, a visual masterpiece, and a delicious labor of love.
Ingredients You’ll Need
The beauty of the Grand Staircase Wedding Cake is that it’s built from a handful of classic, straightforward ingredients, each chosen to play a crucial role in flavor, structure, or that dreamy look. These kitchen staples truly come alive when they’re whipped, stacked, and adorned into this unforgettable creation.
- All-purpose flour: Provides a sturdy, yet tender foundation for the cake layers so they can hold up impressively tall.
- Granulated sugar: Not just for sweetness, it gives the cake that lovely golden crumb and depth of flavor.
- Large eggs: Eggs bind everything together, lending richness and a beautiful, delicate texture to each bite.
- Unsalted butter (cake and buttercream): The heart and soul of this recipe, it brings unmatched flavor and creaminess.
- Baking powder: Ensures each layer gets the perfect rise and stays light, never dense.
- Salt: A pinch goes a long way in balancing out the sweetness and making the vanilla flavor pop.
- Whole milk: Adds moisture and richness to the cake, and a touch of luxury to the buttercream frosting.
- Vanilla extract: Use a generous pour—this is what gives both cake and frosting their elegant, signature taste.
- Powdered sugar (for buttercream): Finely milled so your buttercream is plush, cloud-like, and beautifully smooth for icing and decorating.
- White fondant: Your blank canvas for sleek, professional-looking tiers and crisp, clean lines.
- Red fondant: Essential for crafting that iconic red carpet on your grand staircase!
- Chocolate polka dot melts or edible paint: Dotting the tiers adds playfulness and a whimsical finish—make sure to have fun with it!
- Edible pearls or small edible decorations: These look like magic scattered across the cake, instantly elevating its elegance.
- Wedding cake toppers (bride and groom): The crowning celebration at the peak of your staircase—adorable and symbolic.
- Staircase structure (edible or non-edible): The centerpiece that brings the entire Grand Staircase Wedding Cake vision dramatically to life.
How to Make Grand Staircase Wedding Cake
Step 1: Bake Those Vanilla Cake Layers
Start the journey by preheating your oven to 350°F (175°C) and prepping your cake pans—use a mix of sizes (think: 12-inch, 10-inch, 8-inch, 6-inch rounds) for that showstopping tiered look. Cream the softened butter and sugar together until they’re light and fluffy; this step adds heaps of air, so don’t rush it! One by one, beat in your eggs, letting each fully blend before adding the next. In a separate bowl, whisk together flour, baking powder, and salt, then alternate adding these dry ingredients with milk and a hefty splash of vanilla. You want a smooth, dreamy batter. Divide evenly, bake for 25-40 minutes (timing depends on the pan sizes), and use the old skewer test to check for doneness. Once the cakes are out, let them cool in their pans before carefully flipping onto racks.
Step 2: Whip Up Fluffy Vanilla Buttercream
Next up, prepare the buttercream that’s going to glue everything together and keep each layer delightfully moist. Beat your softened butter until it’s creamy—this is your moment to go wild with the mixer! Gradually add sifted powdered sugar, about a cup at a time, mixing until it’s dreamy and smooth. Pour in the milk or cream, vanilla, and pinch of salt, and whip on high until fluffy, pale, and irresistible.
Step 3: Assemble and Frost Like a Pro
Once your cake layers are completely cool (patience, my friend—it’s worth it!), level them out if needed. Sandwich each tier with a lavish layer of buttercream, stack them up, and give the whole thing a thin “crumb coat.” This catches any loose crumbs and locks them in. Refrigerate for 15-20 minutes, then apply your final, lush coat of buttercream, making it as smooth as you can—for fondant success, this is crucial.
Step 4: Cover with Fondant for That Iconic Finish
Now for the part that’ll make you feel like a true cake artist. Knead your white fondant until soft and pliable, then roll it out into big, even sheets for each tier. Carefully drape fondant over each frosted tier, gently smoothing from the top down and trimming off extra. Stack the fondant-covered tiers, using dowels or cake supports for stability if you’re going sky-high. This step truly transforms your hard work into a blank, elegant canvas.
Step 5: Create and Decorate the Grand Staircase
Gently attach your staircase structure to the side of the cake, making sure it’s nice and secure. Roll out your vibrant red fondant and place it as the “carpet” on your staircase—this little detail is pure magic! Take your chocolate melts or edible paint and dot the tiers with whimsical polka dots, then scatter edible pearls and tiny decorations for an extra shimmer. Top the staircase with those sweet bride and groom figures. Step back and admire your Grand Staircase Wedding Cake masterpiece before chilling it until serving time.
How to Serve Grand Staircase Wedding Cake

Garnishes
Part of the fun in serving a Grand Staircase Wedding Cake is the dazzle of final flourishes. Consider adding fresh or candied flowers along the base, a drizzle of edible glitter on the red carpet, or a sprinkle of extra edible pearls for a touch of sparkle. Each touch adds personal flair and enhances the cake’s already stunning look.
Side Dishes
Balance the sweetness and decadence with some playful sides. Fresh berries or a light berry compote offer a tart contrast, while a scoop of vanilla or raspberry sorbet keeps things refreshing between bites. If you’re catering to a crowd, bowls of coffee or even a celebratory glass of sparkling wine complement the cake’s luxurious flavor profile beautifully.
Creative Ways to Present
Make the Grand Staircase Wedding Cake the centerpiece by setting it on a shimmery cake stand, surrounded by twinkle lights or little porcelain figurines that match the party’s theme. For photo ops, arrange mini bouquets or candles around the base. For occasions other than weddings, switch up the toppers—think anniversaries, milestone birthdays, or themed parties. Every detail helps make your event feel like pure magic.
Make Ahead and Storage
Storing Leftovers
If you’re lucky enough to have leftovers of your Grand Staircase Wedding Cake, store the remaining slices in an airtight container in the refrigerator. This keeps the cake moist and the buttercream fresh for up to five days. Place a piece of wax paper or parchment between layers so nothing sticks. For best results, bring slices to room temperature before enjoying.
Freezing
You can definitely freeze leftover Grand Staircase Wedding Cake or even full tiers if you want to get a head start before the big day. Wrap the cake (well-chilled or frozen) tightly in plastic wrap and then in aluminum foil. Store in the freezer for up to three months. Thaw overnight in the refrigerator when ready to enjoy or decorate.
Reheating
Wedding cake is best enjoyed soft and luscious, so if you’ve stored your Grand Staircase Wedding Cake in the fridge or freezer, let it sit at room temperature for 30 minutes to an hour before serving. This helps the buttercream and cake come back to their perfect, melt-in-your-mouth texture—no need for a microwave!
FAQs
How do I transport a Grand Staircase Wedding Cake?
Transporting a tiered cake can be nerve-wracking, but take a deep breath! Chill the fully assembled cake first so it’s sturdy. If possible, transport tiers separately and stack them onsite. Use a non-slip mat beneath your cake box, drive slowly, and have touch-up frosting and decorations on hand just in case.
Can I use different flavors for the cake layers?
Absolutely! While classic vanilla is timeless, feel free to experiment with flavors like almond, lemon, or even chocolate. Just keep each tier sturdy and moist for stacking, and make sure the flavors complement the buttercream and fondant decorations.
What’s the best way to get smooth fondant?
Working with fondant can be tricky, but a good crumb coat and a smooth layer of buttercream are essential. Dust surfaces lightly with cornstarch or powdered sugar, roll the fondant evenly, and use fondant smoothers to gently press out air bubbles and creases. Take your time and don’t stress—imperfections are easy to cover with decorations!
Do I need a special cake topper for the staircase?
Traditional bride and groom toppers look classic and festive, but you can absolutely get creative! Use miniature figures, hearts, or even initials for other events. The key is positioning your chosen topper gracefully at the head of the staircase for that signature Grand Staircase Wedding Cake look.
Can I make the staircase structure edible?
Yes, you can craft the staircase out of sturdy fondant, gum paste, or even modeling chocolate for a fully edible showpiece. Experienced bakers may also use rice cereal treats or molded chocolate. Non-edible options are available at cake decorating stores for added ease and stability.
Final Thoughts
There’s just something magical about creating a centerpiece as jaw-dropping as the Grand Staircase Wedding Cake. Whether you’re marking a milestone or simply want to indulge in a bit of baking grandeur, this cake delivers both wow factor and heartwarming flavor. Don’t shy away from giving it a try—it’s surprisingly approachable step by step, and the finished result is the kind of memory you’ll talk about for years to come!


Your email address will not be published. Required fields are marked *