

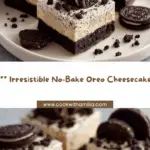
If you’re searching for a genuinely irresistible treat that requires barely any time in the kitchen, No-Bake Oreo Cheesecake Bars are about to become your newest dessert obsession. Imagine a thick, chocolatey Oreo cookie crust, a luscious layer of velvety cheesecake filling loaded with more Oreo bits, and a topping of extra, chunkier cookies—all without ever having to turn on your oven! Perfect for summer days, parties with friends, or anytime you crave a decadent, creamy fix, these bars are equal parts nostalgic and sophisticated. Get ready for a bite that brings smiles, crunch, and pure Oreo bliss in every layer.

Ingredients You’ll Need
Every element in these No-Bake Oreo Cheesecake Bars plays a special role: the cookies give both crunch and unforgettable chocolate flavor, the cream cheese provides that dreamy texture, and a few pantry basics bring it all together. Here’s what you’ll need—and why you really shouldn’t skip a single thing!
- Oreo cookies (for crust): About 28 cookies will become the rich, chocolatey base. Crush them finely to hold everything together.
- Unsalted butter: Six tablespoons of melted butter combine with the cookie crumbs and give structure and a melt-in-your-mouth richness.
- Cream cheese: The heart of the cheesecake filling—softened, creamy, and just tangy enough to balance the sweetness.
- Powdered sugar: This sweetens the filling without adding any graininess; sifts in easily for smoothness.
- Vanilla extract: Just a splash deepens the flavor and rounds out all the sweetness.
- Heavy whipping cream: When whipped, it helps the filling become light, fluffy, and perfectly sliceable.
- Oreo cookies (for filling): Chopped up and stirred in, they add extra texture and Oreo flavor throughout the bars.
- Oreo cookies (for garnish): Broken into halves or quarters, they turn every slice into a showstopper—save a few of your prettiest cookies for the top!
How to Make No-Bake Oreo Cheesecake Bars
Step 1: Create the Perfect Oreo Crust
Start by turning 28 Oreo cookies into fine crumbs—you can pulse them in a food processor or seal them in a zip bag and roll over them with a rolling pin (a little bit of smashing stress relief!). Mix the crumbs in a bowl with melted butter until fully combined. Then, line a square 8×8-inch pan with parchment paper for easy removal. Tip in your buttery Oreo mixture and press it down with the back of a spoon or a flat-bottom glass, making an even, tight layer. Pop the pan in the fridge to chill for 20 minutes so the crust can set up and stay crisp under the filling.
Step 2: Whip Up the Creamy Cheesecake Filling
In a large bowl, beat the softened cream cheese until it’s completely smooth and lump-free—this is the secret to a cloudlike texture. Add the powdered sugar and vanilla extract, mixing until the filling turns creamy and luscious. In a separate bowl, use a hand or stand mixer to whip the cold heavy cream until it holds stiff peaks (you want it thick enough to stand tall—no drooping!). Gently fold the whipped cream into the cream cheese mixture, keeping everything airy. Now, stir through 12 roughly chopped Oreo cookies for an extra dose of cookies in every bite!
Step 3: Assemble Your Cheesecake Bars
Scoop the cheesecake mixture over your chilled crust and spread it out evenly, smoothing the top with a spatula. For that irresistible bakery look, press extra Oreo pieces into the top—go for big chunks to make every square stand out. Now, the hardest part: let the bars chill in the fridge for at least 4 hours, or overnight if you can. The longer they set, the cleaner and creamier each slice will be. When ready to serve, use a sharp knife and wipe between cuts for tidy, picture-perfect bars.
How to Serve No-Bake Oreo Cheesecake Bars

Garnishes
For ultimate wow-factor, I love to crown each bar with big, chunky Oreo pieces or even a drizzle of chocolate syrup. If you’re feeling fancy, a dusting of extra cookie crumbs or a dollop of whipped cream makes each piece even more special—especially when you’re sharing with friends or family for a celebration.
Side Dishes
No-Bake Oreo Cheesecake Bars pair perfectly with a scoop of vanilla ice cream, a handful of fresh strawberries, or even a simple café au lait. Their rich, cookies-and-cream flavor is a fun match for berries, which add a juicy freshness to each bite. For a summer party, consider offering iced coffee or cold brew on the side—the contrast is heavenly!
Creative Ways to Present
Think outside the baking pan: arrange the bars in cupcake liners for a party-worthy dessert tray, layer individual servings in mason jars for an adorable picnic treat, or use a cookie cutter to create playful shapes for birthdays. These No-Bake Oreo Cheesecake Bars are as versatile as they are delicious—make them mini, make them bold, make them yours!
Make Ahead and Storage
Storing Leftovers
If you somehow manage to have extras, simply cover the bars tightly in their pan or transfer them to an airtight container. No-Bake Oreo Cheesecake Bars will stay fresh and creamy in the fridge for up to 4 days, making them a convenient dessert for impromptu cravings or after-dinner treats.
Freezing
Want to save some for later? These cheesecake bars freeze like a dream! To freeze, wrap individual bars tightly in plastic wrap or parchment, then place them in a zip-top bag or airtight container. They can be stored in the freezer for up to 2 months. Let them thaw in the fridge overnight or for a couple of hours before serving for the best texture.
Reheating
No need to reheat—these bars are best enjoyed straight from the fridge or, if frozen, after a gentle thaw in the refrigerator. If you like them extra cold and firm (almost ice cream-like), try eating them slightly chilled from the freezer for a refreshing twist.
FAQs
Do I need a stand mixer for the filling?
Nope! While a stand mixer is handy, a handheld electric mixer (or even a strong arm and whisk) does the trick just fine for whipping the heavy cream and mixing the cheesecake filling smoothly.
Can I use low-fat cream cheese?
You can substitute low-fat or Neufchâtel cream cheese, but keep in mind the bars may not be as rich or creamy. For the best texture and flavor, full-fat cream cheese is the way to go for No-Bake Oreo Cheesecake Bars.
Do the bars hold up well for picnics or parties?
Absolutely! Just keep them chilled until serving, especially if it’s warm outside. The bars are sturdy once set, so they’re ideal for make-ahead events, potlucks, or lunchbox treats.
Can I use other cookie flavors?
Definitely—try golden Oreos, mint Oreos, or any fun limited-edition variety for a unique twist. The base recipe for No-Bake Oreo Cheesecake Bars is super adaptable, and experimenting with flavors makes each batch new and exciting.
My filling seems too soft! What did I do wrong?
If the filling doesn’t set up, it usually means the heavy cream wasn’t whipped to stiff peaks or the bars didn’t chill long enough. Make sure the cream is whipped well and give the bars a full chilling time for the cleanest, firmest slices.
Final Thoughts
No-Bake Oreo Cheesecake Bars are pure dessert joy with almost no fuss, and I just know they’ll become a staple in your treat rotation. There’s something magical about that perfect blend of cookies, cream, and effortless charm—so gather your ingredients and get ready to wow your friends, your family, or just yourself with every creamy, crunchy bite!
Your email address will not be published. Required fields are marked *