

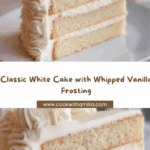
If you’re dreaming of a show-stopping centerpiece that truly celebrates all things light, fluffy, and elegant, look no further than these White Cake Layers. With a crumb so tender it melts in your mouth, a gorgeous pale hue, and just the right sweetness, this recipe is pure celebration on a plate. Whether you’re planning a milestone occasion or just want to treat your loved ones to a seemingly effortless slice of bakery-worthy cake, this method yields consistently beautiful results every time.

Ingredients You’ll Need
There’s magic in the simplicity of classic ingredients, and for our White Cake Layers, each element plays a starring role. From fluffy flour to creamy butter, every ingredient works together to create that signature soft texture and clean, bright flavor that sets this cake apart.
- All-purpose flour: This is your structure—sift it well for the most delicate crumb.
- Baking powder: Gives your White Cake Layers the beautiful lift and fine texture.
- Salt: Just enough to balance the sweetness and bring out the other flavors.
- Unsalted butter, room temperature: Creates richness and a soft, melt-in-your-mouth feel—let it fully soften for easy mixing.
- Sugar: Essential for flavor and that classic moist crumb—make sure it’s beaten in well for lightness.
- Egg whites, room temperature: These keep the cake pristine white while adding moisture and an airy lift.
- Vanilla extract: For a floral, aromatic backdrop that makes every bite taste like a celebration.
- Whole milk, room temperature: Keeps things luxuriously tender and blends perfectly into the batter.
- Unsalted butter, room temperature (Frosting): Whipped to cloud-like perfection, it’s the base for a dreamy finish.
- Powdered sugar, sifted: Delivers serious silkiness—sifting is non-negotiable for lump-free results.
- Heavy cream (or milk): Adds luscious body, making the frosting irresistibly smooth and easy to spread.
- Vanilla extract: It echoes the flavor of the cake, tying the whole experience together.
- Pinch of salt: Just a hint keeps things from being overly sweet and telegraphs bakery-worthy balance.
How to Make White Cake Layers
Step 1: Prepare Your Pans and Preheat
Start by greasing and lining two 8-inch round cake pans with parchment paper. Preheat your oven to 350°F (175°C). This little bit of prep work ensures your White Cake Layers pop out beautifully and stay in one gorgeous piece—no sticking, no crumbling.
Step 2: Mix the Dry Ingredients
In a medium bowl, whisk together the all-purpose flour, baking powder, and salt. It may seem simple, but this step is crucial for an even rise and a fine, tender crumb. By combining the leavening agents first, you avoid any stubborn clumps and guarantee every bite of your White Cake Layers is cloud-like from edge to center.
Step 3: Cream Butter and Sugar
In a large bowl, beat the room temperature butter and sugar until it’s pale, fluffy, and doubled in volume. This is where the magic happens! Airy creamed butter ensures your White Cake Layers bake up to towering, bakery-style heights. Don’t rush—let it get light and luscious before moving on.
Step 4: Add Egg Whites and Vanilla
With the mixer on medium, add egg whites one at a time, beating well after each addition. This keeps the batter beautifully light and pristine. Finish with the vanilla extract, and pause to breathe in that sweet aroma—this is what classic celebration cakes are all about.
Step 5: Alternate Dry Ingredients and Milk
Add the flour mixture in three parts, alternating with the milk, and begin and end with the flour. Mix gently, stopping as soon as everything is combined. This care preserves the tender crumb that defines perfect White Cake Layers—don’t be tempted to overmix!
Step 6: Bake to Perfection
Divide the batter evenly between your prepared pans and smooth out the tops. Pop them in the oven for 25–30 minutes, or until a toothpick inserted in the center comes out clean and the edges gently pull away from the sides. Let the cakes cool in their pans for 10 minutes, then invert onto a rack to cool completely. Patience here means you’ll be rewarded with pristine, stackable layers every time.
Step 7: Craft the Whipped Vanilla Frosting
In a mixing bowl, beat your butter until it’s creamy and almost white. Gradually add sifted powdered sugar—one cup at a time—to avoid mess and ensure smoothness. Add in heavy cream, vanilla, and a pinch of salt, then whip on high speed until the frosting is cloud-like and ready for swooping and swirling. This dreamy frosting makes your White Cake Layers a true classic.
Step 8: Assemble and Decorate
Once cooled, carefully slice each cake in half for four even White Cake Layers. Place your first layer on a serving platter, spread with frosting, and repeat until you’ve built a four-tiered masterpiece. Apply a thin crumb coat around the outside to trap stray crumbs, chill for 20 minutes, then finish with a generous final coat and pipe decorative swirls on top. Stand back and admire your beautiful handiwork!
How to Serve White Cake Layers

Garnishes
Dress your cake up with elegant touches like a tumble of fresh berries, white chocolate curls, or edible flowers sprinkled across the top. A dusting of powdered sugar or a scatter of silver dragees adds that special-occasion sparkle to your gorgeous White Cake Layers, making them irresistible even before anyone takes a bite.
Side Dishes
This classic cake shines alongside simple accompaniments. Try a scoop of vanilla bean ice cream, freshly sliced strawberries, or a little dollop of whipped cream. These fresh, light sides complement the richness of your White Cake Layers and let the delicate vanilla flavors really pop.
Creative Ways to Present
Turn these White Cake Layers into a showpiece by layering with tinted frosting for a pastel ombre effect or stacking with lemon curd or raspberry jam between the tiers for a surprising twist. Individual mini-cakes or cake jars are charming for parties—just cut the layers into rounds and build single-size portions!
Make Ahead and Storage
Storing Leftovers
Once frosted, your White Cake Layers will keep happily under a cake dome at cool room temperature for up to two days, maintaining their soft crumb and moistness. After that, transfer to the fridge (well wrapped) for up to three additional days—just be sure to let slices come to room temperature before serving for the full flavor and tender bite.
Freezing
For maximum flexibility, the unfrosted White Cake Layers can be wrapped tightly in plastic and foil, then frozen for up to two months. When you’re ready to assemble, just thaw them overnight in the fridge (still wrapped to prevent condensation) and frost while slightly chilled for neat, smooth results.
Reheating
To restore that just-baked softness, let refrigerated White Cake Layers sit at room temperature for 30 minutes before serving. If your cake seems a bit dry, a quick microwave zap (10–15 seconds per slice) brings it right back to life—pipe on a little extra frosting and it’s as good as new!
FAQs
Can I use cake flour instead of all-purpose flour?
Absolutely! Cake flour makes the White Cake Layers extra tender and fine. Substitute an equal weight for the all-purpose flour for a slightly more delicate crumb—just be careful not to overmix.
What’s the best way to slice even White Cake Layers?
Use a long, serrated bread knife and rotate the cake as you cut horizontally. Chilling the cakes for 30 minutes before slicing helps prevent crumbs and keeps your layers neat and uniform.
How do I keep my cake super white?
Stick to egg whites only (no yolks), use clear vanilla extract if you want a truly white color, and whip plenty of air into your butter and sugar. These details contribute to the dazzling appearance of your White Cake Layers.
Can I make this recipe gluten-free?
Yes! Substitute your favorite 1:1 gluten-free baking flour blend for the all-purpose flour. Just note the texture might be a touch different, but the White Cake Layers will still taste absolutely delicious.
Why do I alternate the flour and milk when mixing?
This gentle method alternates dry and wet additions so the batter doesn’t get overloaded with either one and ensures an even, smooth final blend—perfect White Cake Layers every time!
Final Thoughts
There’s something undeniably joyful about bringing together these White Cake Layers—each one soft, tall, and ready for celebration. If you’ve been searching for a recipe that impresses both visually and with every dreamy bite, this is the one to try. Gather your favorite people, whip up this cake, and watch as everyone swoons over your baking magic!
Your email address will not be published. Required fields are marked *