

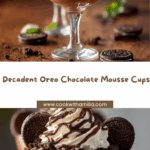
If ever there was a dessert guaranteed to charm a crowd or simply treat yourself after a long week, it’s these Oreo Chocolate Mousse Cups. Silky smooth chocolate mousse layered atop a buttery Oreo cookie base and crowned with whipped cream, chocolate drizzle, and a sprinkle of cookie crumbs—every spoonful is pure comfort. Whether you’re a chocolate die-hard or an Oreo lover, this dessert brings out the kid in everyone, blending uncomplicated ingredients into a treat that’s elegant enough for entertaining yet deliciously nostalgic.

Ingredients You’ll Need
The beauty of Oreo Chocolate Mousse Cups is that you don’t need a complicated shopping list to whip up something magical. Each ingredient plays a pivotal role, from the crunch and flavor of Oreos to the airy richness of homemade mousse. Here’s what you’ll need, along with why each one matters.
- Oreo cookies: Finely crushed, they become the irresistible, chocolatey base every mousse cup dreams of.
- Melted butter: Just enough to bind the cookie crumbs together and create a buttery, slightly salty contrast.
- Chocolate (dark or milk): The key to classic mousse; use a chocolate you genuinely love eating on its own.
- Cocoa powder: Intensifies that signature chocolate hit and deepens the flavor.
- Sugar (optional): Balances out dark chocolate’s bitterness for those who like their sweets a bit sweeter.
- Heavy cream (chilled): Whipped to gentle peaks, it gives the mousse its iconic, pillowy lightness.
- Egg whites (optional): For extra volume and a mousse that’s practically cloud-like (use only if you’re comfortable with raw eggs).
- Whipped cream: Fluffy, billowy clouds on top—because what’s a mousse cup without a finishing touch?
- Oreo cookies (halved): Eye-catching and instantly tells everyone what kind of treat they’re digging into.
- Chocolate sauce: Adds a glossy, decadent drizzle that takes these over the top.
- Fresh mint leaves: A pop of green for both aroma and that special ‘wow’ factor.
- Extra Oreo crumbs: For a final dusting that brings everything full circle.
How to Make Oreo Chocolate Mousse Cups
Step 1: Prepare the Base
Start by crushing your Oreo cookies into a fine, sandy consistency. A food processor makes quick work of this, but a rolling pin and a zip-top bag will do just fine! Mix the crushed cookies with melted butter until everything looks coated and shiny—the butter helps the crumbs stick together and turn beautifully crisp once chilled. Scoop a spoonful of the mixture into each serving glass, pressing down gently to form an even base. This little layer is the foundation that every bite of Oreo Chocolate Mousse Cups rests on.
Step 2: Make the Mousse
Next comes the luxurious mousse. Begin by gently melting your chopped chocolate over a double boiler (or in the microwave with short bursts, stirring in between). Let it cool slightly before moving on. Meanwhile, whip your chilled heavy cream to soft peaks—this gives the mousse its lush, cloud-like texture. If you’re going for extra fluff, whip your egg whites in a separate clean bowl until stiff peaks form. Add the cocoa powder (and sugar, if using) into the whipped cream, then pour in the melted chocolate and fold everything together carefully. If using egg whites, fold them in last; take your time to keep all that lovely air in the mixture. Spoon the mousse generously over the prepared Oreo bases in each cup. Cover and refrigerate for at least two hours—this lets the mousse firm up and the flavors meld beautifully.
Step 3: Garnish & Serve
Once your mousse is thoroughly chilled and set, it’s time for the grand finale. Pipe or dollop a swirl of whipped cream onto each cup. Tuck half an Oreo cookie into the cream for an irresistible visual cue. Drizzle everything with your favorite chocolate sauce, letting it cascade down the peaks and valleys of cream and mousse. Sprinkle with extra Oreo crumbs and finish each dessert with a fresh mint leaf. Serve your Oreo Chocolate Mousse Cups with a dessert spoon, and get ready for smiles all around!
How to Serve Oreo Chocolate Mousse Cups

Garnishes
The best part of Oreo Chocolate Mousse Cups might just be the finishing touches. Whipped cream provides a light, creamy topper that balances the deep chocolate flavor, while a drizzle of chocolate sauce makes each cup look glossy and decadent. Don’t forget the extra crushed Oreos for texture and that cute mint leaf to add a pop of color and freshness. Each garnish isn’t just decoration; it amplifies flavor and makes dessert feel utterly special.
Side Dishes
While these mousse cups can absolutely stand on their own, why not make dessert a little journey? Serve them with shots of bold espresso for a grown-up, Italian café vibe, or pour a glass of rich red wine for something sultrier. Simple butter cookies or fresh berries can complement and lighten up the dessert, offering a balance to all the chocolate richness.
Creative Ways to Present
Presentation is half the fun with Oreo Chocolate Mousse Cups. Use vintage cocktail glasses for a classy twist, or layer in mini jars for an adorable picnic treat. For a party, try making bite-sized versions in tall shot glasses or little espresso cups—they’re just as delicious, and even cuter for sharing. Get playful with colored spoons or decorative picks for garnishing, and your mousse cups will be as delightful to look at as they are to eat.
Make Ahead and Storage
Storing Leftovers
If you happen to have any leftovers (highly unlikely!), simply cover the Oreo Chocolate Mousse Cups tightly and stash them in the fridge. They’ll stay fresh, creamy, and just as irresistible for up to two days. In fact, the flavors might even deepen a bit as they sit, making them even more decadent the next day.
Freezing
You can freeze these mousse cups if you need to prep ahead for a party or simply want a ready-to-eat treat in your freezer. Just wrap them well with plastic wrap, making sure the mousse is protected from air, and freeze for up to a month. Thaw in the fridge for several hours before serving. The texture might become a touch denser, but the chocolatey magic remains.
Reheating
Luckily, there’s no reheating required for this chilled dessert! If you’re taking your mousse cups straight from the fridge or freezer, let them sit at room temperature for about 10-15 minutes to soften for the optimal creamy bite. Avoid microwaving—this treats best in its cool glory.
FAQs
Can I make Oreo Chocolate Mousse Cups without egg whites?
Absolutely! The egg whites are optional and only serve to make the mousse a little lighter and fluffier. You’ll still get a rich, wonderfully creamy mousse without them—perfect for those avoiding raw eggs.
How can I make this recipe gluten-free?
Simple swap! Just use gluten-free chocolate sandwich cookies in place of regular Oreos, and double-check the other ingredients for hidden gluten sources. The result will still be just as delicious and very chocolatey.
Can I prepare Oreo Chocolate Mousse Cups the day before?
Yes, and in fact, making them ahead is encouraged! Prepare the mousse cups up to 24 hours in advance and keep them covered in the refrigerator. Wait to add the whipped cream and final garnishes just before serving for the best presentation.
What type of chocolate is best for the mousse?
Use a good-quality chocolate you enjoy eating by itself—dark chocolate for a more intense flavor, or milk chocolate for extra sweetness. If you love a bittersweet edge, blend dark and milk together for the best of both worlds.
Can I add flavors like coffee or liqueur to the mousse?
Definitely! A splash of strong brewed coffee or a dash of Baileys, Kahlúa, or orange liqueur melds beautifully into the mousse. Just stir it into the melted chocolate before folding in the cream for subtle depth and a grown-up twist.
Final Thoughts
There’s truly nothing like a spoonful of Oreo Chocolate Mousse Cups to make any day feel like a celebration. If you’re looking for an effortless treat that’s rich, creamy, and full of nostalgia, this is the recipe to try. Gather your ingredients, get creative with your presentation, and savor every dreamy bite. You deserve it!
Your email address will not be published. Required fields are marked *